Scenario
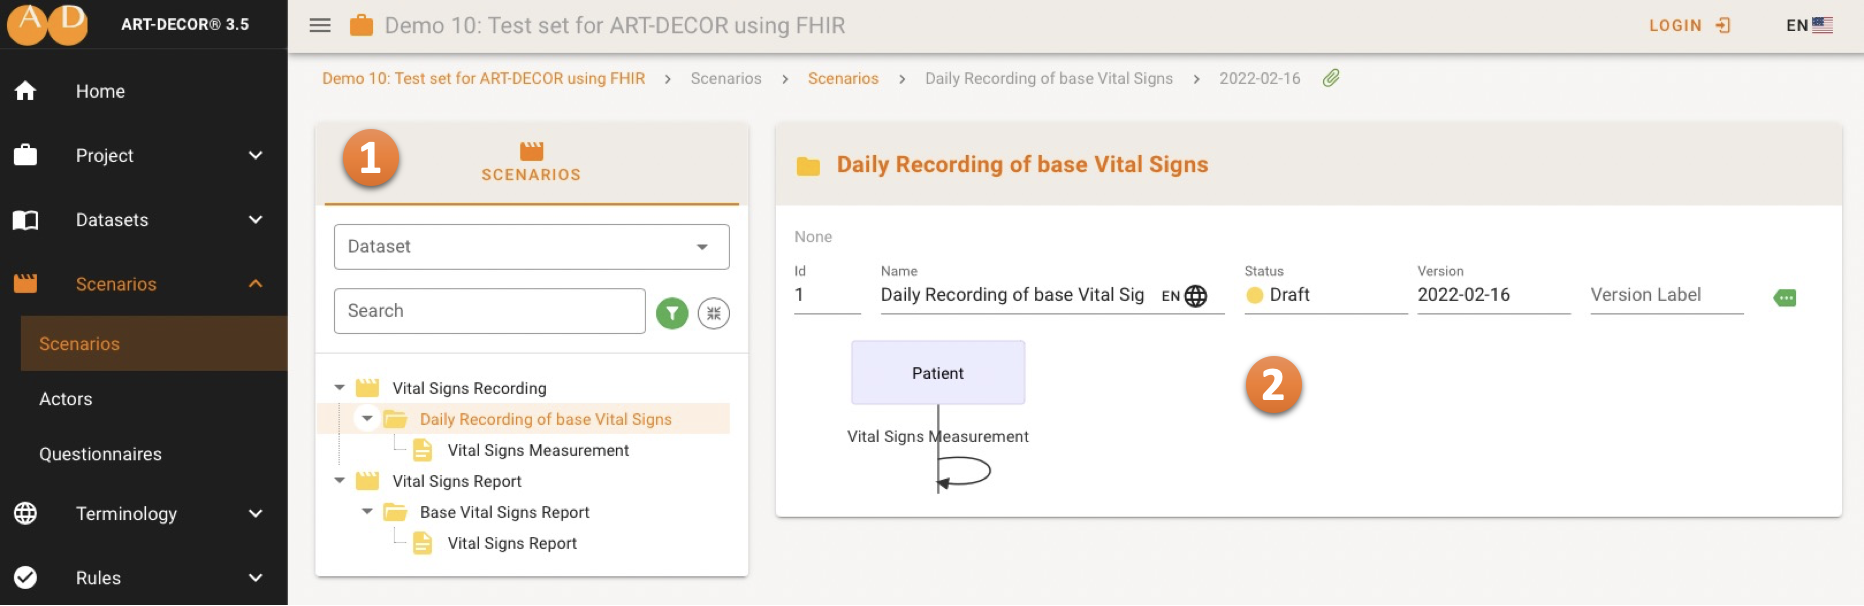
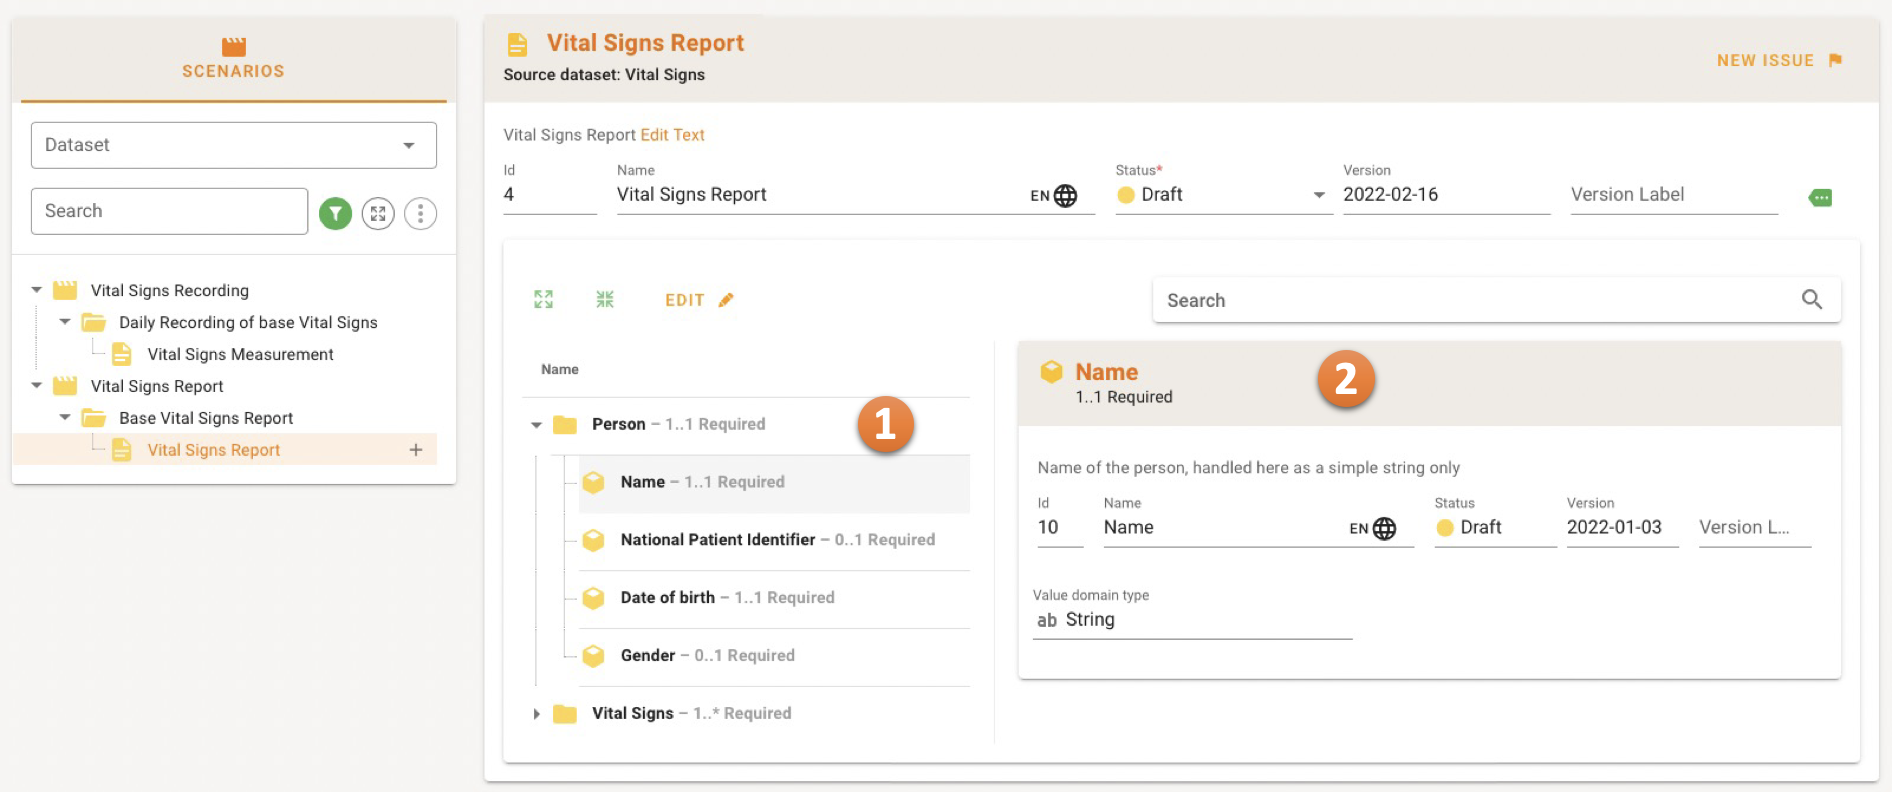
The Scenario Panel offers an overview of the Scenarios and the underlying grouped Transactions 1. Details are shown to the right 2.
Choosing a Scenario
When choosing a Scenario you can
- either select from all the Scenarios in the Project or
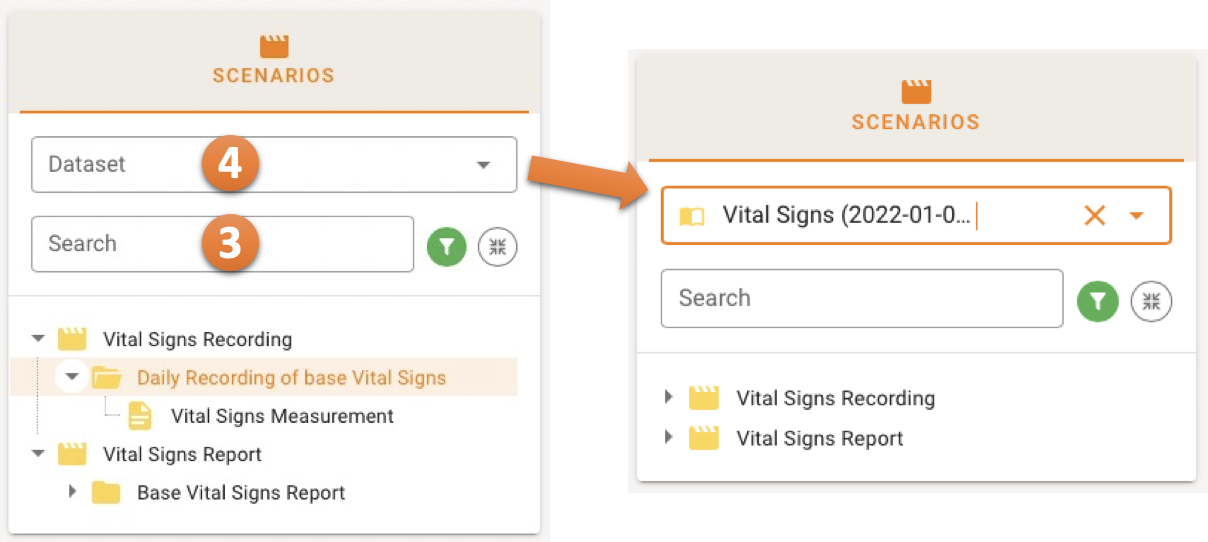
- perform a simple search on names using the Search Bar 3 or
- first select a Dataset in the Dataset Selector Bar 4 to filter the Scenarios to only those who make use of the selected Datasets; this is very useful if you have a large number of Scenarios in your project.
The filter option allows you to filter the Status of the Scenarios/Transactions shown in the list. The Scenarios related to that dataset will be shown in the tree.
Transaction Detail Panel
After choosing a scenario, the transaction detail panel opens where you can find a list of all the transactions for that specific scenario.
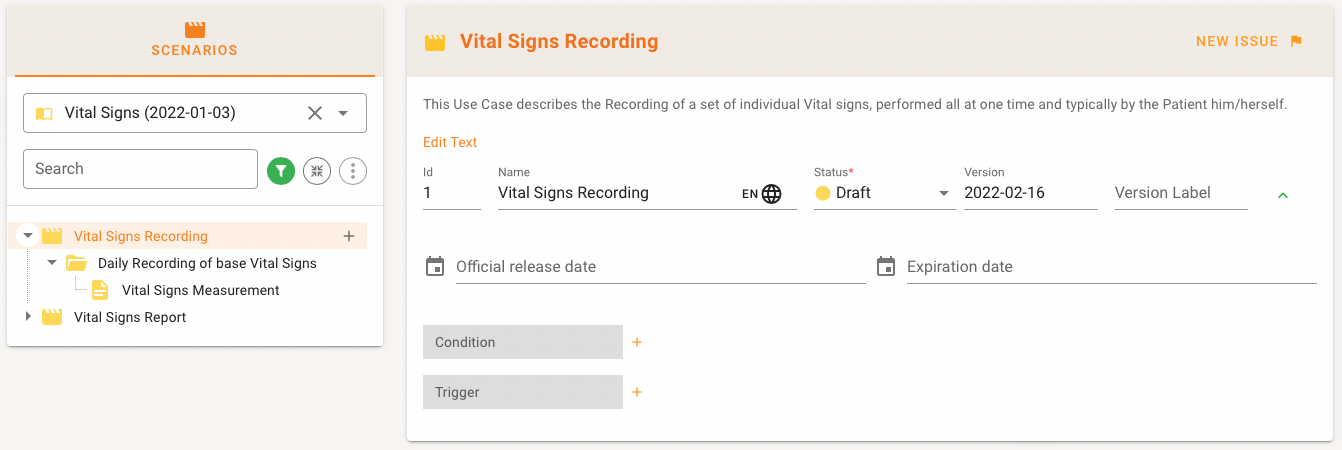
When a Scenario is selected you see the Scenario details including the Use Case Story (Description), Condition and Trigger.
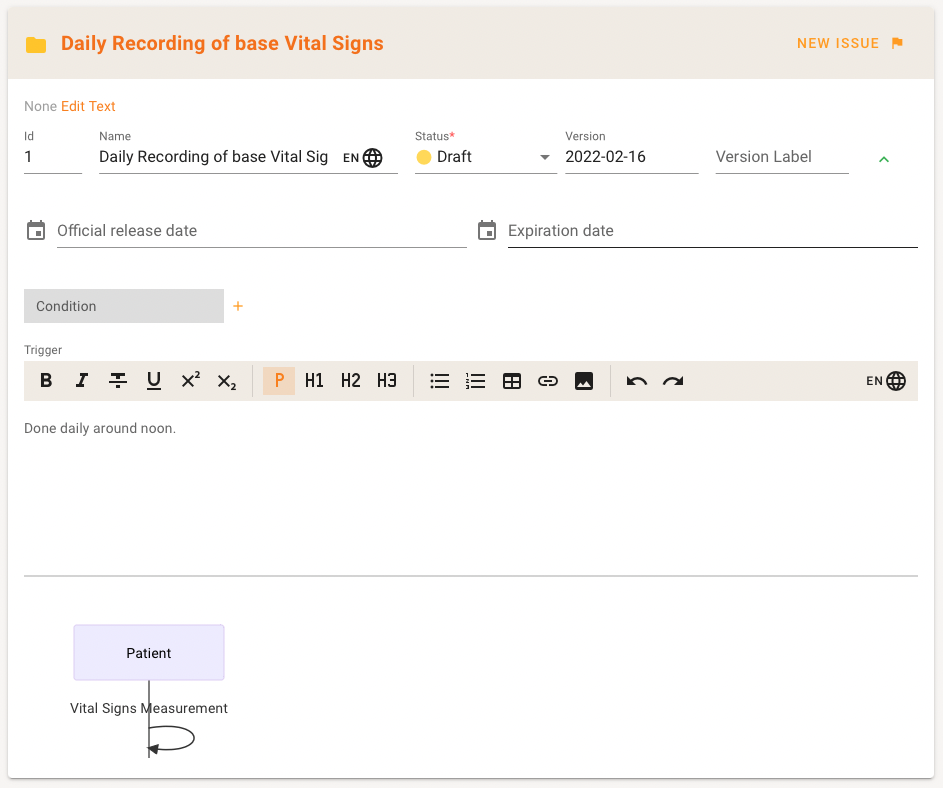
When a Transaction group is selected, the details of the group are shown, including a sequence graph on Actors and communication structures.
When selecting a Transaction Leaf, Type of Transaction (see Categories). the Transaction Model and Label etc. Also A Representing Template and a Source Dataset can be seen/maintained here. In the lower part of the Details the actual Concepts belonging to the Transaction are shown in a Tree View 1 with Concept Details to the right 2.
Add a Scenario
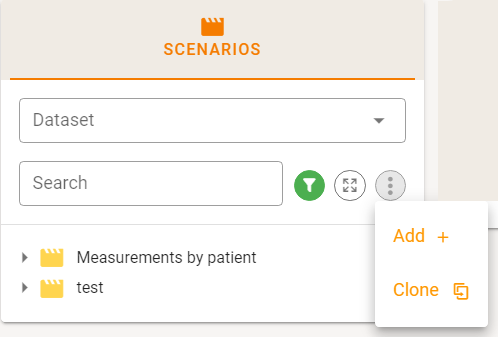
By choosing ADD from the menu item you can add a new Scenario or choose CLONE to clone an existing Scenario.
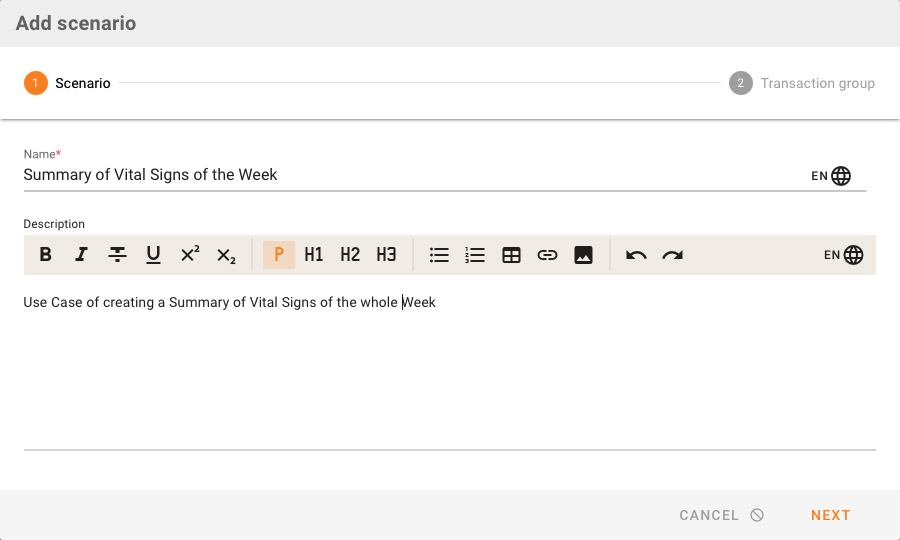
Add a name and a Use Case Description.
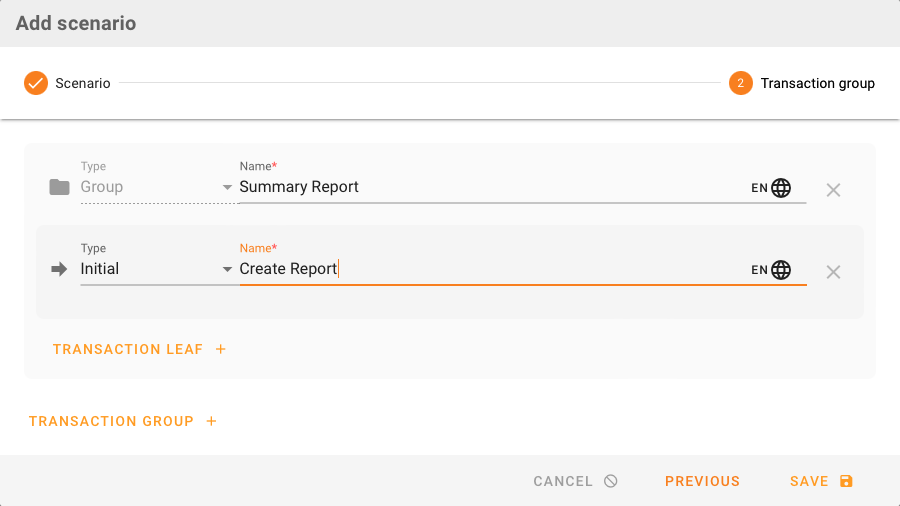
The next step allows you to add Transaction Groups and Transaction leaves (see also below). Don't forget to save the new Scenario.
Add a Transaction
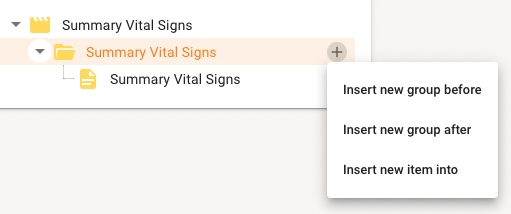
By selecting + from the Transaction Tree you can add a new Transaction to a Scenario. The mini menu offers insertion of a new Transaction Group before or after the selected existing one, or addition of a Transaction leaf (item).
 .
.
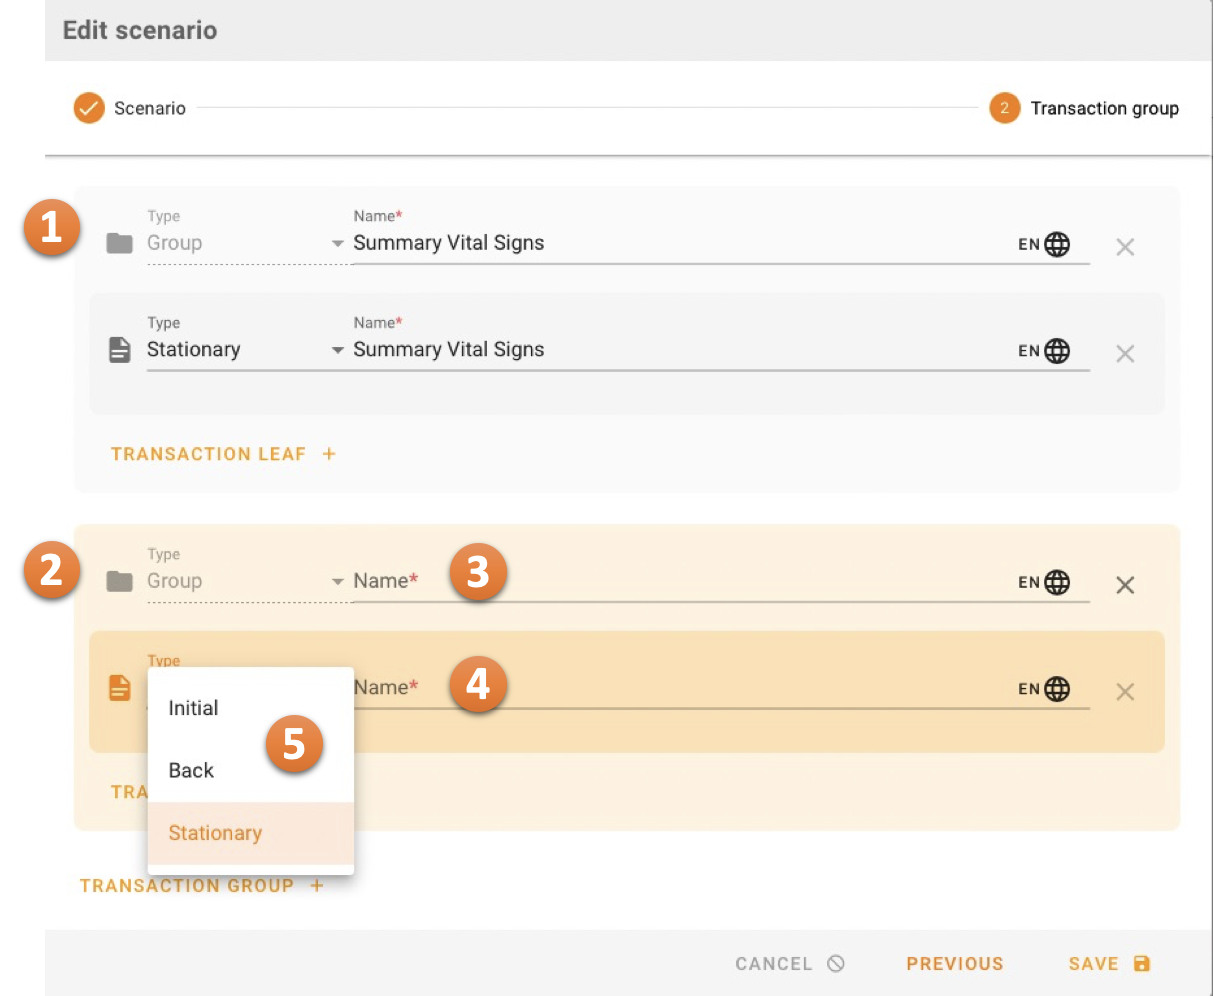
A new window opens showing all Transaction Groups so far 1, the new one to be edited is colorized in orange 2.
First, add a name for the Transaction Group 3 and Leaf 4. Select also the Type of Transaction (see Categories) 5.
Editing Transaction Leaf Details
When a Transaction Leaf is selected, the details of that Transaction are shown (see below).
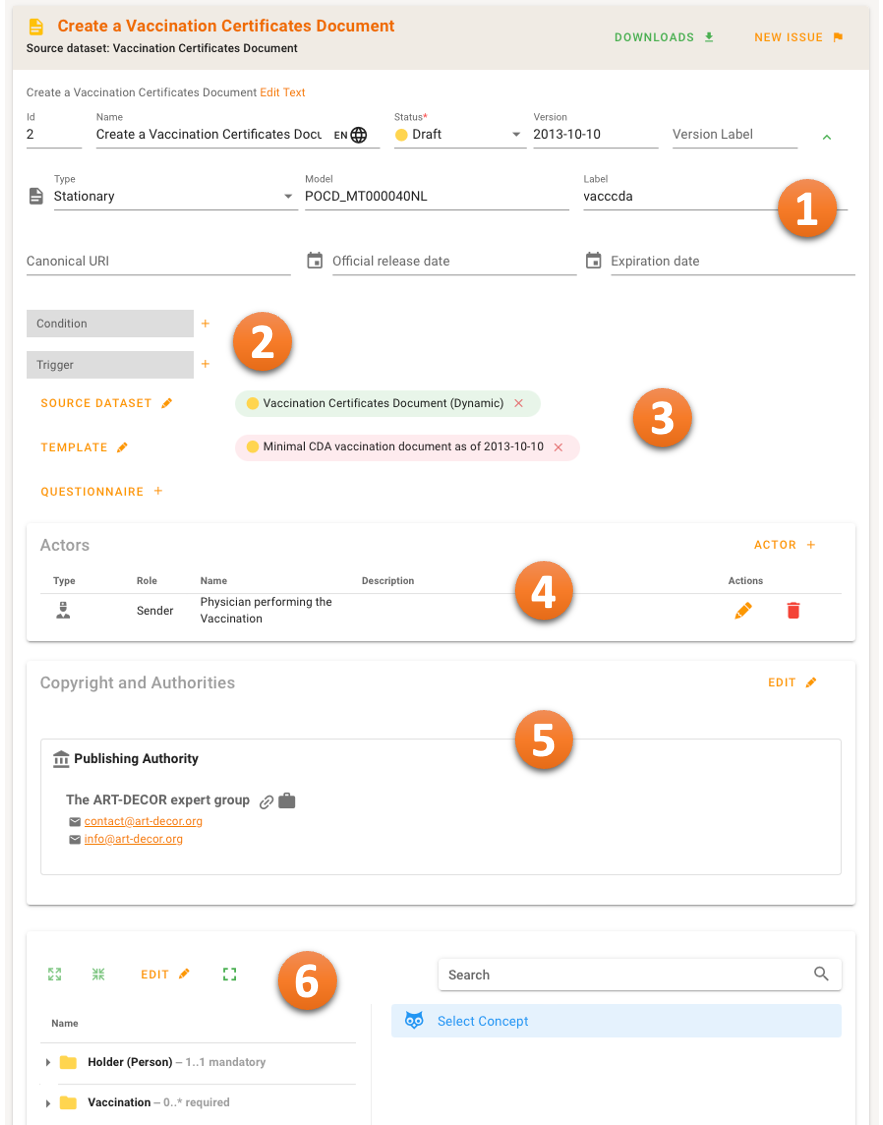
If you are a Project Author, Metadata can be directly edited 1, also Conditions and Triggers can be specified 2.
The Source Dataset must be selected from the Project in order to be able to work with the Transaction at all 3.
In the same area 3, the associated Representing Template and Questionnaire can be chosen which is a Template or Questionnaire from the Project that represents the Transaction from a technical dataformat perspective content-wise.
Actors 4 are predefined in the Actors Panel and may be chosen here a sender/receiver/stationary etc.
There may be information displayed about Copyright and/or Publishing Authorities 5. This information could also be inherited from parent artifacts.
Finally, the Transaction Concepts – a set of references to the Concepts from the Source Dataset – are shown in a hierarchical tree 6 and can be put into edit-mode to change the set of concepts or their properties such as cardinality, conformance, conditions etc.
Managing the associated Source Dataset, Representing Template, Questionnaire

The Source Dataset must be selected from the Project in order to be able to work with the Transaction at all. It can be added and also edited. If a Transaction has already associated concepts from a Source dataset, a special Smart Cloning option (see below) might help you to properly migrate the already refined concepts to a new version of a dataset.
associated Representing Template and Questionnaire can be chosen which is a Template or Questionnaire from the Project that represents the Transaction from a technical dataformat perspective content-wise.
Choosing Actors for the Transaction
You must choose Actors from the Actors list. Refer to the later section here about adding an Actor. Once Actors are available to choose from, select a sender and receiver Actor for the transaction (type initial and back), or just a sender (for type stationary only).
Concepts for the Transaction
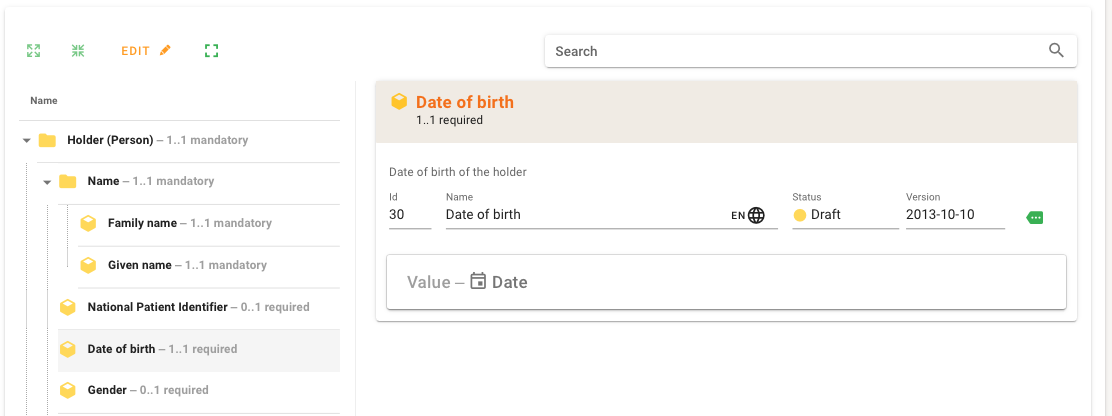
All concepts that are part of the current Transaction are "borrowed" from the Source dataset. They are listed in non-edit mode as a tree in the Concept List Card. When clicking on an item in the tree details are shown to the right (actually drawn from the underlying dataset).
When in edit mode (typicall switched to Fullscreen mode by the way to make use of the screen), all concepts in the tree can be selected or deselected to be included in the Transaction.
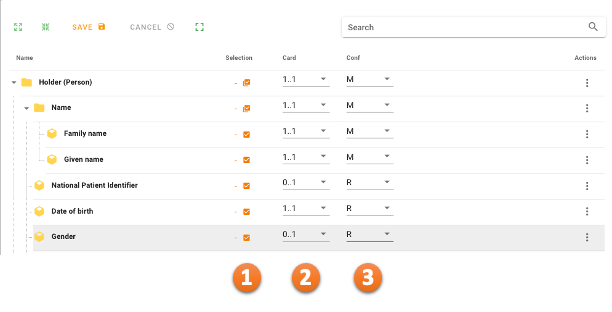
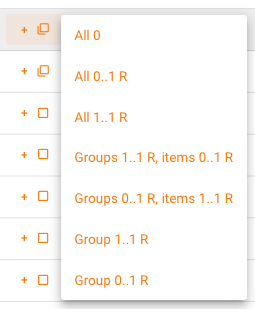
The 1 column offers a switch to deselect the concept from the Transaction or to select it. When newly selecting a concept, the following helping dialog offers the most common choices for the Cardinality and Conformance of the item. It can still be manually corrected.
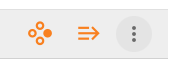
There is an Action menu to the right of each concept.

You can set the Context of a Transaction item by selecting the four-dot icon menu item. The context provides additional information or constraints for the concept in the light of the Transaction. Here are some examples:
Additional information the for the concept particularly in this Transaction
A reference to further information
A binding to specific properties such as types of example or preferred Value Sets or types of Identifies etc. If terminology or identifiers are known and can be referenced this shall be done by the binding of terminology or identifiers to this concept by means of Terminology Associations or Identifier Associations.
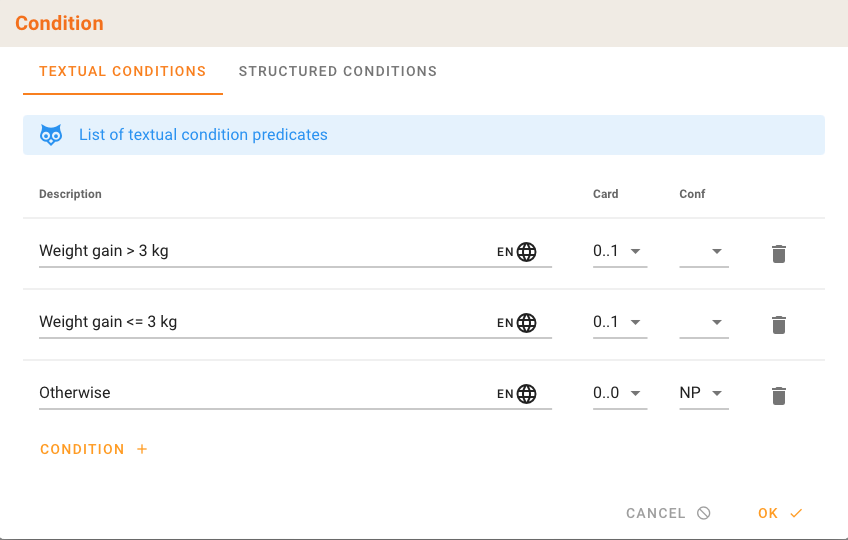
The menu also offers the dialog to edit and manage the set of conditions whenever a Transaction concept is set to "conditionally". The list-and-arrow icon opens the Condition Dialog.
You can edit the list of Conditions. The simpliest way is to add textual conditional statements like in the follwing example.
If applicable you can also set structural conditions, as seen in the following example.
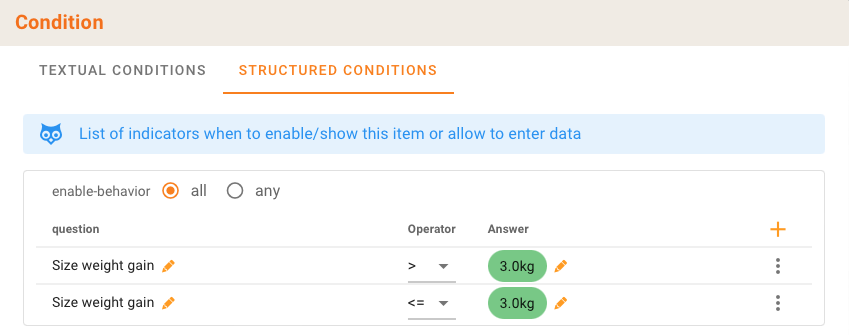
::: note
Structural Conditions translate into conditional Questionnaire Constructs (enableWhen) when transforming a Scenario with Conditions into a new Questionnaire.
:::
Your First Scenario from scratch
It needs to be mentioned that – if a Project has NO scenario so far – the procedure to add the very first one makes a few more steps necessary. The following documentation describes setting up Actors first, and then add a first Scenario. In essence this includes:
- Adding at least one Actor
- Adding a blank Scenario and a Transaction Group and a Transaction Leaf.
Actors
Add Actors
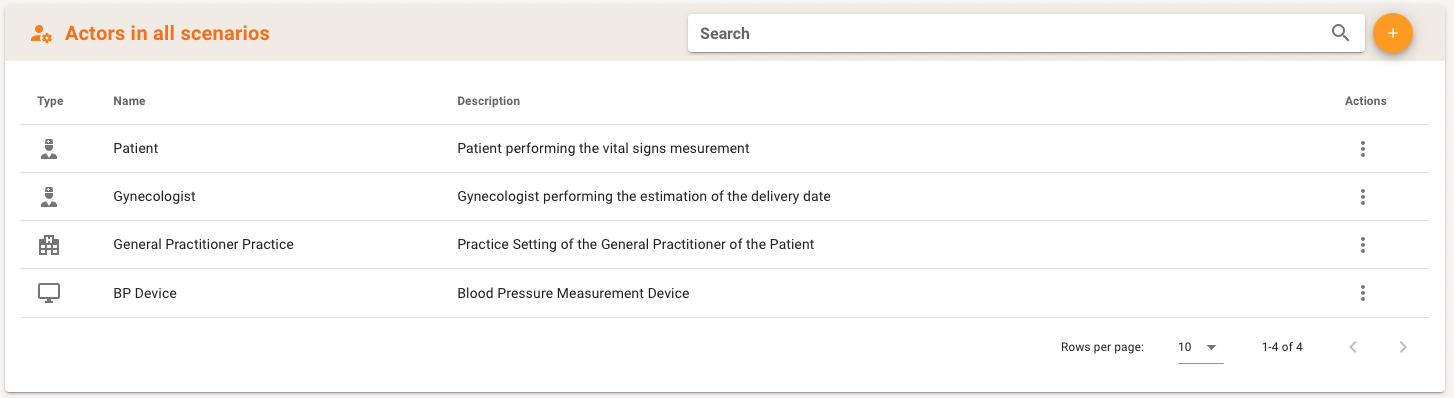
In the Scenario Panel there is also the Actors Panel available. This Panel gives you an overview of all Actors in any of your Scenarios. Actor's type (person, organization, device), Name, Description. The Action menu at the right allows you to edit or delete an Actor. The latter is only possible if the Actor is not used in any Transaction so far.
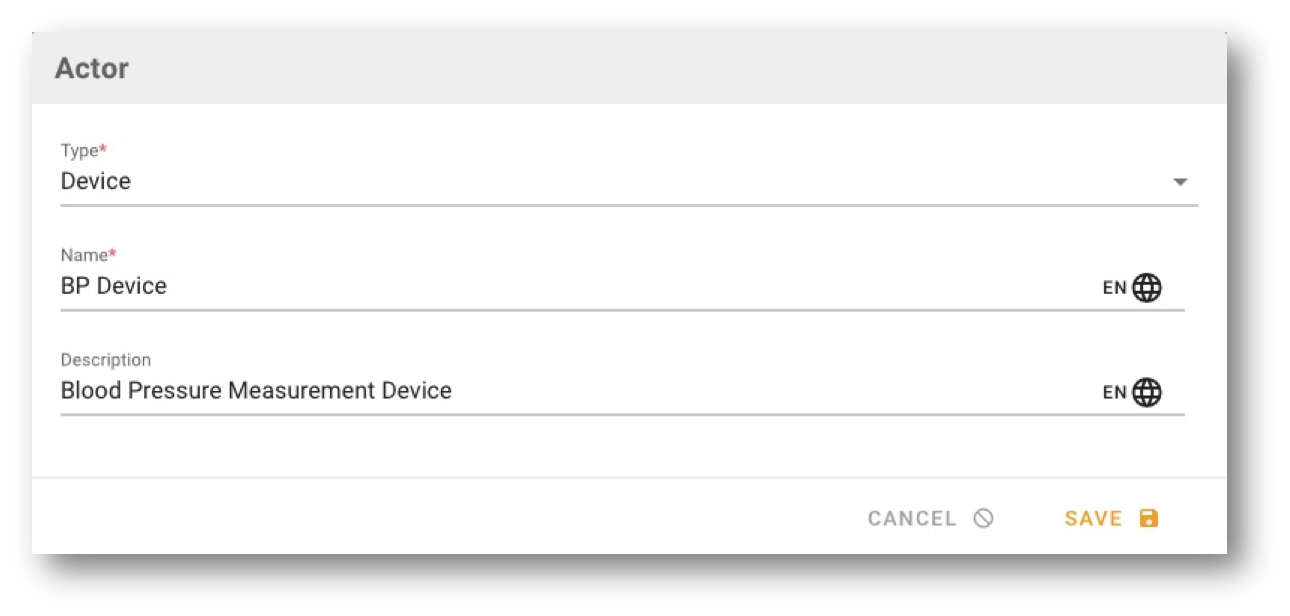
By clicking on the + button you can add an Actor. A new window will open where you can fill in the type of actor: Person, Organization or Device.
A name of the Actor must be specified, also a description is always useful.
Edit and Delete Actors
When selecting the mini menu of an Actor you have the option to edit (pencil) or delete (x) the specific Actor.

Smart Cloning of a Scenario
We added an essential feature when working with multiple versions of Datasets and Scenarios. When cloning a Transaction leaf of a Scenario the new Scenario is basically empty as it loses its Source Dataset. We now introduced the Cloning a Transaction leaf of a Scenario based on a new version of the underlying dataset. Below we have included some background we recommend you read.
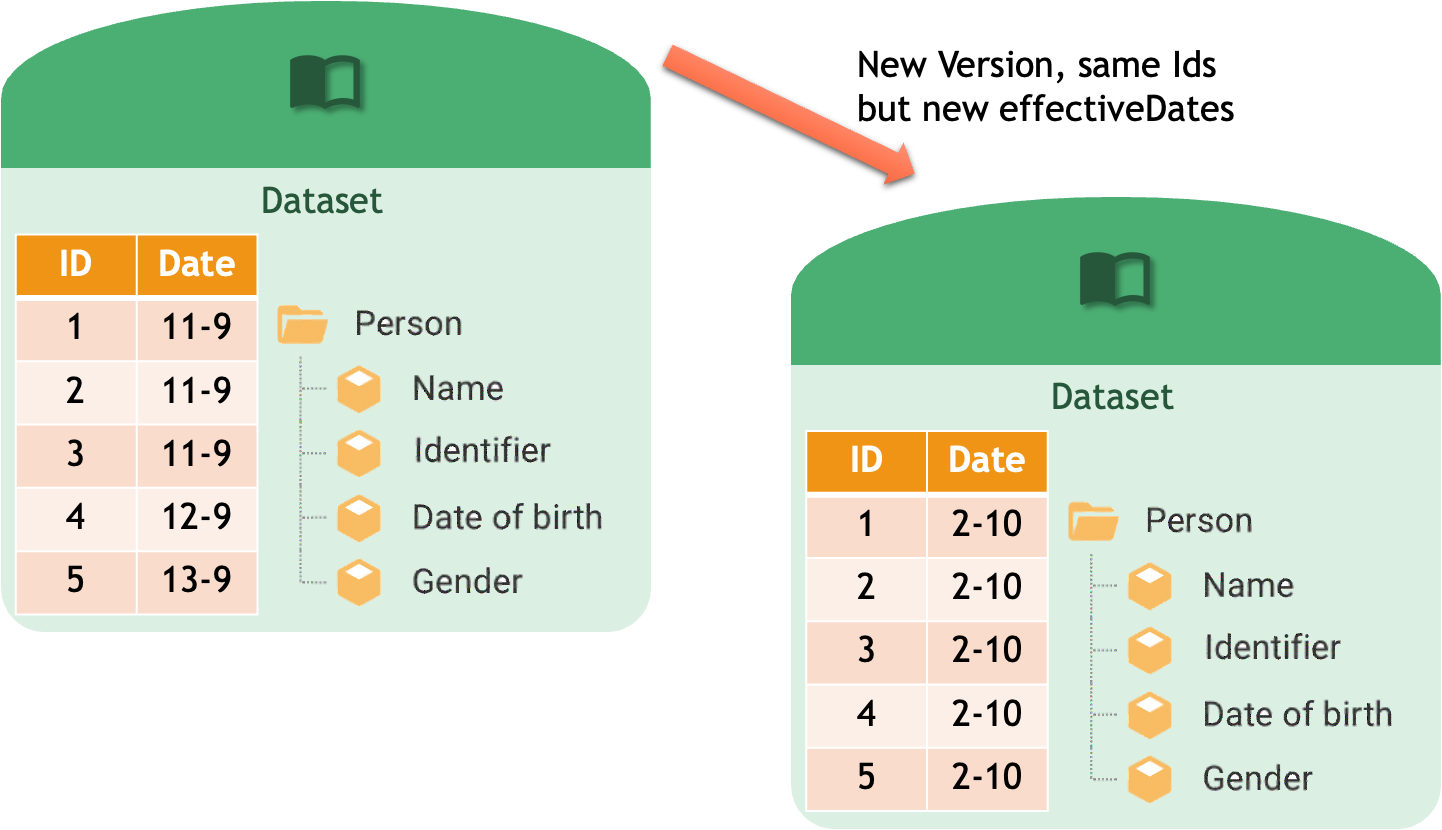
Background: a Source Dataset provides a set of Concepts (with an id and effectiveDate) that are referenced in a Transaction Leaf.
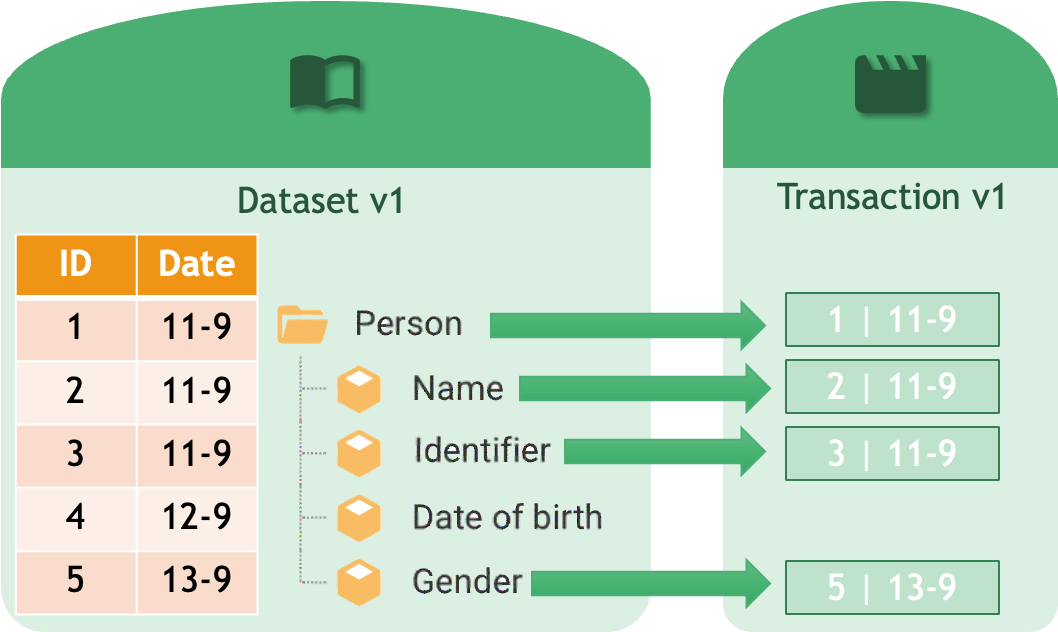
Creating a new version of the Dataset may typically let all IDs be the same per concept (persistent IDs), while the effective dates move on to the cloning date (the new version date).
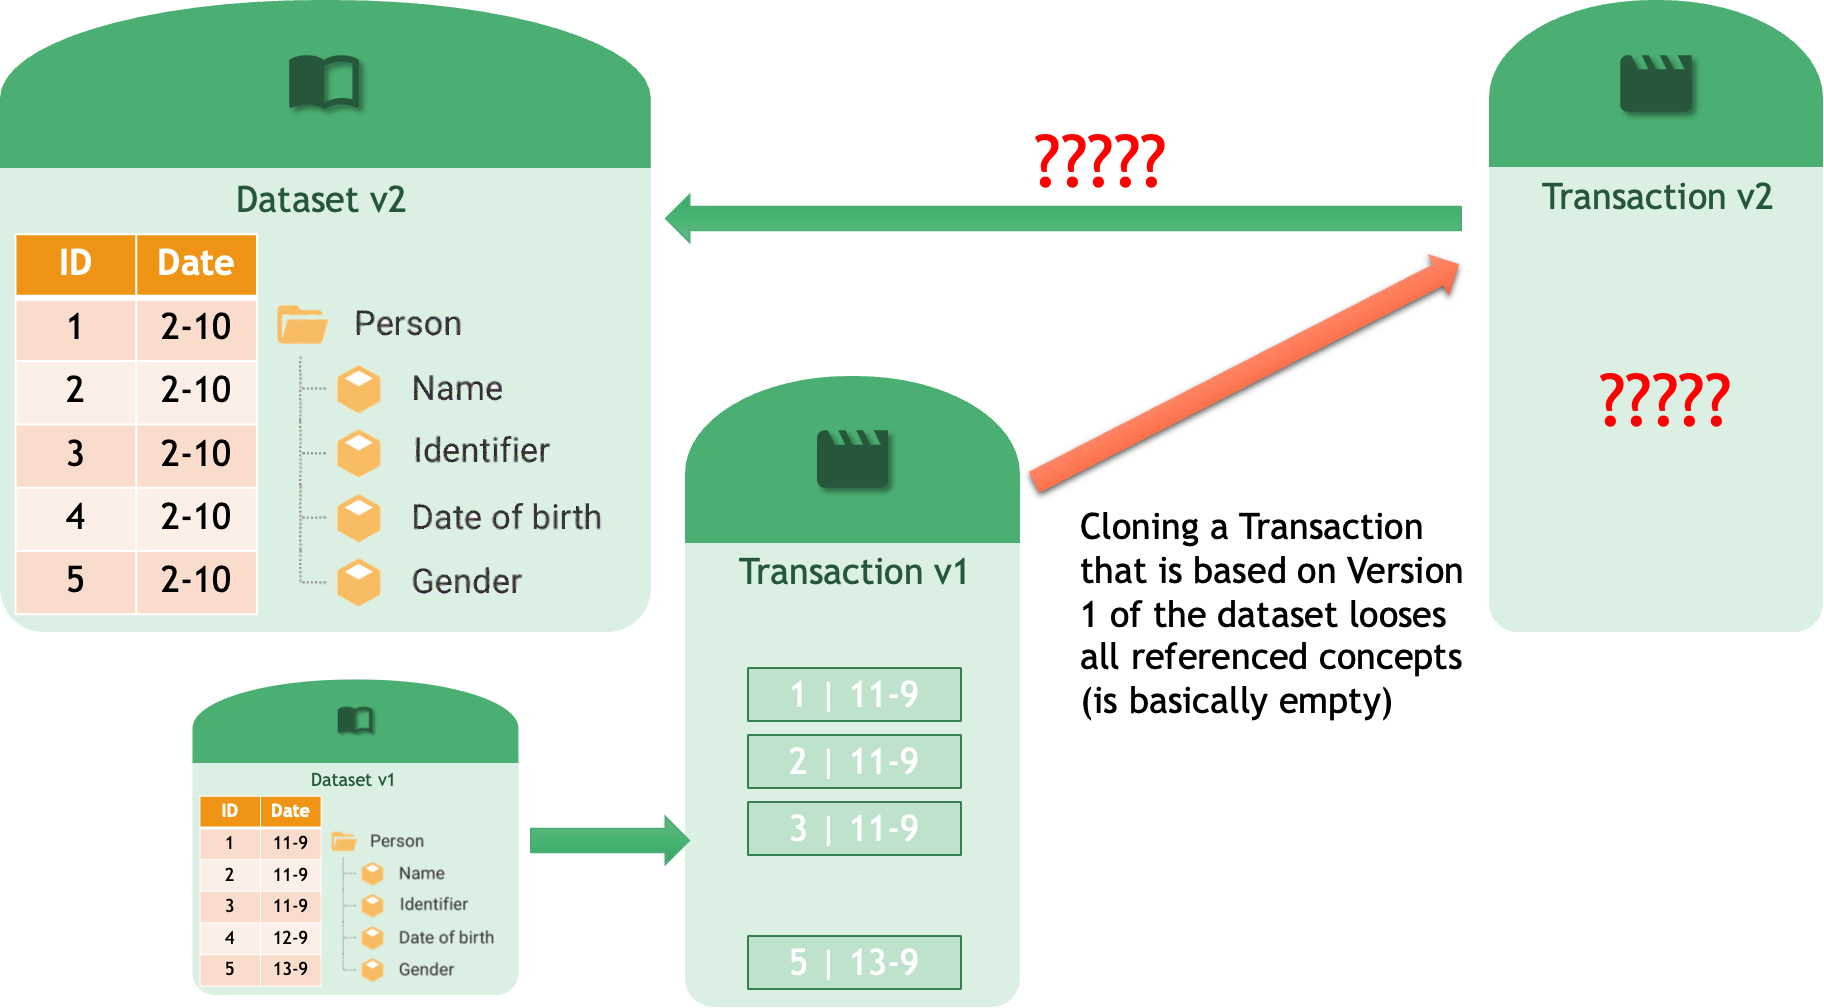
Problem: Cloning a Transaction that is based on Version 1 of the dataset loses all referenced concepts (is basically empty) as it loses its Source Dataset
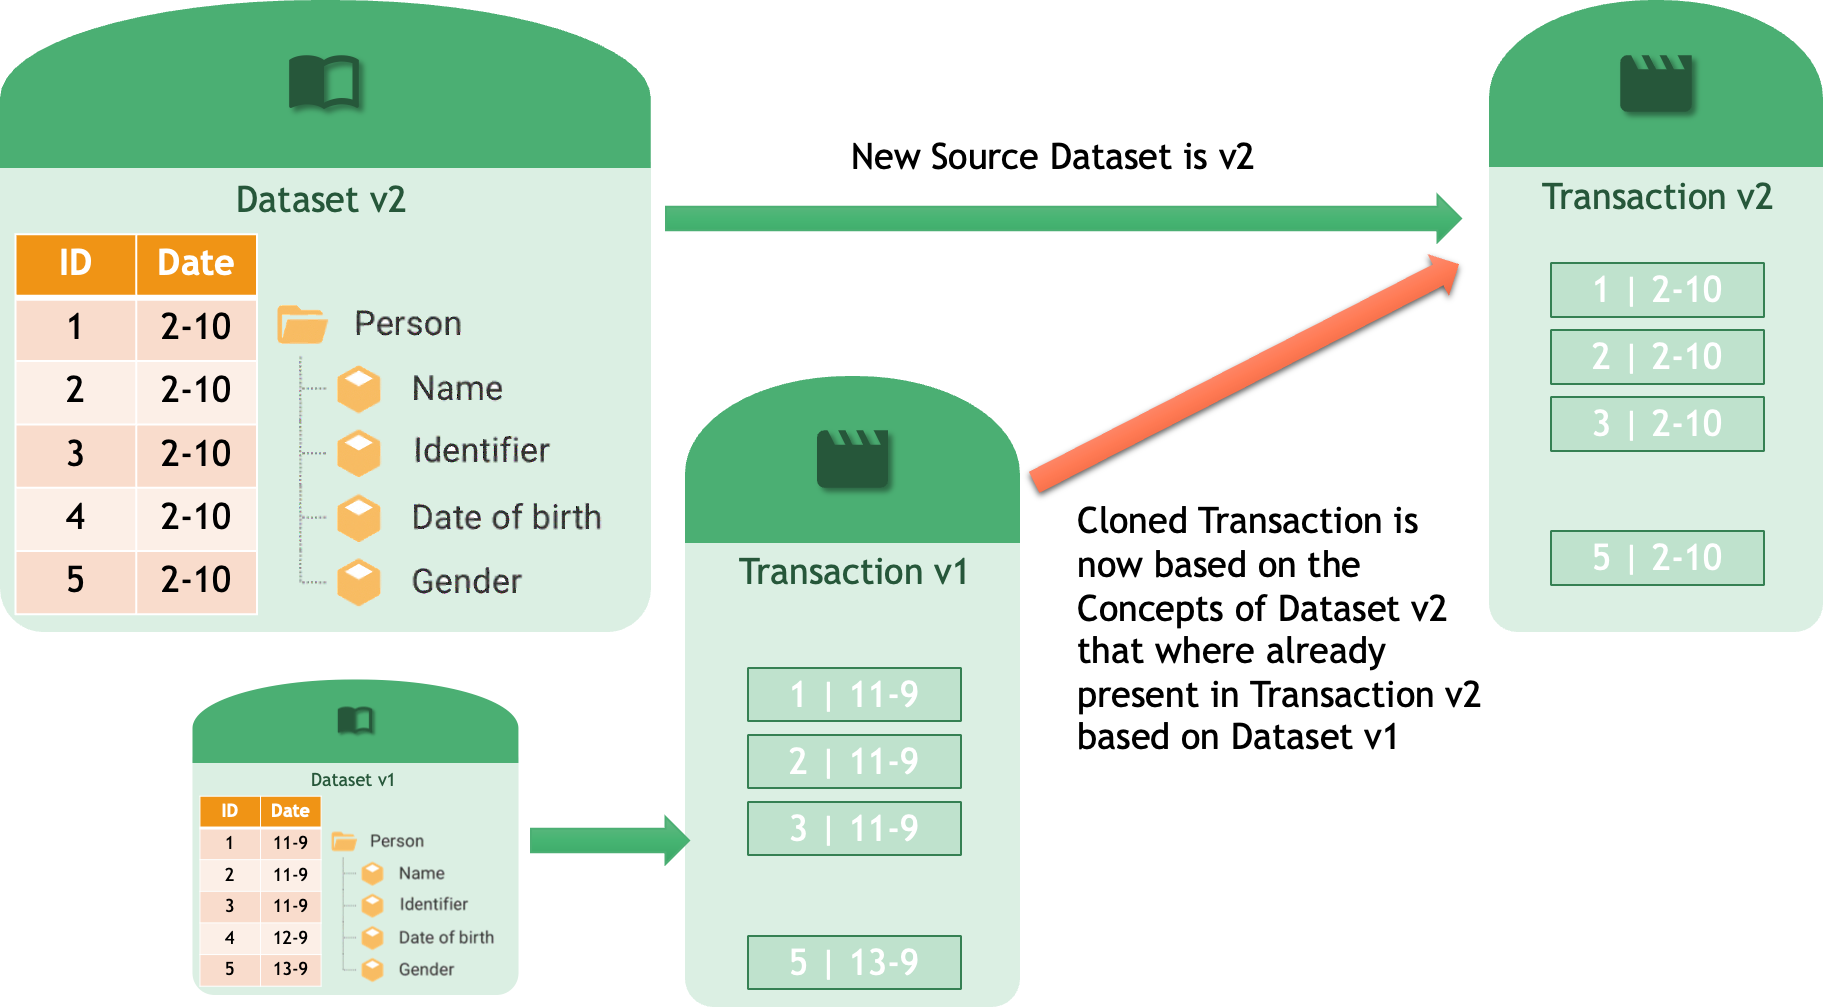
Happier with Smart Cloning: With the pre-requisite that the IDs are kept for the concepts in Dataset version1 and the new Dataset v2, cloning a Transaction based on Dataset v1 may include the option to take over all concepts in Transaction v1 that are also present in Dataset v2 and populate the newly cloned Transaction with references to the concepts in Dataset v2. So the cloned Transaction is now based on the Concepts of Dataset v2 that where already present in Transaction v2 based on Dataset v1.
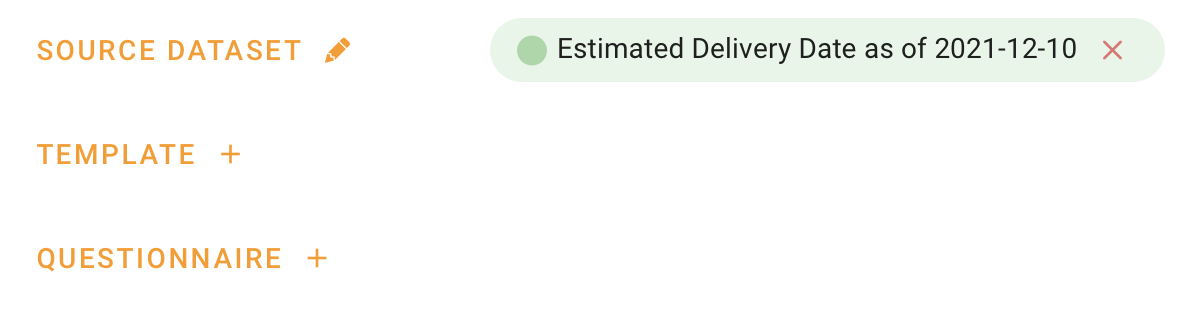
An example: assume that there is a Scenario that has just been cloned from an existing one. Looking at the Scenario metadata we see that the underlying dataset is still the Estimated Delivery Date as of 2021-12-10 dataset, the old version.
When clicking on the pencil to edit the Source Dataset you see a dialog that shows all dataset in the project. We still see that the Estimated Delivery Date v1 dataset is chosen, but we want to re-assign the underlying dataset to the new existing version 2 of the Estimated Delivery Date dataset.

When selecting the new Estimated Delivery Date v2 dataset the right side of the dialog opens up to summarize what you are going to do: the wise owl days that the concepts in the current transaction leaf are based on the displayed original dataset and that you can "smart clone" the concepts in the transaction leaf referring to the selected new dataset. It shows old and prospective new dataset and explains the options to either just re-assign the transaction to another dataset and lose all references of the concepts in the transaction (so you can start building the concepts from scratch) or to smart clone concepts of this transaction based on another (newer) dataset.
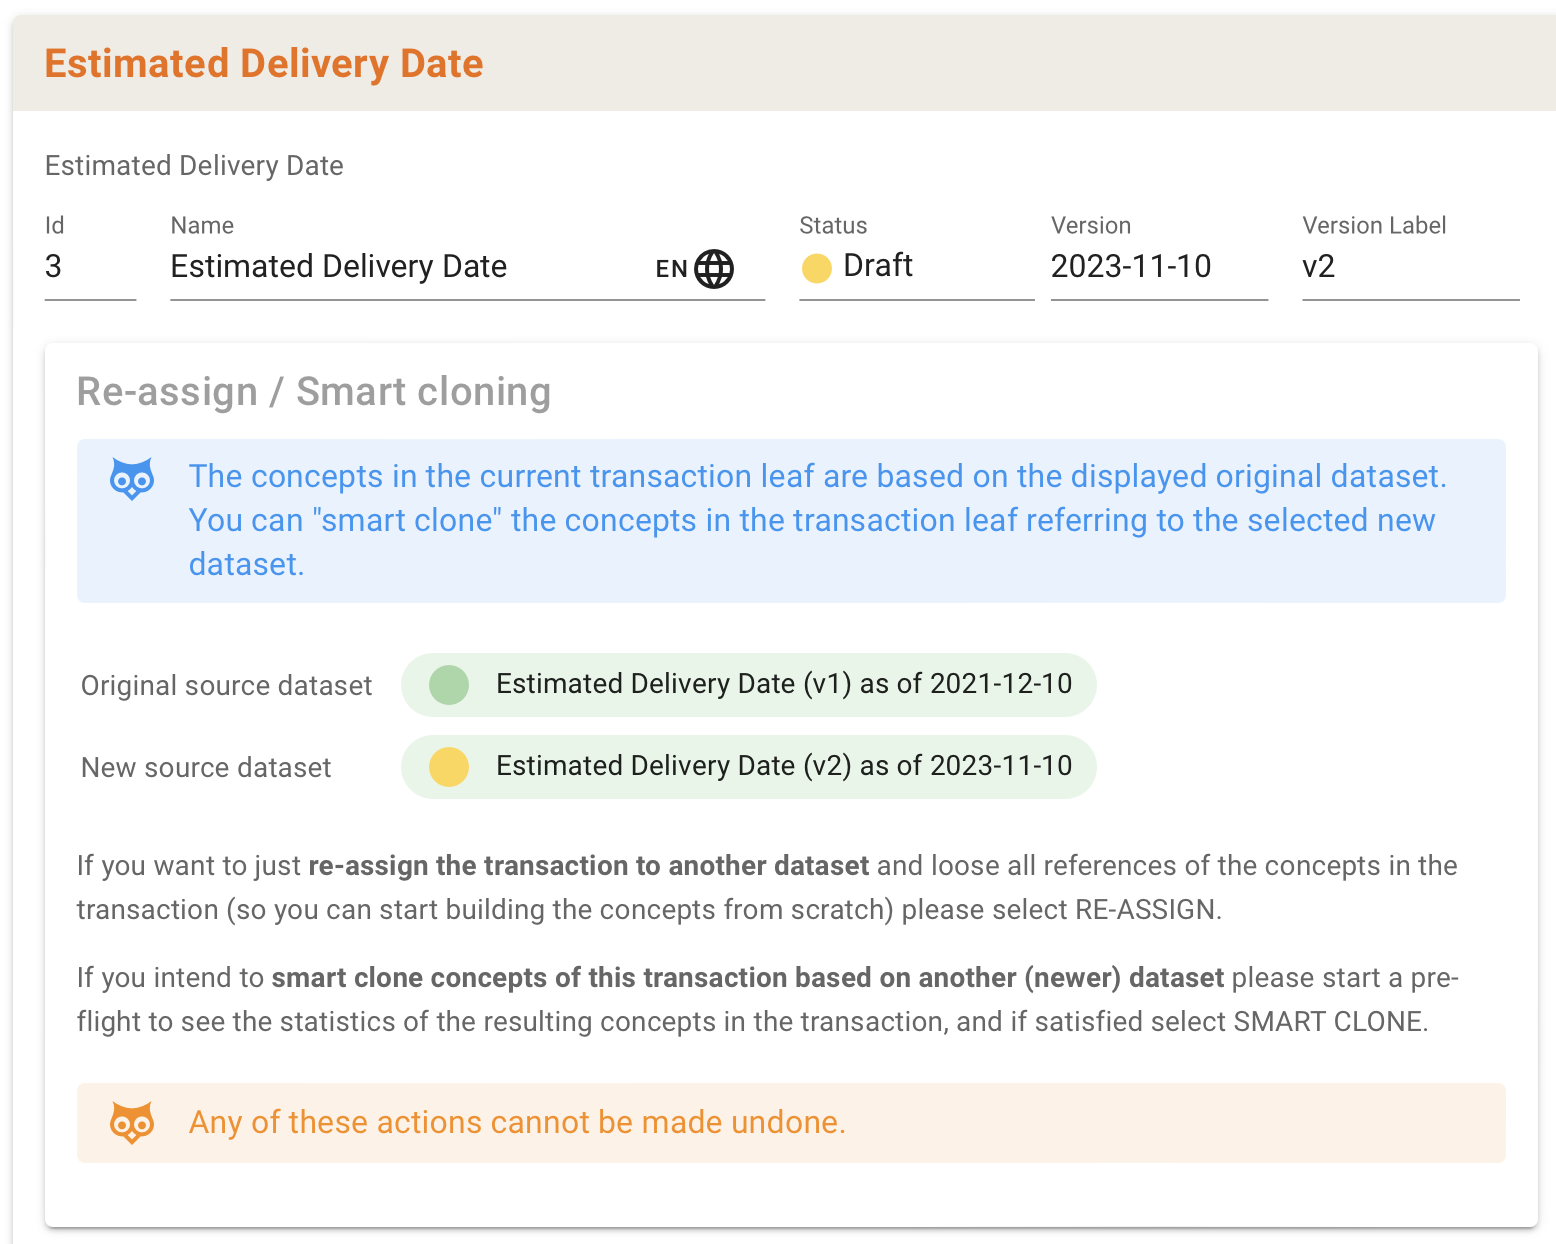
For the latter option there is a button SMART CLONING (PREFLIGHT) to start a pre-flight to see the statistics of the resulting concepts in the transaction, i.e. a list of concepts that could not be transformed in to the new dataset.

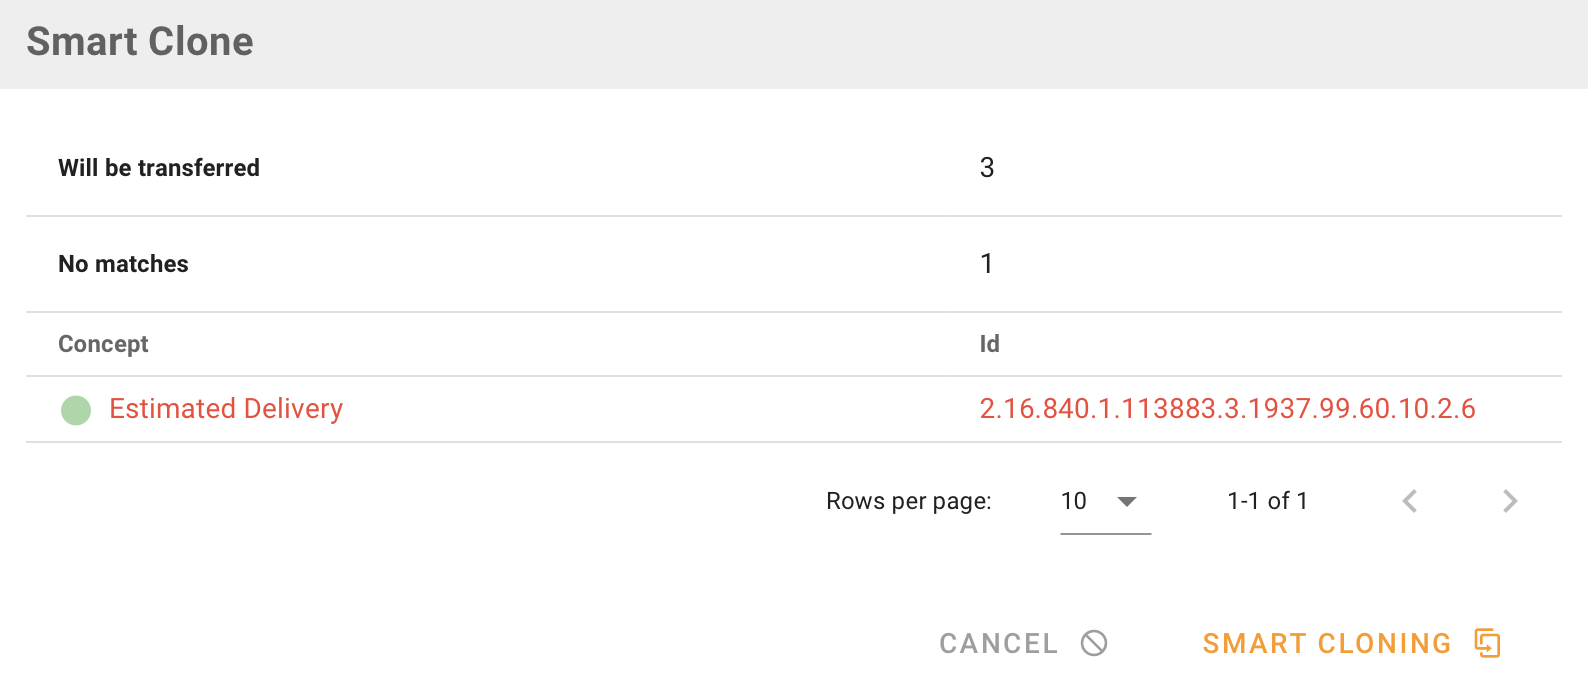
Once you decide what to do you can either "smart clone" the transaction, or cancel the preflight and just re-assign to start from scratch with selecting concepts in the transaction.
Building blocks
::: note
Demo project (demo16) demonstrates the full obligation workflow.
:::
ART-DECOR building blocks are pre-defined transactions that have cardinalities, conformance etc. and that can be re-used in other transactions. Building blocks in ART-DECOR are aligned with the HL7 Obligations framework extension. Obligations allow specifying element-level conformance statements directed at specific actors (e.g. sender vs. receiver), going beyond the traditional @conformance and @isMandatory attributes. Obligations are stored under transactions / Representing Template / concept. FHIR R4 export produces StructureDefinition resources with obligation extensions and ActorDefinition resources for referenced actors.
A practical instruction for adding building blocks is:
Make sure the concept you want to use is present in a dataset. For example: create a new dataset
In that created dataset: create a concept reference to a concept from any external project
Create a new scenario, transaction
In the transaction: set the source dataset
Edit the transaction concept tree, select the concept so that it is part of that transaction
Select the option TBB, to select the transaction where this concept originates
The user now has options to either re-use, or override cardinality, conformance and context.
Obligations
::: note
For now, obligations are supported from the ART-DECOR backend API. The frontend does not yet offer full support for viewing and editing of obligations. DECOR services does offer support for viewing obligations.
:::
ART-DECOR offers support for the FHIR Obligations framework. Obligations function the same way as conformance does up until now, but obligations also offer a way to document more complex specifications. A conformance statement is a statement relating to one or more actors, and a group of concepts within a transaction / Representing Template.
The properties of obligations:
It is possible to include an obligation statement per concept in the transaction / Representing Template.
Also the associated actors can differ per concept.
The role that the actor performs can also be specified with SHALL statements, for example: 'SHALL:able-to-populate
orSHALL;display`.Obligation statements may include a context: for example, for patient older than 65 years or when the venue is a hospital.
Obligation statement may include repetition information. The value of repetitions is that they define obligations per occurrence of a repeating element rather than for the collection as a whole. Without repetition semantics, an implementation might assume that at least one item in a list needs to satisfy an obligation. With repetitions, it's explicit that every occurrence must satisfy it.
Exports
Scenarios can be exported in various formats. Please visit our Exporting Artifacts page.