Project
The Project Menu offers the following areas:
- an Overview of the selected project
- Version Information containing information about releases and publications of the project information)
- the Publications List
- Implementation Guides
- History of artifacts of the project
- a list of Identifiers used in the project
- Forms with ADA (not yet implemented)
- a Development area to check your project for consistency, e.g. before publications, or to create validation scripts and methods.
If you are logged in and an author of the project, the following additional areas are offered:
- a list of Authors contributing to and associated with the project.
- a panel to see and maintain DECOR locks on artifacts
- entry to the MyCommunity area offering community specific information
- the section about Governance Groups the project belongs to
Overview
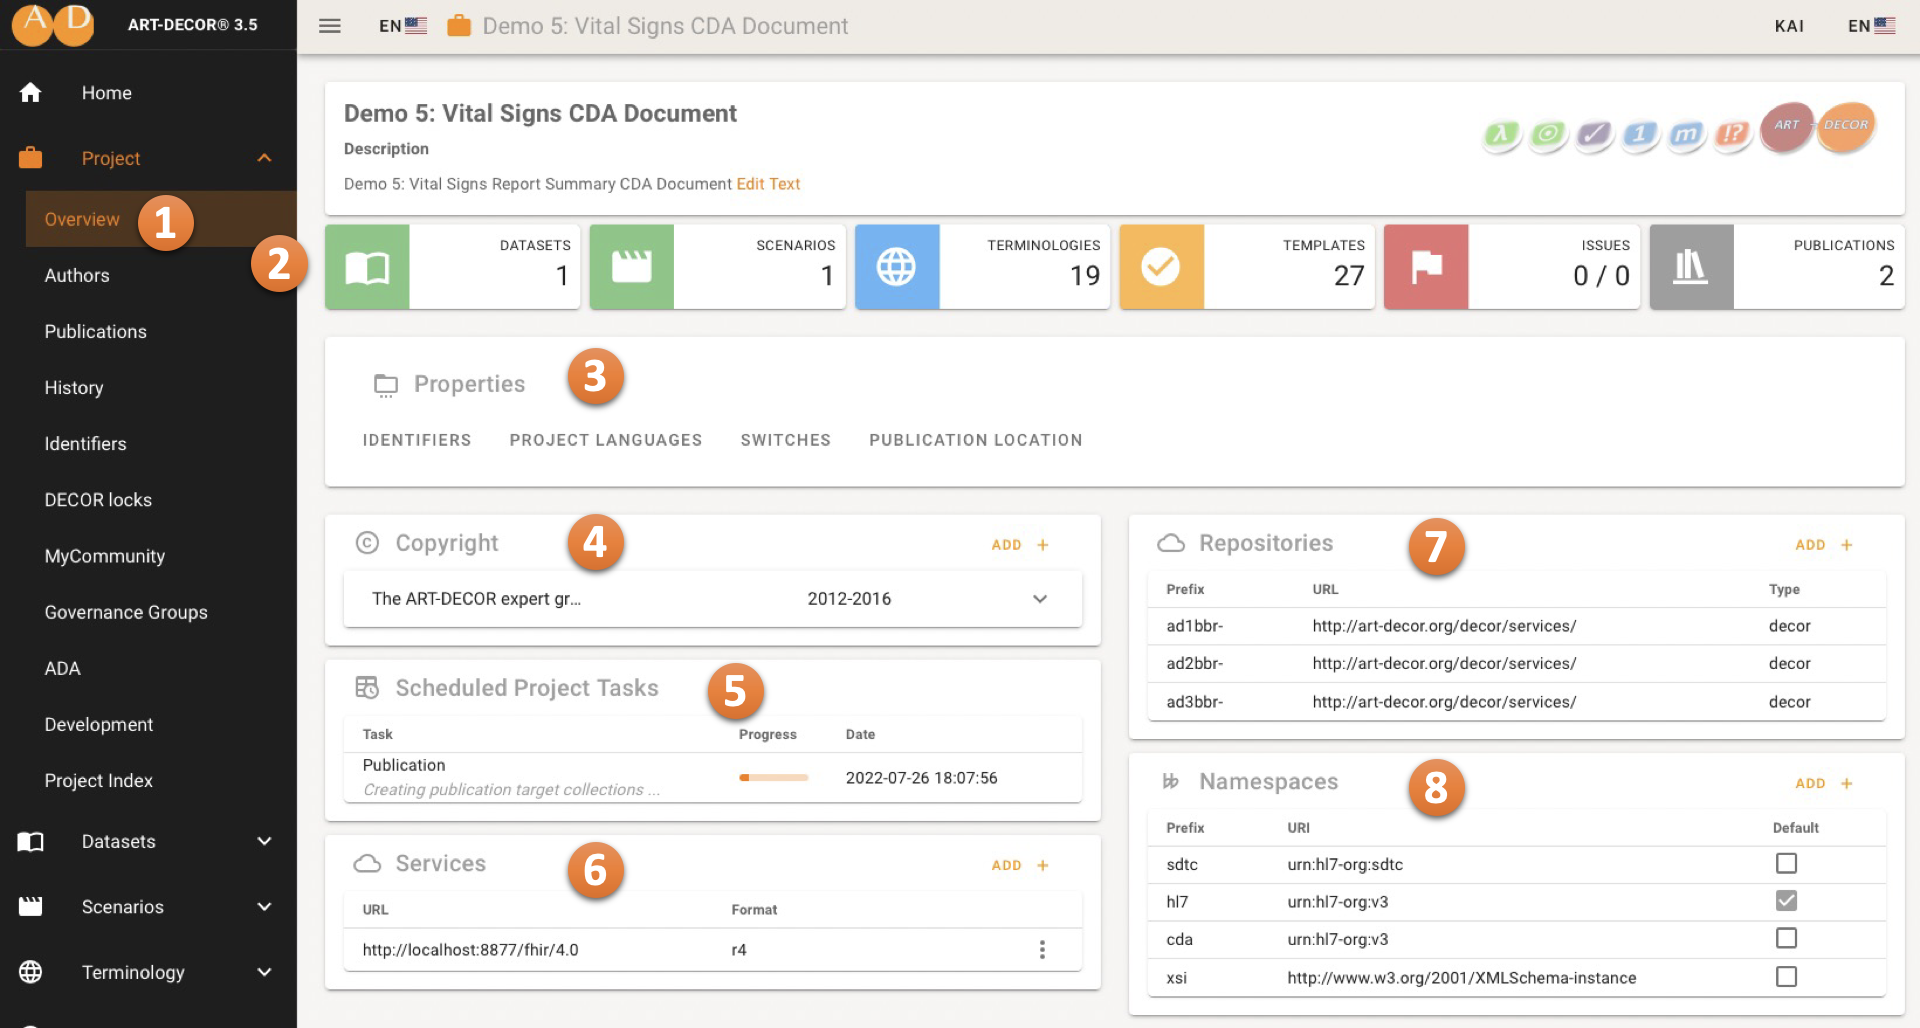
In this Panel 1 you get an overview about the project, its Statistics 2, Properties and Settings 3. There are also cards for Copyright Information 4, Scheduled Project Tasks 5 and defined Services 6. The overview is completed by the list of referenced Repositories 7 and Namespaces used 8.
Depending on whether you are a logged-in project author or not, additional options appear.
Statistics Cards
Below Project information, description and icon you see the Statistics Cards 2 that are also clickable for direct access to Datasets, Scenarios, Terminology, Templates, Issues and Publications.
Properties Card
In the Properties Card 3, Identifiers, Languages, Switches and Publication Locations are shown. Clicking on a tab opens it, clicking again on an open tab collapses the Property Card tabs.
Identifiers gives you an overview of the project prefix, id and last modified date.

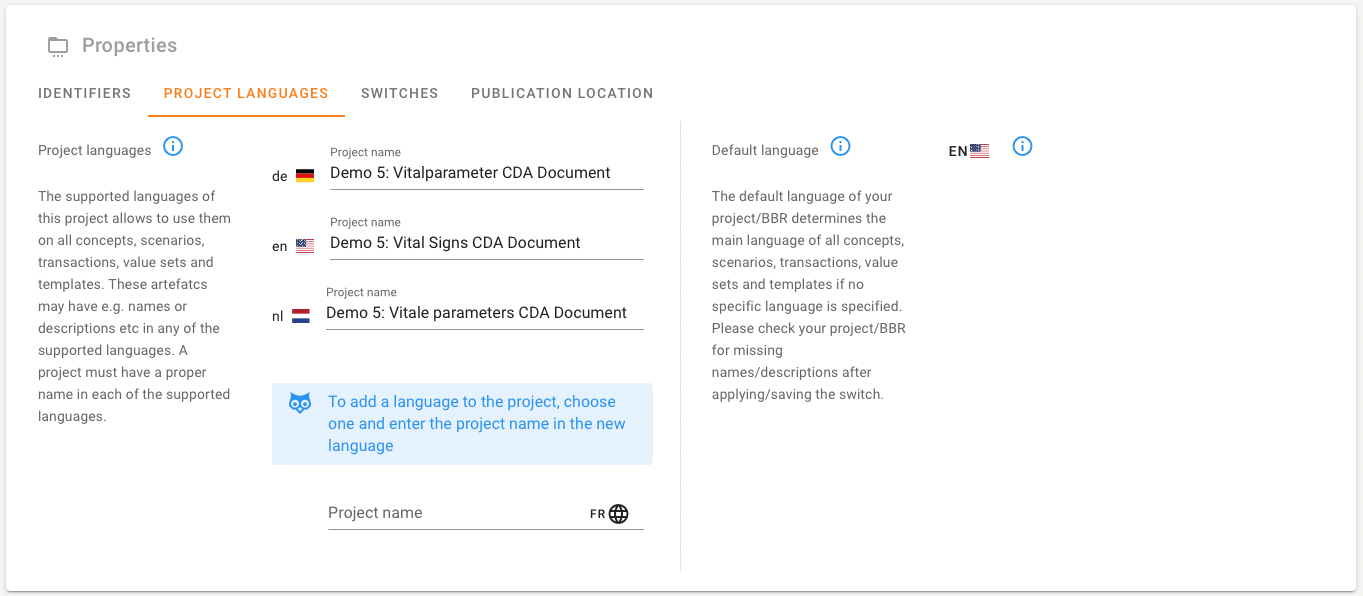
In the Project Languages tab you can edit the name of the current project in one or more different languages or add new languages to the project. You also can see and switch which language is the so-called default language. There are comprehensive explanations in this area.
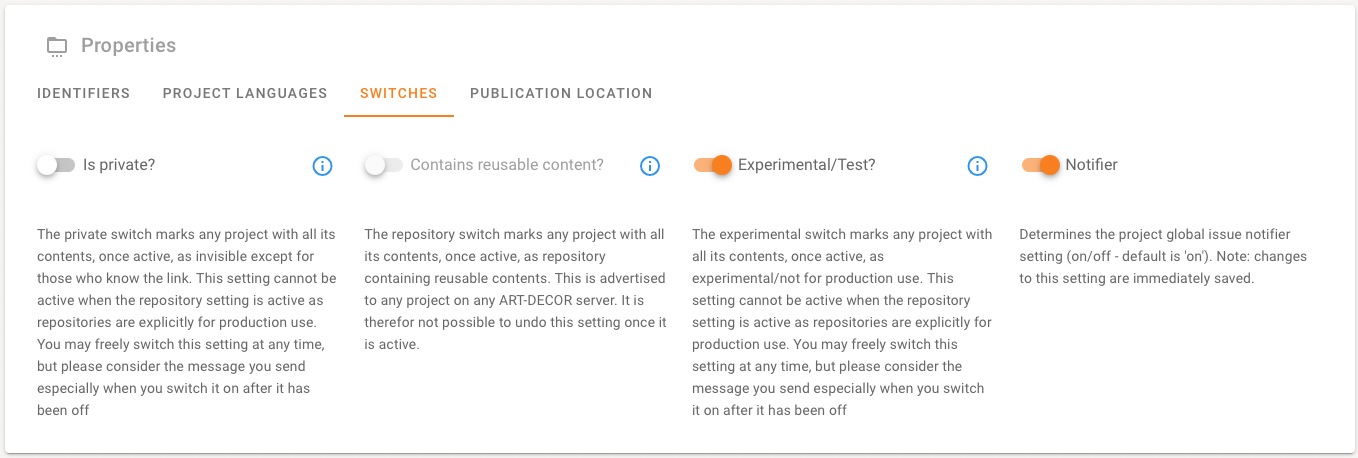
The Switches tab allows to make the project private or public, to declare that the project contains reusable content, to declare the project as experimental/test or not and to switch the notifier on or off. There are comprehensive explanations in this area.
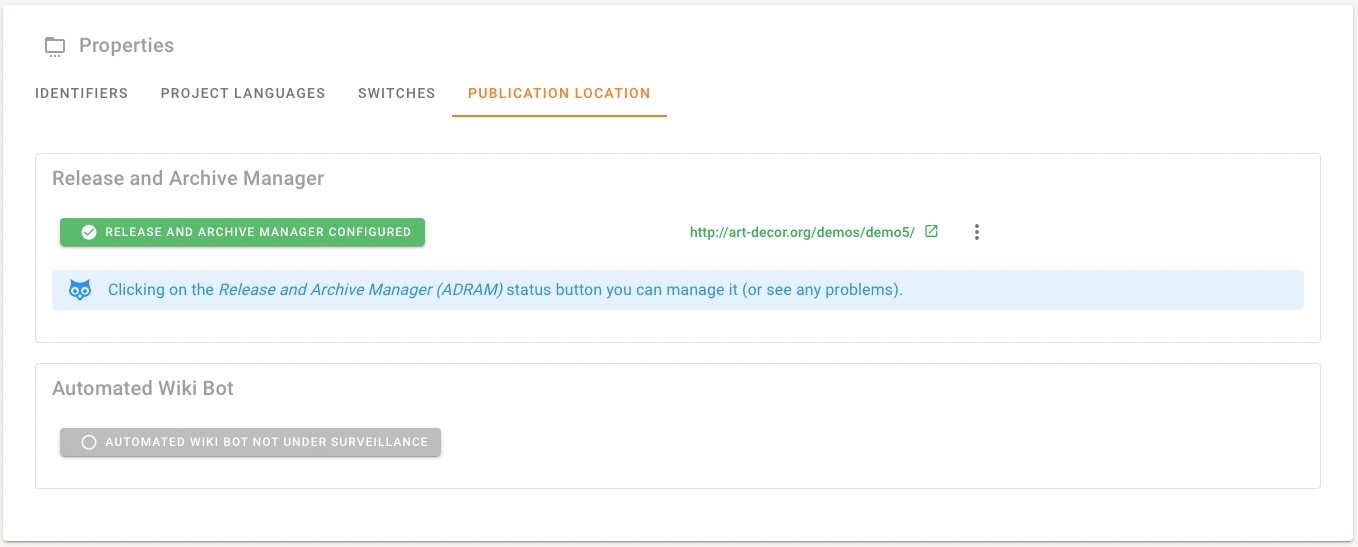
The Publication Location tab gives you the option to edit the location of the publication or to delete the location. It also allows you to overview the publications-related external processes, the Release and Archive Manager (ADRAM) and the Automated Wiki Bot (ADAWIB), if configured and parameterized for this project.
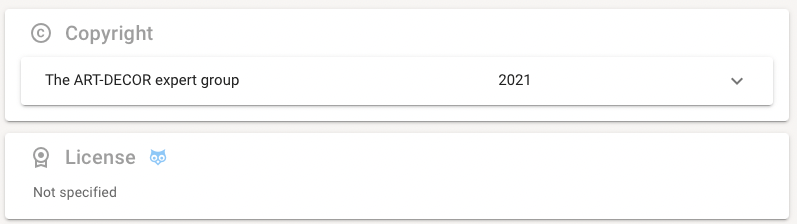
Copyright Card
Copyright 4 provides an overview of the Copyright Information for the current project. It is also possible to add a new Copyright or to maintain the existing ones.
Users may use the following notation to specify that there is only a from-date and no end date specified: 2025-
Scheduled Project Tasks Card
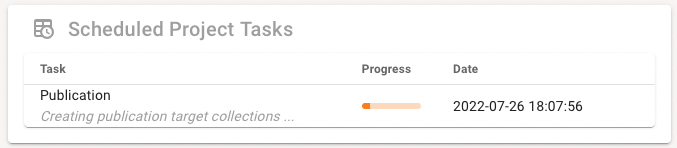
Scheduled Project Task 5 provides a list of actual running tasks for the project and their status, e.g. a publication request. If a task has not been completed it is also possible to delete the task.
Services Card
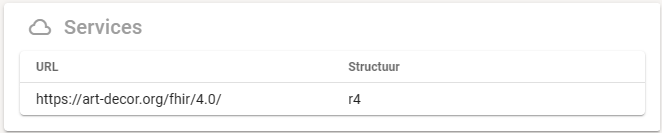
Services 6 contains a list of services defined for the project along with the specified format. You can add new or maintain existing ones.
Repositories Card
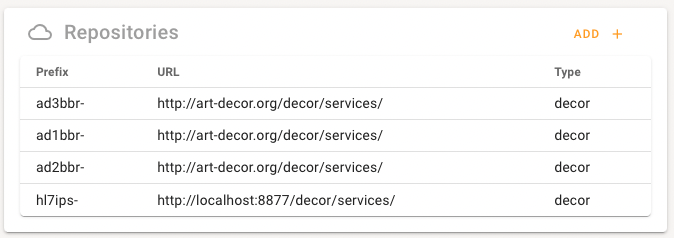
Repositories 7 gives you an overview of the repository reference used for the project with repository prefix, url and type. To add a new repository reference to the project simply use the ADD button. The ADD dialog also offers a search for a specific repository.
It is not possible to un-reference (delete) a repository reference.
NOTE
Please be aware that BBR URLs are identifiers rather than real visitable URLs. They shall always have http:// as the scheme.
Namespaces Card
Namespaces provides an overview of which namespaces are used in the current project. To declare a current namespace as default you can select it in the default column.
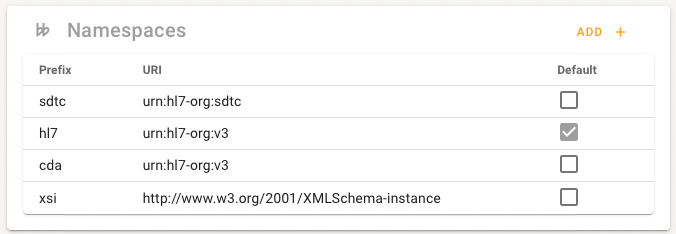
You can also add a new namespace by clicking the ADD-button.
WARNING
Please be cautious and sure that you know what you are doing when maintaining namespaces. Unthoughtful actions on namespaces may even make the project unavailable to you or may cause errors on validation.
License Management Card
ART-DECOR® is a promotor of open standards and fosters to make specifications findable, accessible, and optimize their re-use.
If interoperability specifications and especially content for building block repositories shall be truly open source, project authors/responsibles need to license it so that others are free to use, change, and distribute the specifications.
Specification of License information for DECOR Projects is available and appears on a special License Management Card. In the Project Overview Panel, right after the Copyright Card the new License Card appears.
As a Project Author you can assign a license to the project as a whole. When clicking on the ADD + button in the License Card a dialog is opened that offers a list of supported licenses.
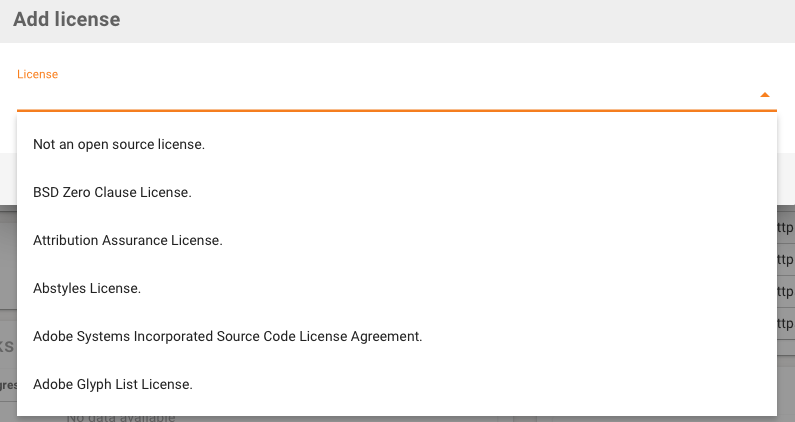
The list is using an SPDX license Identifiers, or a special case 'not-open-source'. Once saved the license information can be edited or deleted.

A project can have at most one license. We in the team discuss whether we suggest having a default license for new projects in the future.
Authors
The Authors panel is only available if you are logged-in as project author. It provides an overview of all authors of the project, their name and whether their account is active or not. More details like email address, subscriptions and expiration date can be seen when expanding the row. It is also possible to add a new author to the current project via the + button.

Publications
Publications panel
The Publications panel provides the list of existing publications and gives you the option to add a new publication to the current project.
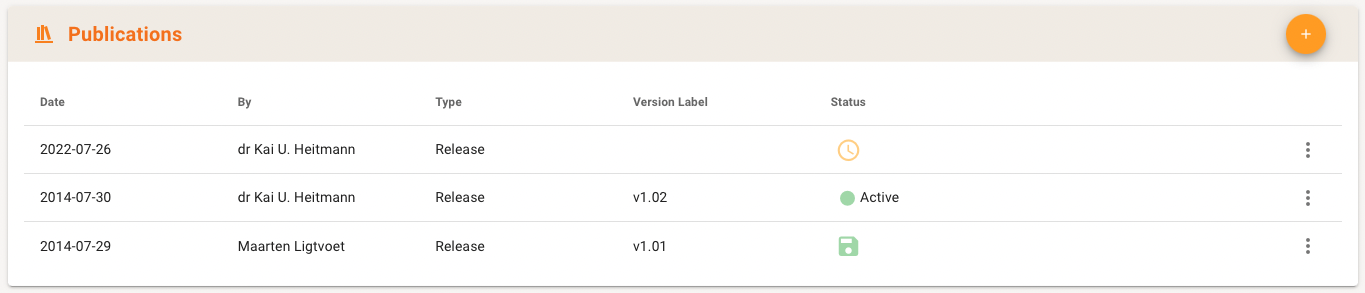
The status of a publication or publication request is shown in the status column.

There are several Types of Publications, all indicated in the list in the Type and with specific symbols in the Status column.
An Intermediate Version acts as a kind of backup of the current state of the project. For this purpose the project is historicized as a whole, this is shown with a green hollow diskette symbol 1.
For Releases, option 1 is to only save the project, as a "freeze". This saved-only release is not published elsewhere but can act as a starting point for further releases of the project and the corresponding release notes. The saved-only release is denoted with a green diskette symbol 2.
If a Release is properly processed and published at its Publication Location, the Status if the release is indicated (in the example "active"), and the green diskette symbol says it is stored, the bookshelf symbol says it is published at its Publication Location 3. The Status of the Publication can be changed according to the Release status workflow.
Once processed in the first phase (compilation of all project artifacts needed), the corresponding icon is a clock that the external continuation process (ADRAM) 4.
Triggering a Release
Recommended Preparation
Preparation of the publication is important. Once published you may give the result a status cancelled or deprecated but there's no undo. Here's a checklist of things to consider:
- Run Terminology Report to identify outdated codes and fix issues
- Run Check DECOR and fix issues, also look at the warnings like missing translations in multilingual projects
- Check status for all artifacts i.e. datasets, scenarios, transactions, templates, terminology
- Check the contents of the publication filter if all relevant transactions are present.
Optional extra steps
- Run a Runtime Compile and validate instances against the updated specification
- Run a development compile and generate html and runtime environment against the compilation, follow the steps below and check the 'development' option below the release label.
Ready to submit
Now that you are ready: Click on the + button in the Publications Panel to initiate one of the types of Publications:
- Intermediate Version (historicized project)
- Release
- without a Publication (rarely used)
- Release with Publication (normally chosen).
A new window with four tabs will open where you can set the options for the Publication.
In the General Tab you can choose for any of the types mentioned above, either as an Intermediate Version (historicized project)...
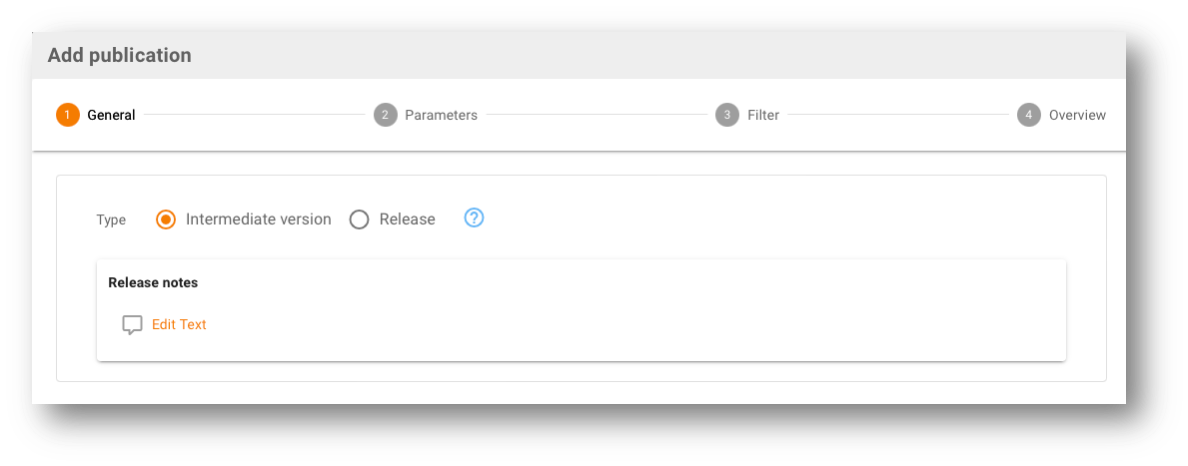
... or as a Release 1 with or without Publication Request. By default the Publication Request 2 is typically set to on (but you can switch it off). The Publication Request causes the Release to be published at the pre-defined Publication Location.
NOTE
This is of course only possible if the Publication Location is properly set in the Project Settings.
If you want a Release to be officially published at its pre-defined Publication Location, you must switch the corresponding switch 2 to "on". It is disabled, if there is no pre-defined Publication Location set yet. Refer to the Project Properties to learn how to parametrize it.
In addition you might choose that the Publication with a Publication Request is also published using a specific Implementation Guide (IG) 3 that you have defined. You must choose an IG from your list by clicking on the select button. For creating and maintaining Implementation Guides please visit our documentation.
Finally you might want to let ART-DECOR create Automatic Release Notes suggestions based on a previous release. For that purpose choose a previous Release (if any) on which to base the Release Notes for this publication 4. For these Release Notes a suggestion is made based on the issues recorded in this project that have changed since the date of the selected previous publication. If no previous publication is chosen, the last one is automatically taken. If there is no release yet, all issues are considered..

The remainder of the dialog allows you to add or refine more details for the Release. Add Release Notes as text 1. If a Release shall be created, assign a Release Label 2. You can decide to have a development / test release only 3 instead of a proper publication. Choose the language(s) of the Publication 4.

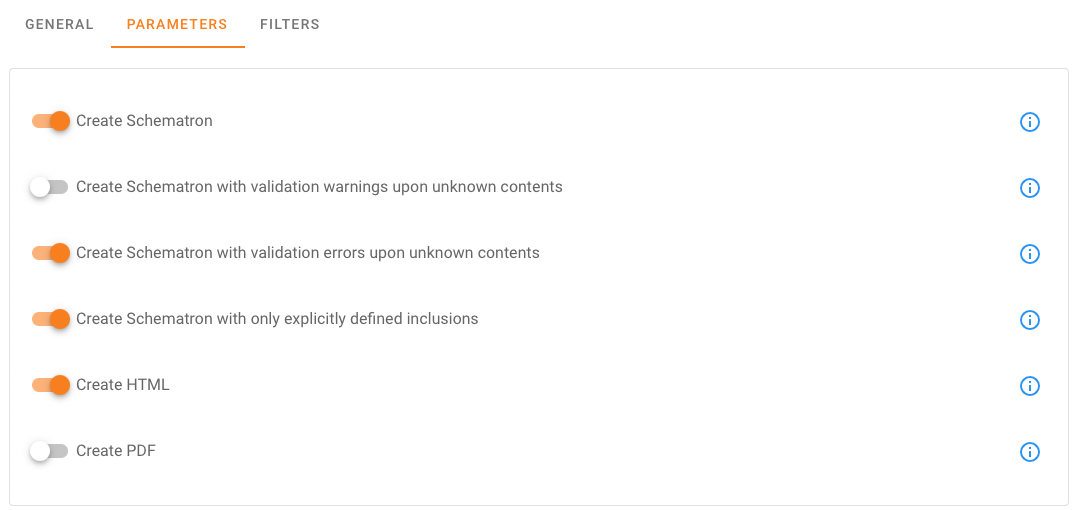
In the Parameters tab you can switch specific parameters on or off. Information buttons provide more information about the parameter.
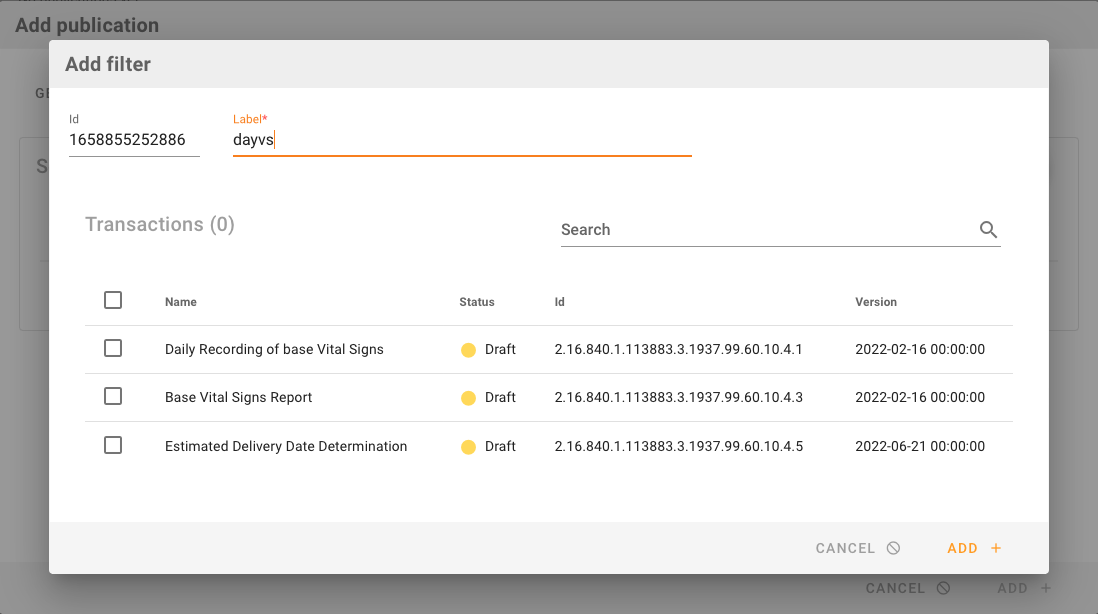
You can also add filters to the Publication based on one or more Scenarios via the Filter tab. Add a filter using the + button. A list of all possible Transactions in the project is shown. Choose one or more Transactions that shall act as a filter. It is required to give a label to the filter.
A defined filter is then offered to be used for the Publication ("Select filter") in the Filter tab. Click to select the filter for the publication.

NOTE
In fact a filtered publication is a Scenario/Transaction or use case based publication including only those artifacts actually belonging to the Scenario/Transaction. This is especially useful for larger projects that cover multiple use cases.
Process of Release Publication Requests
If a Release is triggered it is shown initially as a waiting-in-queue.
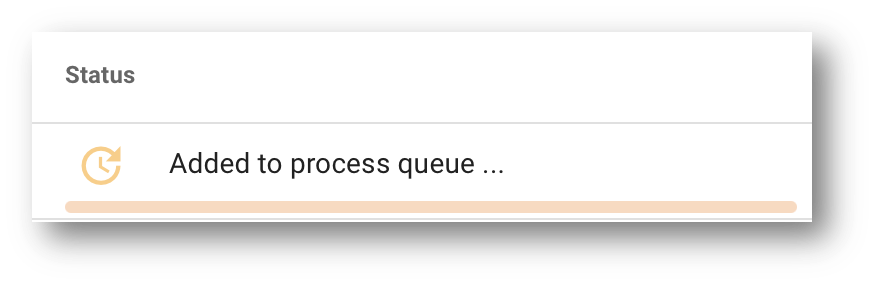
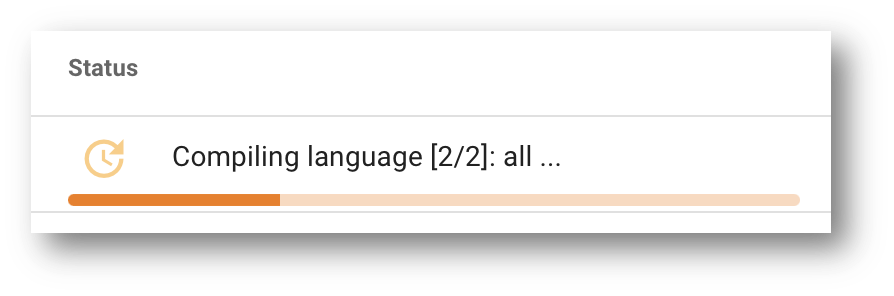
During the process the progress is shown.
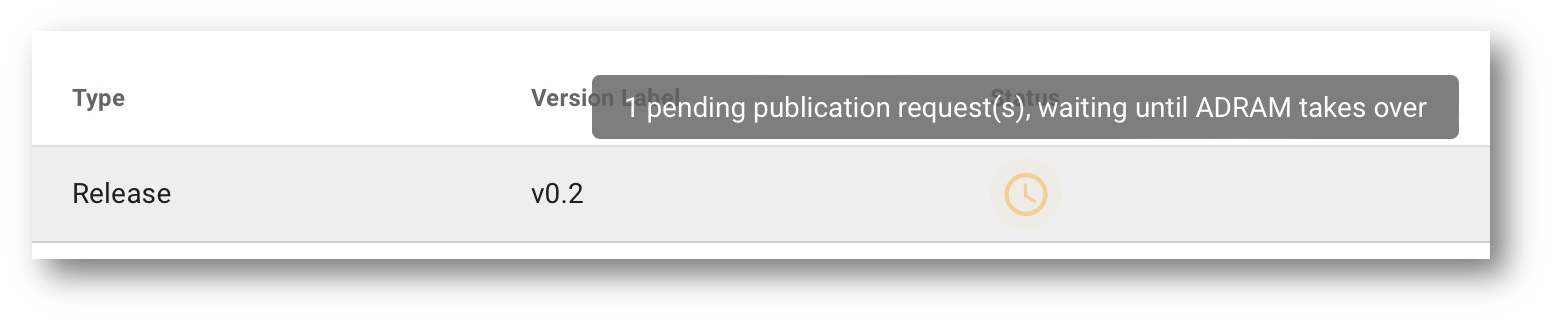
Once processed in the first phase (compilation of all project artifacts needed), the corresponding icon is a clock. The hover text tells that in this state it is waiting for the external continuation process (ADRAM).
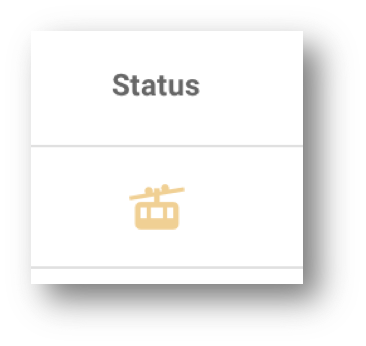
Once it is taken over by ADRAM, the progress of the second phase (the actual transformation of the release and its publication) is denoted by a gondola, along with progress information.
If a release publication process fails it is displayed as an error.

NOTE
A number of checks can be done to improve the quality of your project before you create and publish a release. To check the quality of terminology content contained in the project you can perform a Terminology Report.
Publication Page
All Requested Publications are typically landing at a certain location, the Publication Landing Page. This is either a location provided by ART-DECOR Open Tools or self-hosted. The Release and Archive Manager (ADRAM) processes the requests and puts them on the right spot once ready. The following graphic shows an example with different Recent Publications and multiple Scenarios, there is also a section for archived Publications.

History
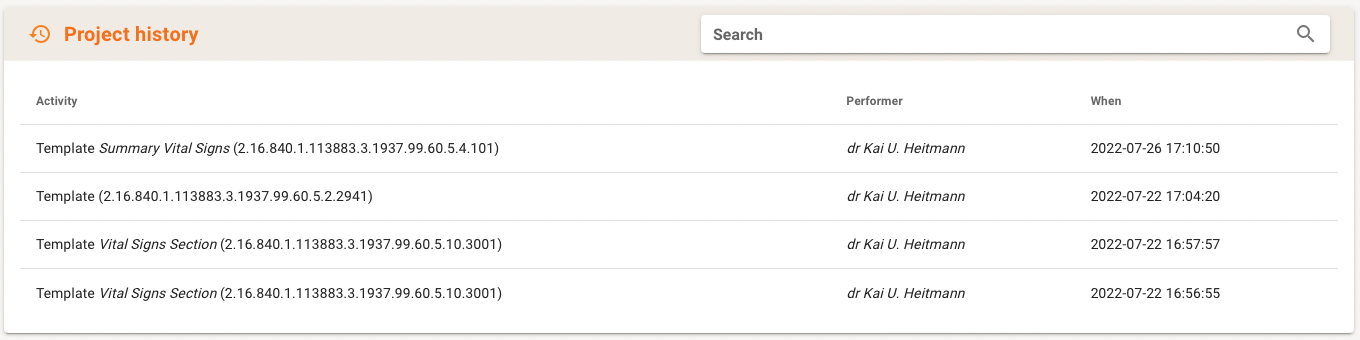
The History panel provides you an overview of all edit activities of the current project. It is also possible to search for a specific activity. You must be a logged-in project author to see this panel.
Identifiers
The Identifiers panel provides an overview of all Identifiers used in the current project. The panel is divided into two sections:
- Base Ids
- Other Ids.
Base Ids
Base Ids, shown in the lower part of the Identifier Panel, represent the set of root identifiers (OIDs) for ART-DECOR artifacts used by the project as default assignments for new Ids and for display purposes.
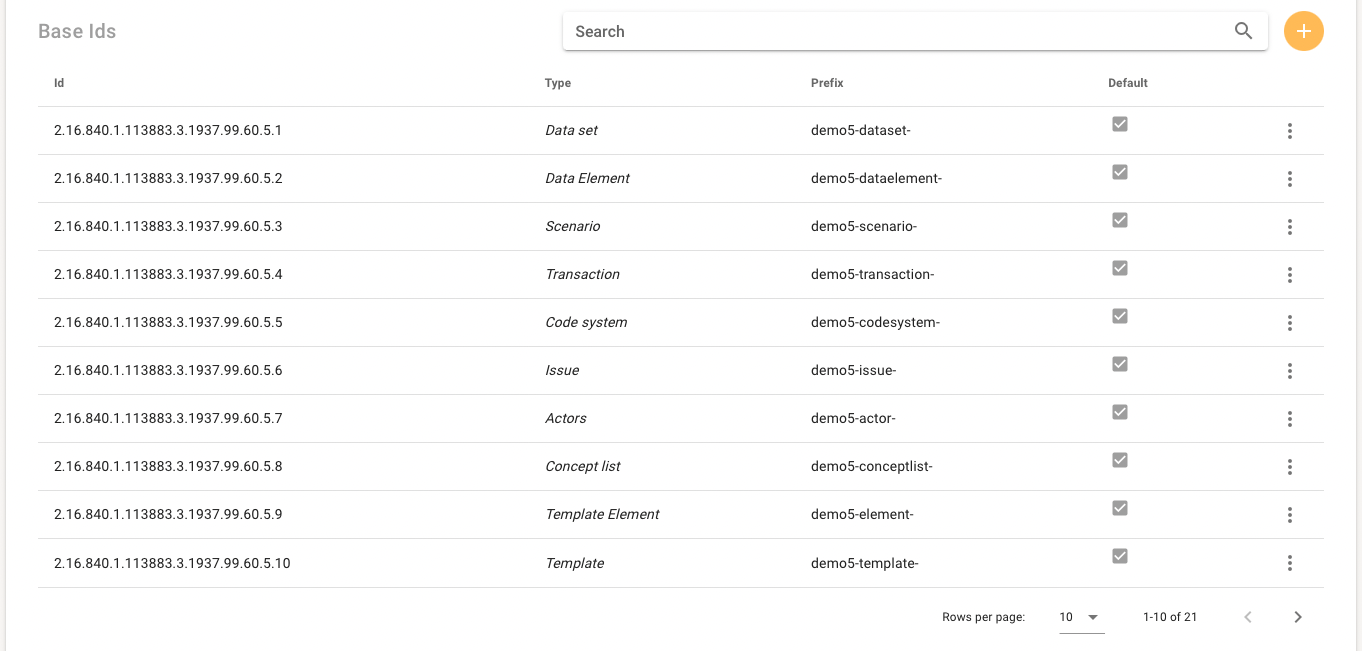
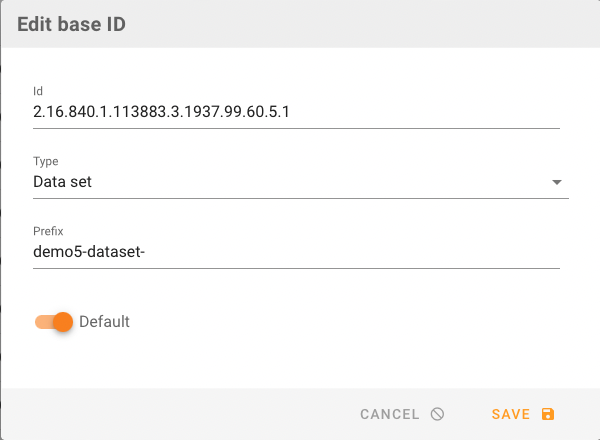
A Base Id has an OID (root), type of artifact and a so-called prefix that is used for short names for ids. It is possible to add and maintain the ids, or make a certain Base Id the default.
EXAMPLE
If you create a new Code Systems where you don't have an own identification for, ART-DECOR assigns an id based on the Base Ids for Code Systems (see above). According to the recommendations of the ISO standard ISO/TS 13582:2015(en) Health informatics — Sharing of OID registry information, the new Code System for example gets the first free id based on the root ending on .5 concatenated with the first free last digit of the already existing Code Systems in the project.
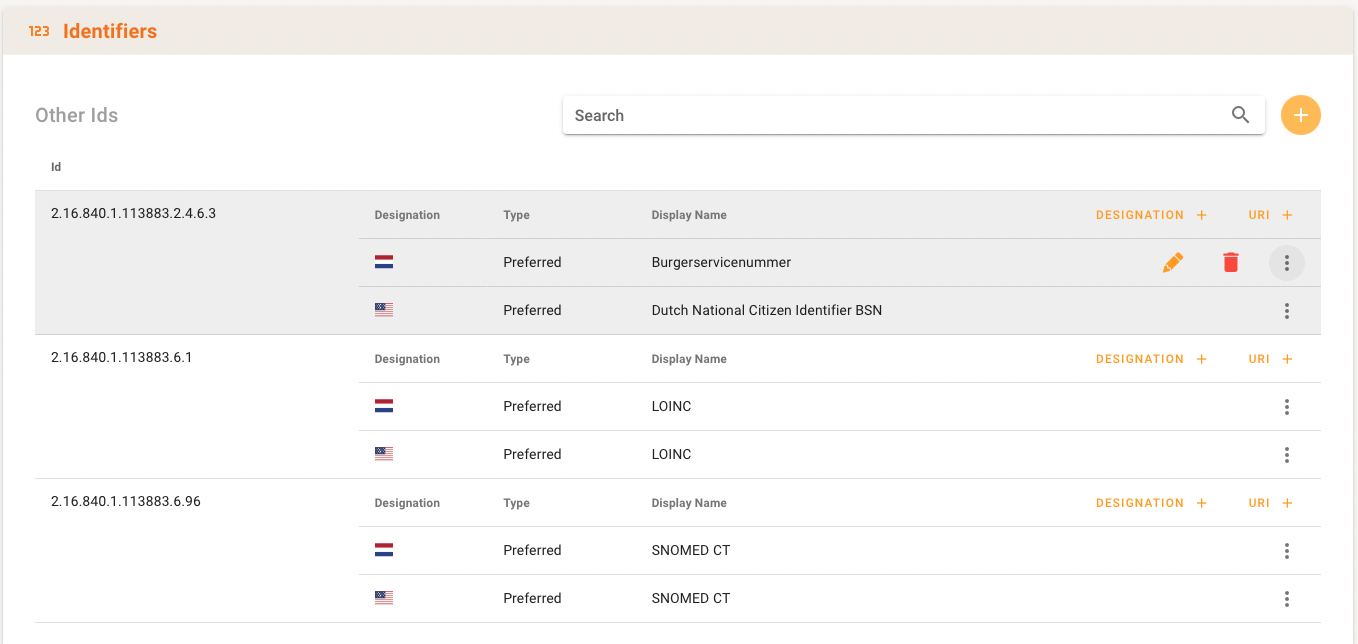
Other Ids
Other Ids are external Ids such as terminology Ids (OIDs or URIs) for LOINC and SNOMED etc. or for identification schemes such as the Dutch National Citizen Identifier (BSN). It is possible to add and maintain an id, add a designation or associate a URI.
Base Ids
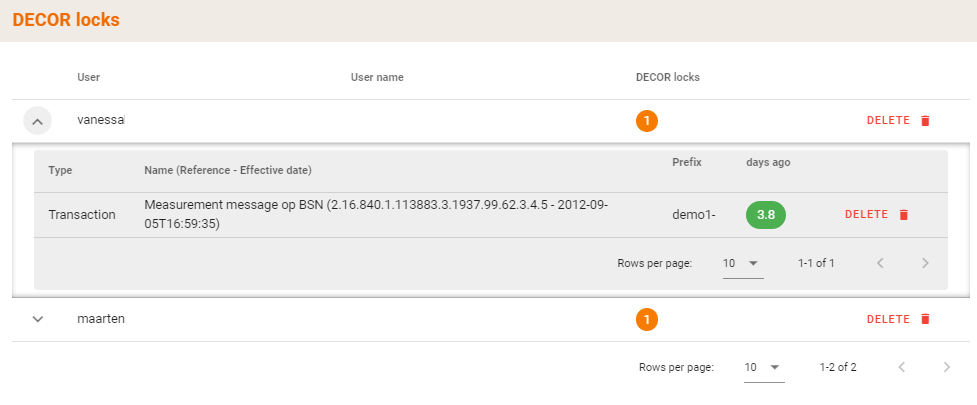
DECOR locks
In the DECOR locks panel you have an overview of all locks of the current project. You can see which type the lock is, the name, prefix and how many days it has been locked. It is also possible to delete a lock, either one-by-one or for a whole holder of locks.
MyCommunity
In this panel you have direct access to the MyCommunity board.

Governance Groups
This panel allows you to create and maintain Governance Groups.

Development
The Development Panel offers various features for authors of a project during developers of a specification. The features include:
- to check the underlying internal specification file, called DECOR Project file.
- to compile a development version based on the current status of the Project
- to manage ART-DECOR Artifacts of the Project
- to create and maintain Terminology Reports of the Project
- to create and maintain Generic and Integrity Reports of the Project.
The features are arranged with tabs, initially the CHECK DECOR tab is selected.
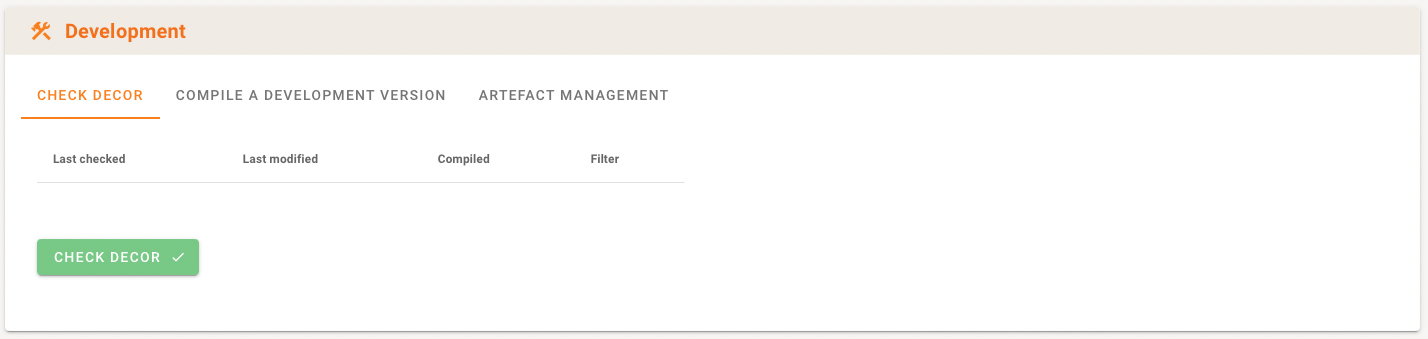
Check DECOR
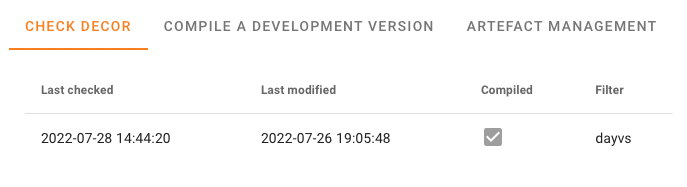
The CHECK DECOR tab gives you the option to validate the project, in essence the underlying internal specification file (DECOR file). If there has been a previous check you can also browse these results.
Define Project Checks
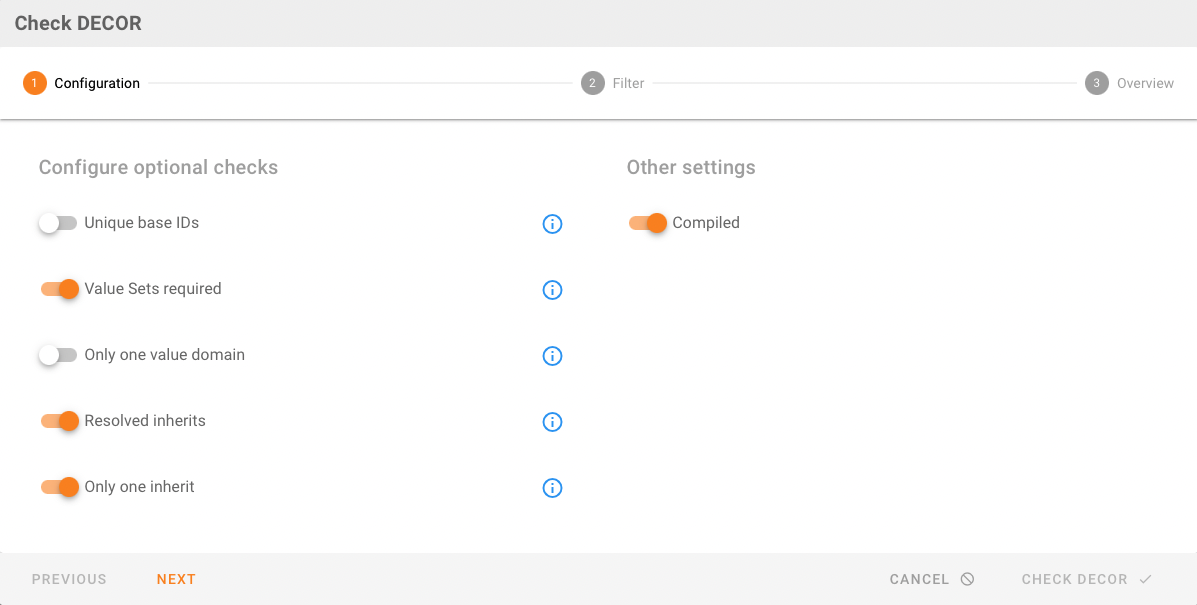
To validate the project you click on the CHECK DECOR button and a new window will open where you can configure optional checks and other settings. When you click on the Information icons you can see what each configuration means in detail. Once you've selected the configuration option you need, you can then click on the NEXT button.
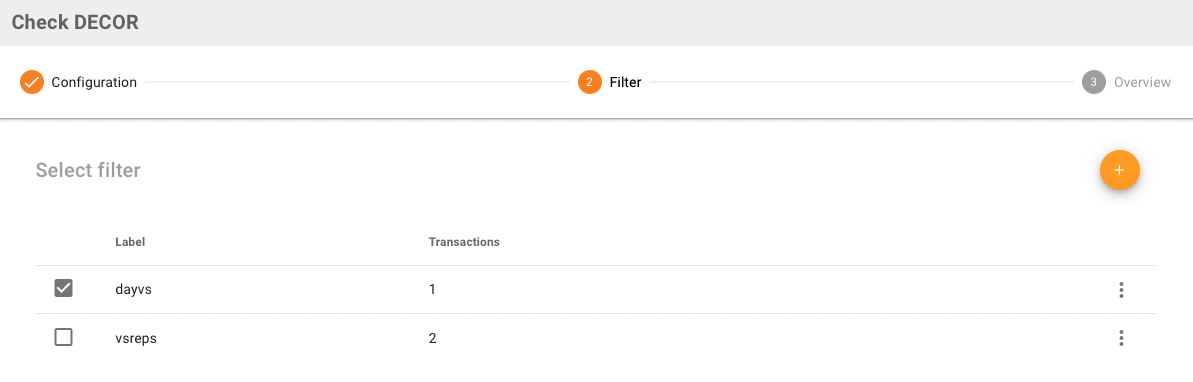
In the next step you can select or specify filters on which transaction(s) you wish to perform the check. To add a filter click on the + button and a new window will open where you have the option to filter a specific transaction to validate. If you don't need to filter out you can directly click on the NEXT button.
Adding a label to the selected transaction is required, this is the name of the filter the selection.
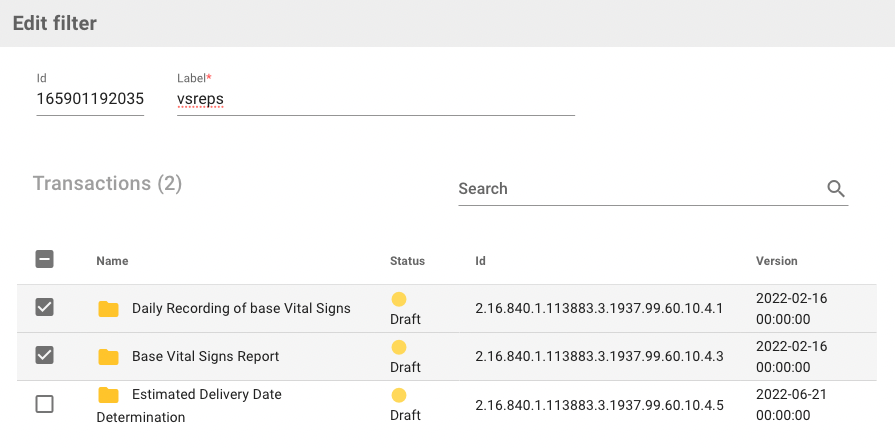
You can then click on save and the filter will be added to the DECOR CHECK where they can be selected/de-selected for the actual check.
By clicking on the NEXT button you come to the last part of the DECOR CHECK dialog where you see a summary of the configuration, filter and compiled settings.
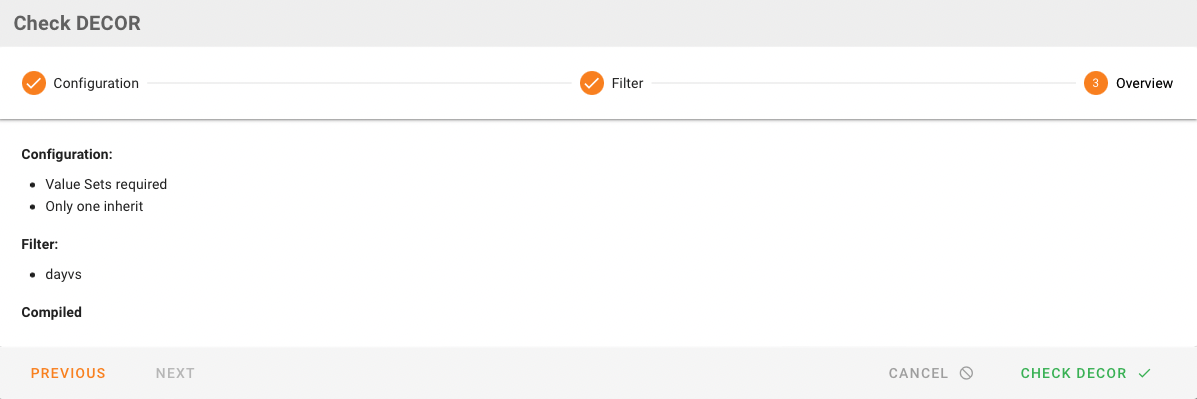
You can then click on CHECK DECOR. As soon as you start the CHECK DECOR and it's ready the current window will automatically refresh.
Results of a Check
The results of the DECOR check is done through schema and schematron validation and are listed below where you have an overview of the different parts of the validation.
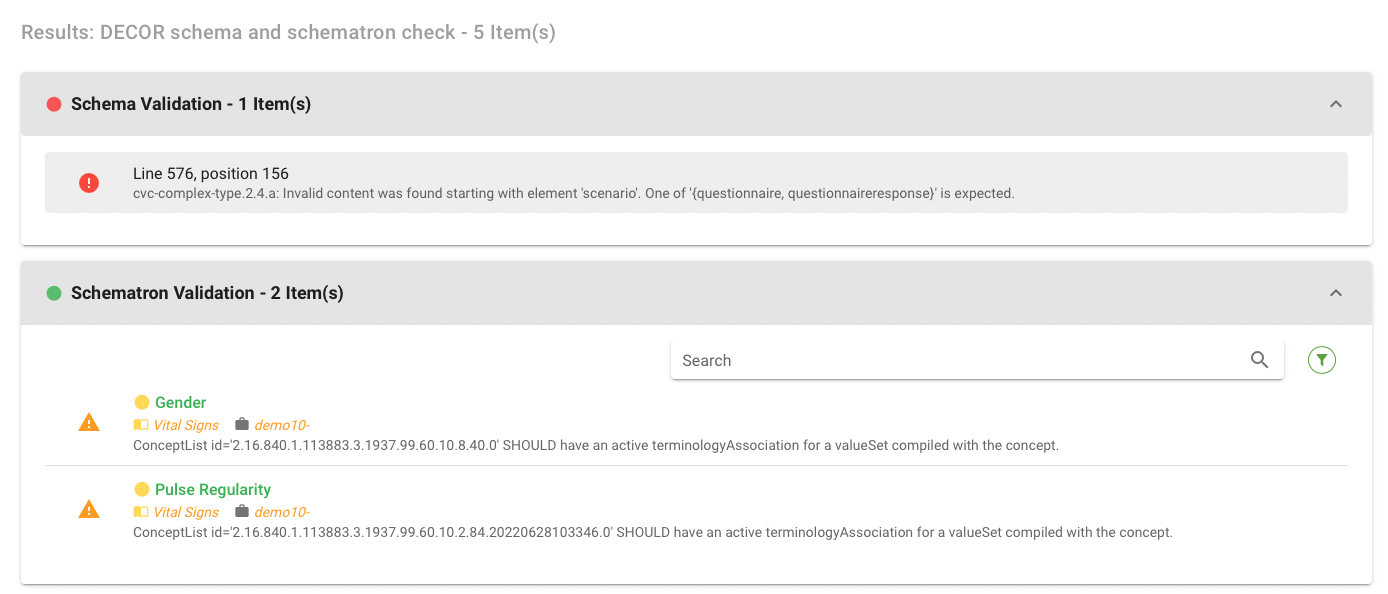
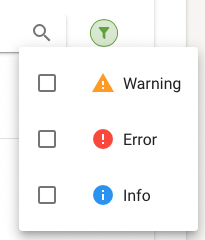
It is also possible to filter out the results of the check / validation using the filter icon.
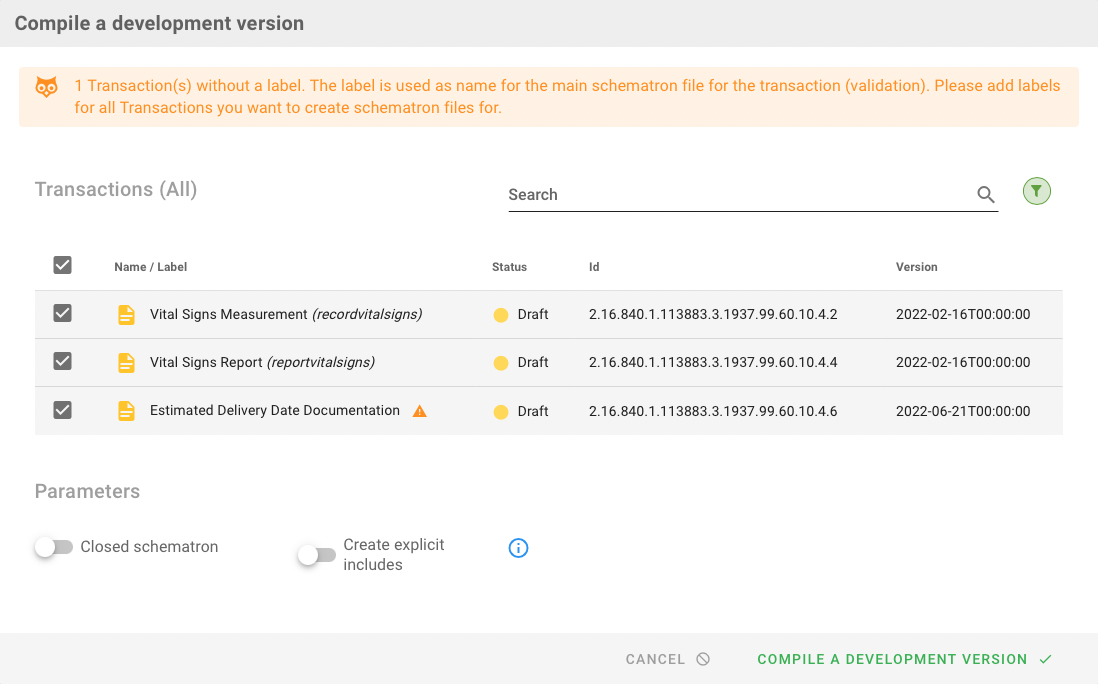
Compile a development version
You can Compile a Development Version of your project which essentially compiles your project in current state with a number of options:
- create schematrons (open or close)
- create explicit includes (an Information button tells more about this option)
- select one or more Transactions from your project to set the focus on the selected ones.
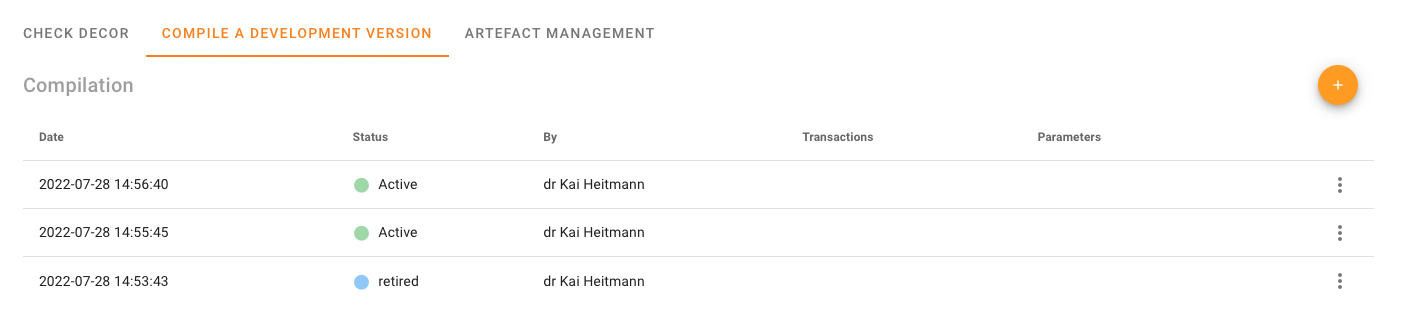
The overall result is shown after processing in the list. Historic compiles are stored also but marked automatically as deprecated if they are the third or higher generation of compilations.
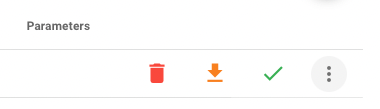
You can also delete or download an existing schematron package or do a live validation of an XML instance against the compiled schematron packages.
Live Validation of Instances
You can validate XML instances against your development packages directly in the tool. Choose first a compiled environment from the list.
A dialog opens and offers you to Upload the instance to be validated and to select a Transaction from the list. Then you click on VALIDATE.
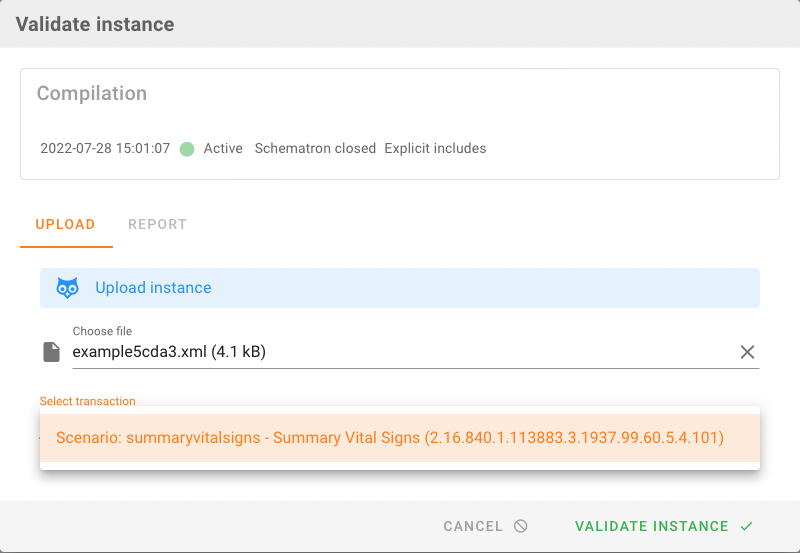
The results of the validation (schema and schematron from the development environment) are shown in the Report tab.
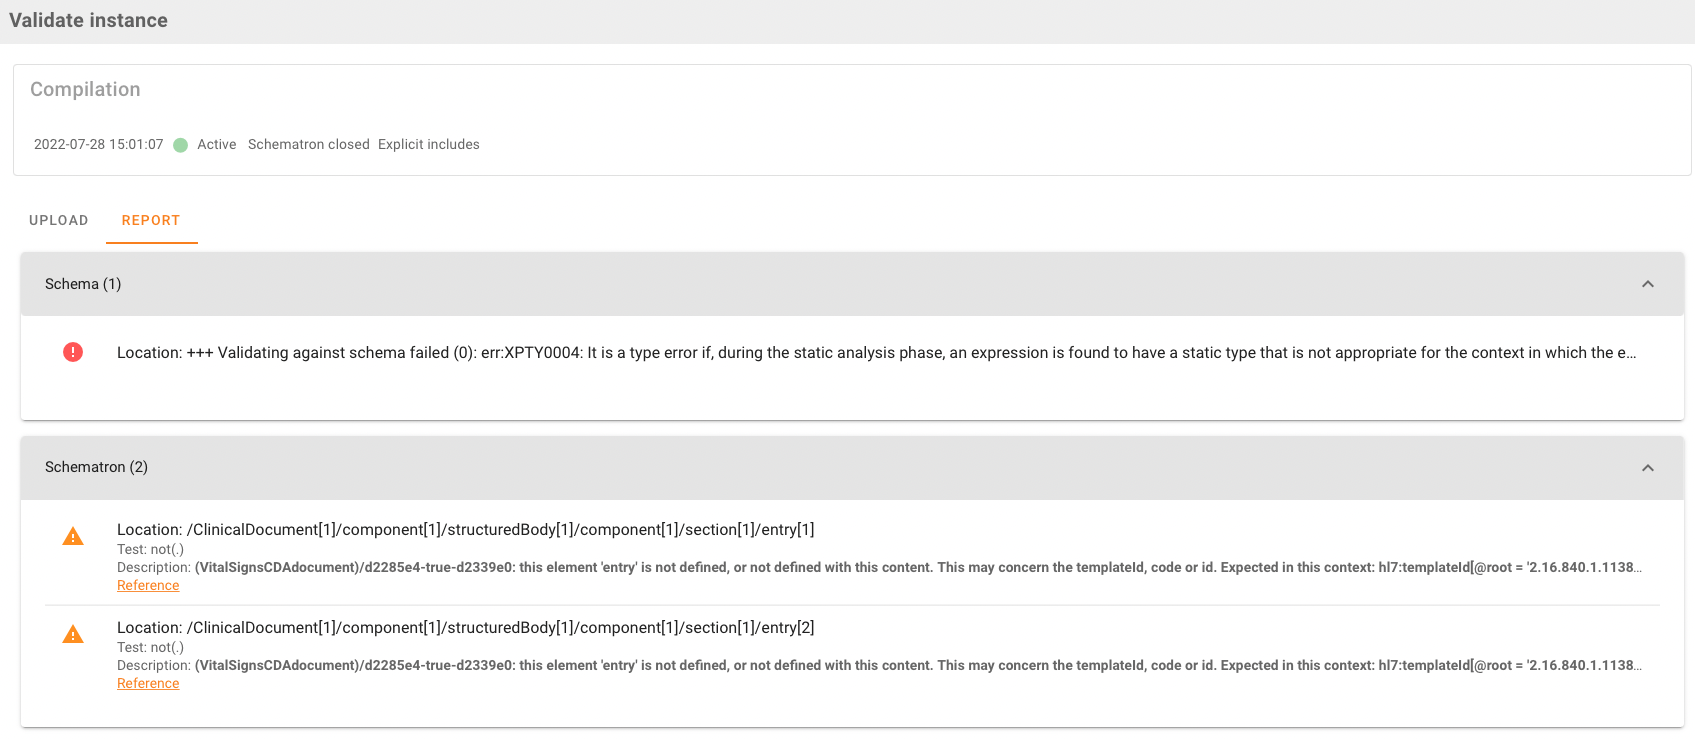
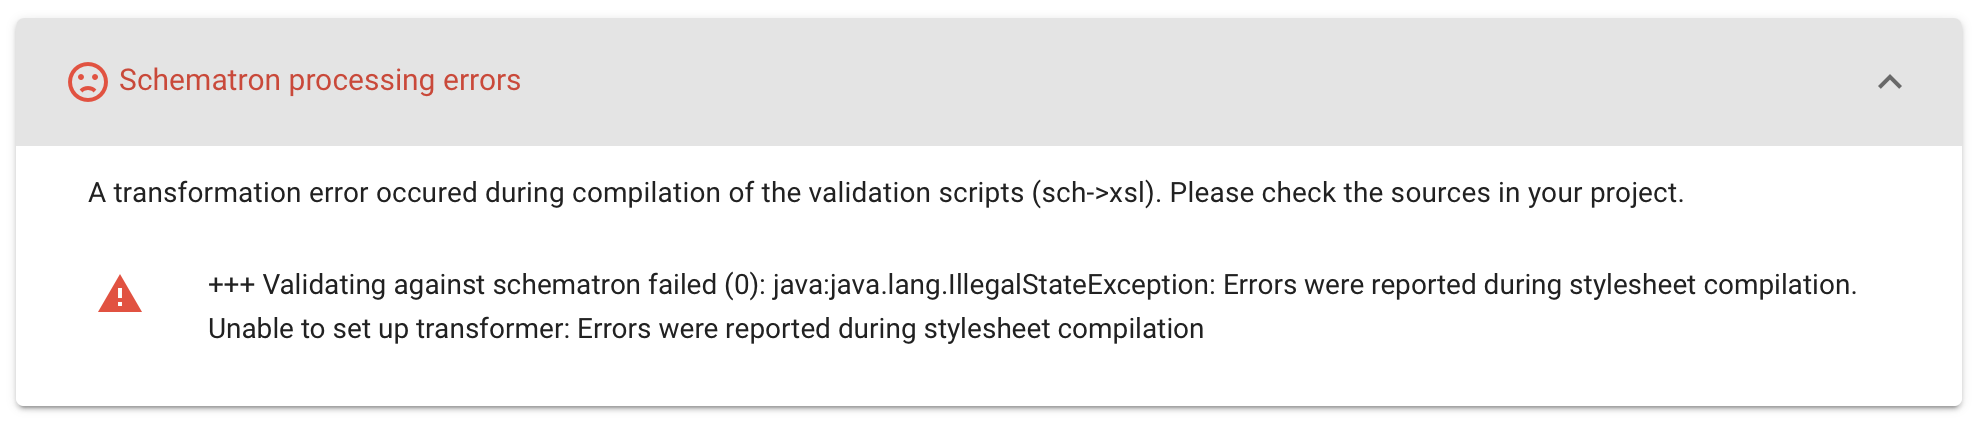
In case the creation or use of the validation scripts (SVRL) fails, an error message is displayed accordingly instead of the schematron validation result.
Artifact Management
Under this tab options are listed to manage ART-DECOR artifacts of the Project, namely Adding Ids to Template element and attribute definition and Artifact Identifier Management.
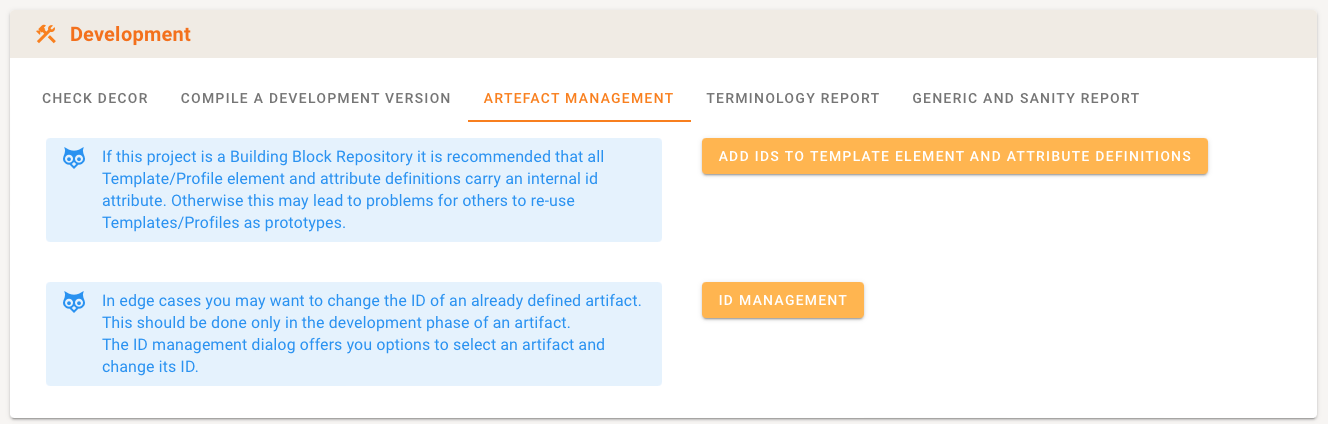
Adding IDs to Template element and attribute definition
If this project is a Building Block Repository it is recommended that all Template/Profile element and attribute definitions carry an internal id attribute. Otherwise this may lead to problems for others to re-use Templates/Profiles as prototypes. Therefore it is possible to add internal id's to all Template elements and attributes in the project. This is rarely done manually as ART-DECOR tries to assign internal id's to all Template elements and attributes when maintaining Templates.
Artifact Identifier Management
In edge cases you may want to change the ID of an existing artifact. This should be done only in the development phase of an artifact. The Artifact Identifier Management dialog offers you options to select an artifact and change its ID.
You first choose the type of artifact you want to change using the popup menu at the button.
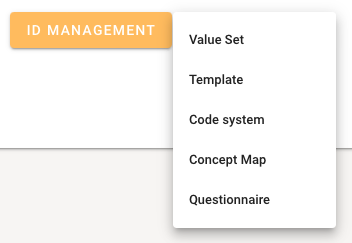
Depending on the chosen type the opening dialog offers all items on a left sided navigation card. When selecting an item, the dialog to the right shows all options for the ID change.
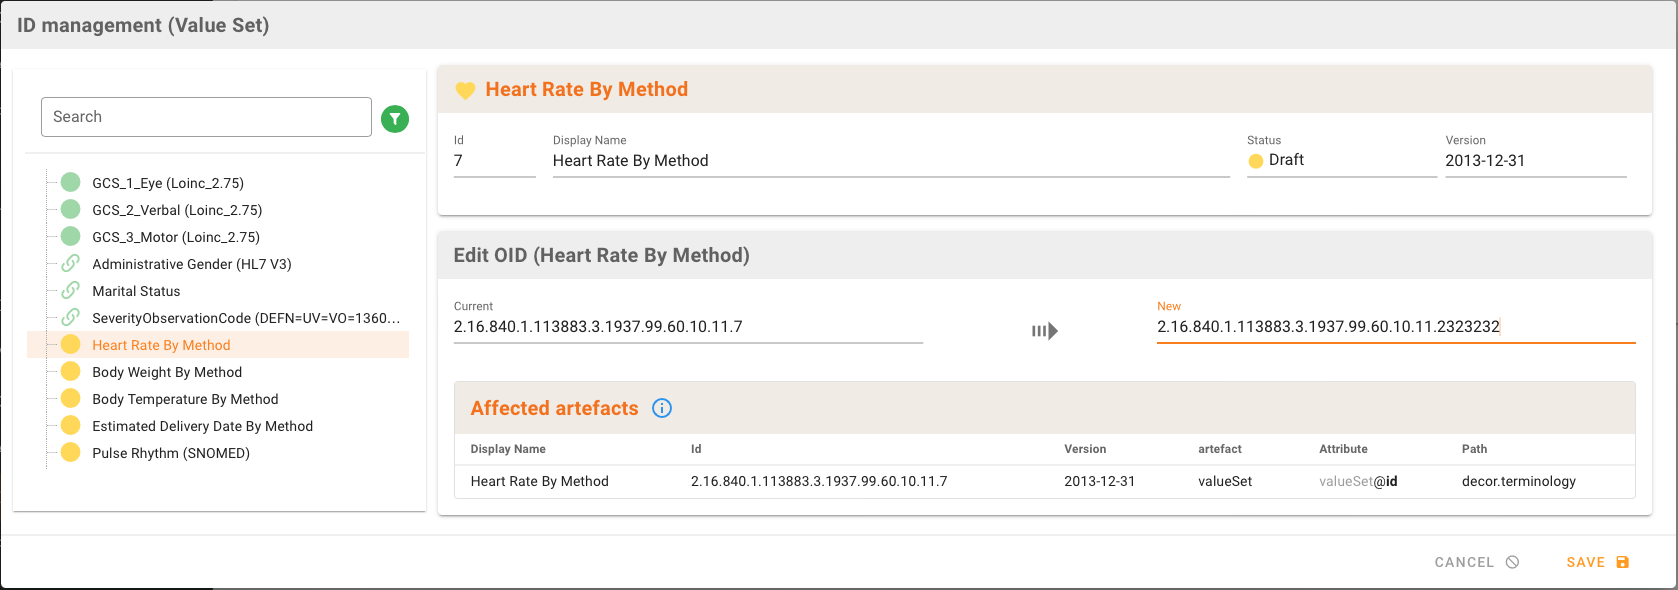
The top card shows some item details, the bottom card allows you to change the ID and lists all affected artifacts with some details. When the ID already exists, the item is shown and saving changes is disabled.

You may add the New ID for the change.
NOTE
OID pattern is [0-2](\.(0|[1-9][0-9]*))*. An OID identifies exactly one object and SHALL NOT be reused. OIDs of three nodes or less are always reserved for a purpose. See https://oid-info.com or the hosting servers' OID index when in doubt.
When the new ID is ok from the admins perspective the save button changes the item's ID.
NOTE
When changing the ID, ART-DECOR does not automagically change all dependencies. Changing IDs is on users own responsibility and possible reference changes that were listed in the affected item list need to be changed manually.
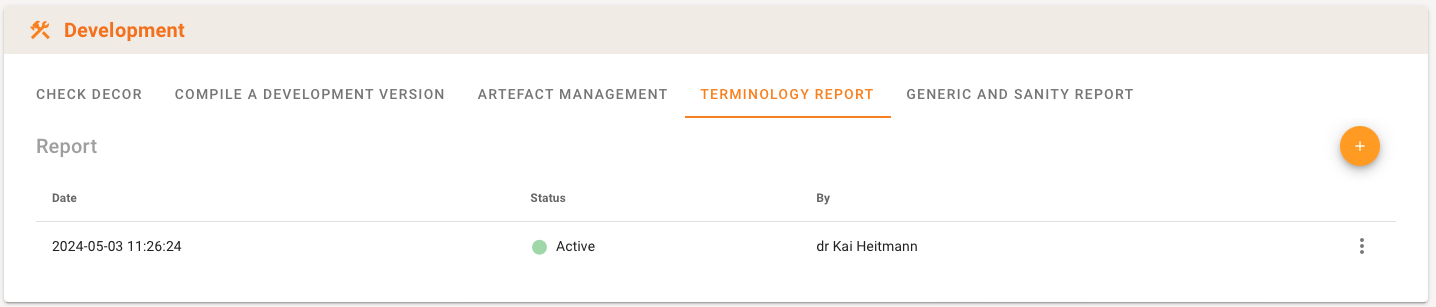
Terminology Reports of the Project
You can trigger and maintain Terminology Reports of the Project.
It is possible to initiate a Terminology Report to check the terminologies used in your project. The report detects whether a coded concept in a value set has an illegal display name or is deprecated and should no longer be used. Usually a Terminology Report check will be performed before creating a publication, as part of preflighting publication and quality checks but could of course be run more often. For projects with large or many value sets this can be a lengthy process.
You can trigger a new Terminology Report by clicking on the add (+) button. The request is added to the process queue and handled in the background. Once finished it appears in the list of Terminology Reports of the Project.
Generic and Integrity Reports of the Project
You can trigger and maintain Generic and Integrity Reports of the Project. While this is still an experimental but continuously maturing area, you can trigger various types of reports. Stay tuned to learn more in the near future.
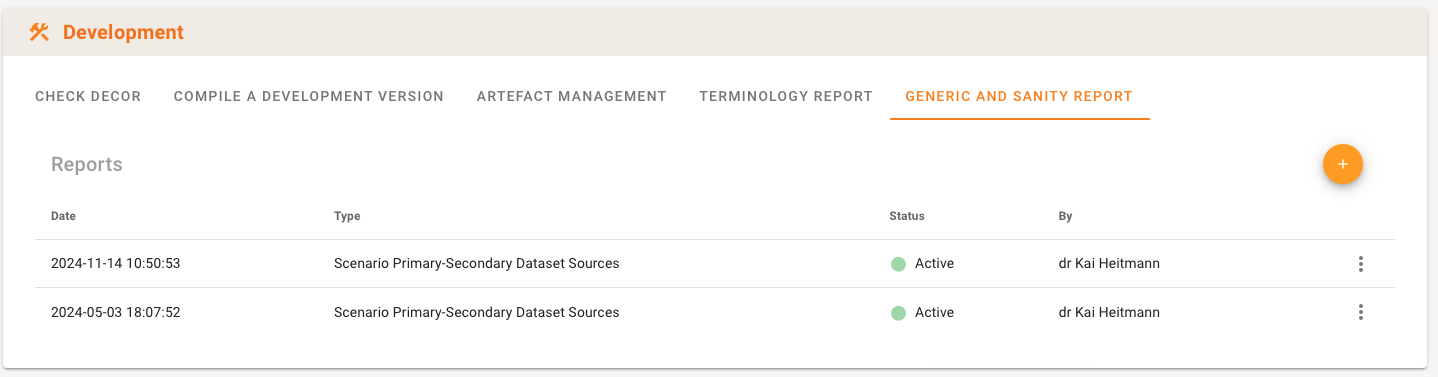
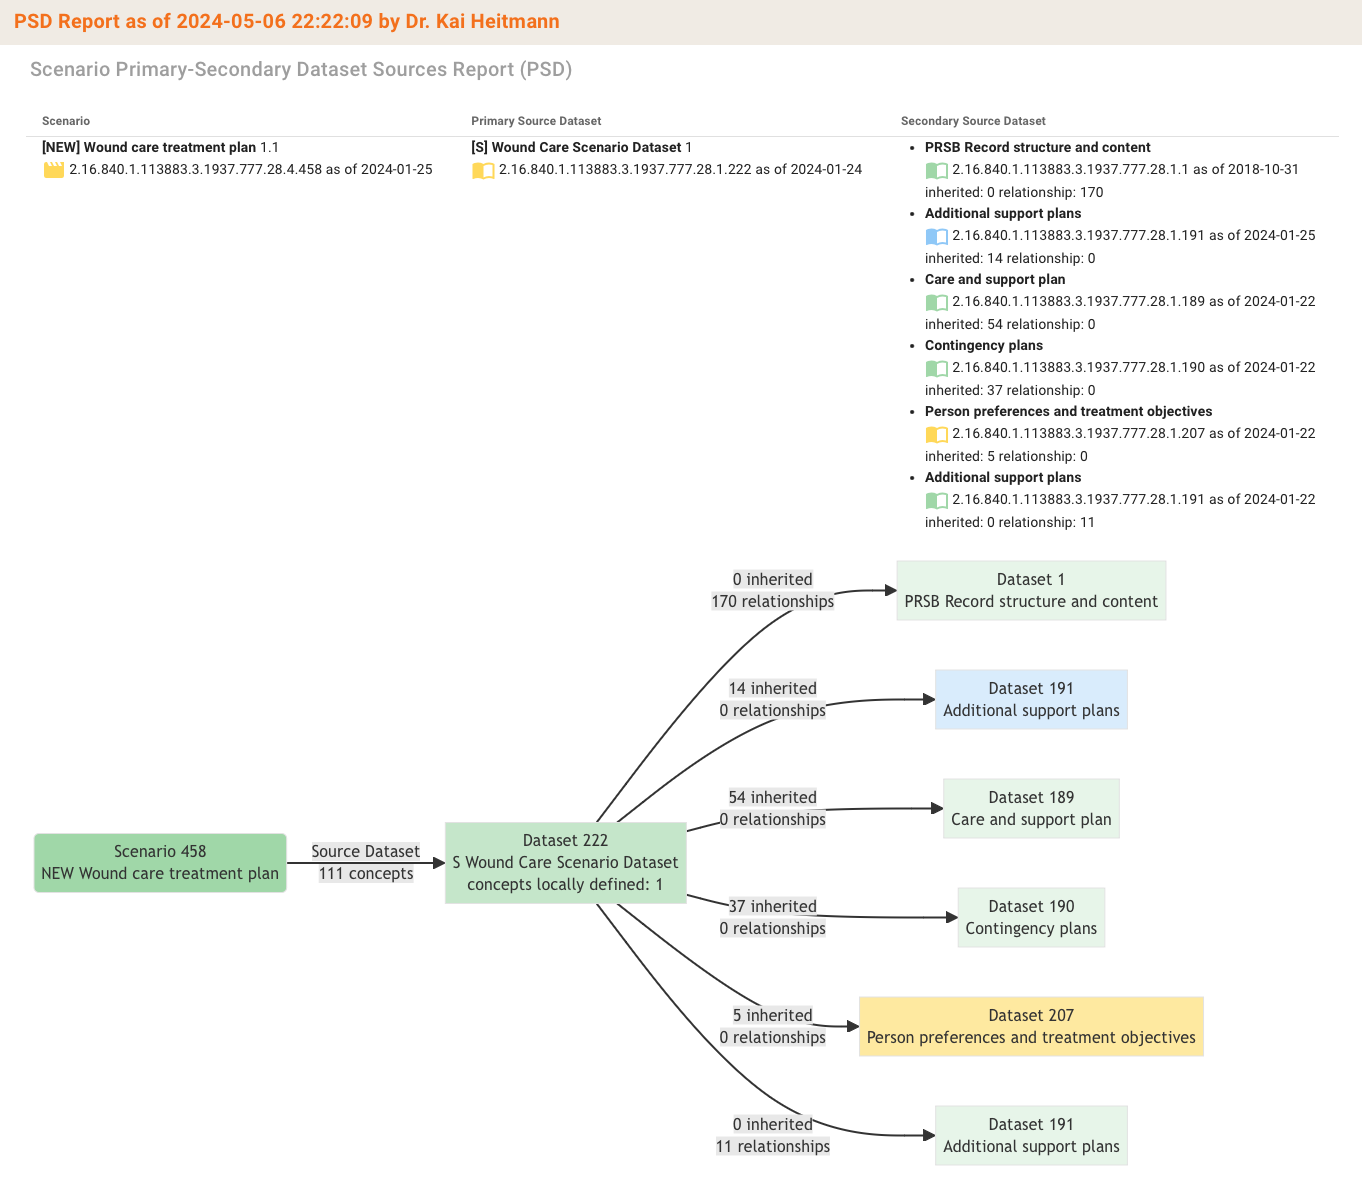
As of now the following report is available:
Scenario Primary-Secondary Dataset Sources (PSD) shows origin of scenario concepts in the inheritance chain through datasets. The following report is a rendition of such a report.
Project Index
The Project Index allows you to inspect summaries of all ART-DECOR artifacts of your Project. Use the artifact tabs to flip between the different kinds of artifacts. Each tab also offers a variety of download options in different formats through the colored pills.
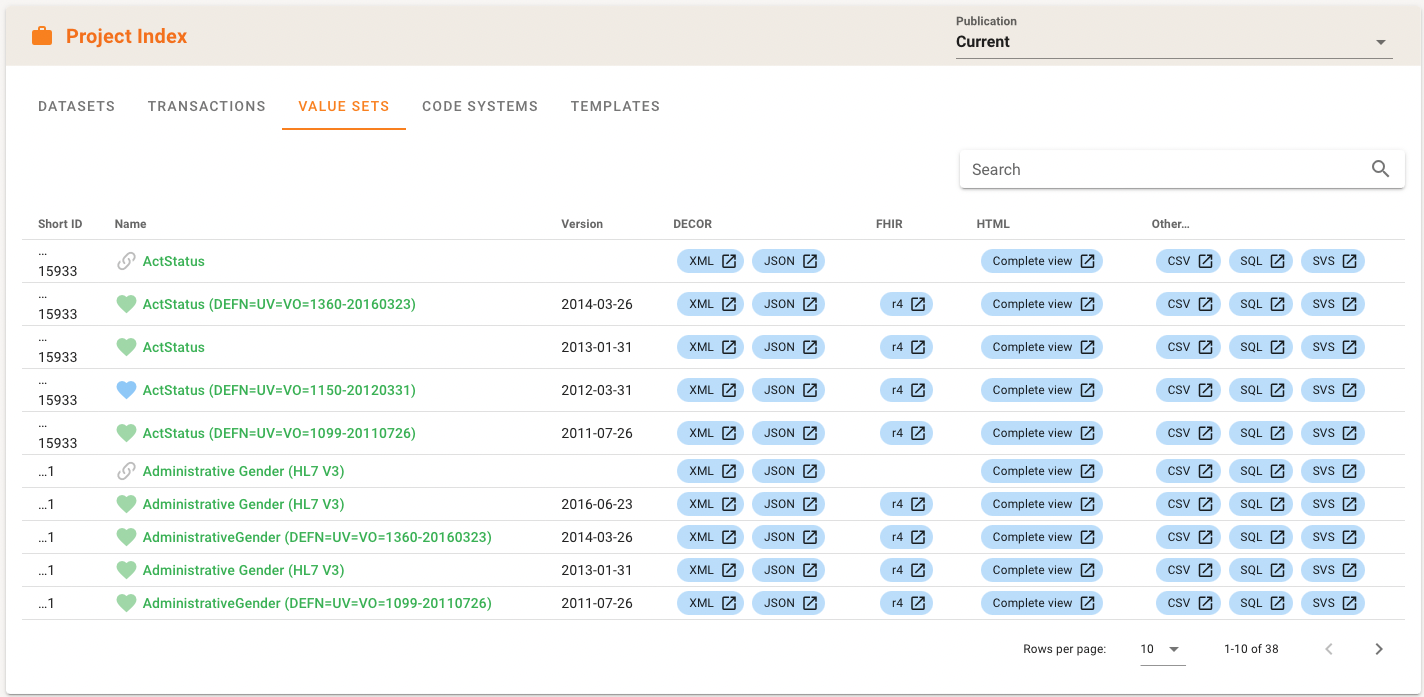
As usual green pills are used for Care provider oriented artifacts, blue pills for Terminologist and red pills for Data Format Specialists and Technicians.
