Introduction
This is a test scenario for ART-DECOR information standards. During the test an ART-DECOR project is recreated, based on the demo5 project from ART-DECOR examples (see see [[1]] or [[2]]).
To execute the scenario, you need at least two user accounts:
A DBA user for creating the project
A Project administrator for populating the project
A general author account
Server preparation
Create a restore instance: ./exist_stop_backup.sh --BackupLabel LABEL
- This way we can edit data in the database, and go back to a restore point before we changed data
Run updates:
backend: make sure the latest API, etc are all installed
frontend: update vue by running on the server/SSH:
echo "update art-decor vue frontend" ; cd /opt/art-decor-vue/; ./vue_pull.sh --localOr see the documentation:
https://docs.art-decor.org/administration/setupmaintain/frontend3/#install-vue-frontend
Enable/disable the right server functions.
https://docs.art-decor.org/administration/frontendfeatures/#disable-frontend-functionality
Steps to perform for this scenario
User create
- Add a project-admin user on the server, so that we can add it to projects later on.
As dba-user: add user testuserprojadmin{date}.
Enter values for all fields.
Groups: ada-user, decor, decor-admin, editor, issues, terminology
Save the user.
- Add a author user on the server, so that we can add it to projects later on.
As dba-user: add user testuserauthor{date}.
Enter values for all fields.
Groups: ada-user, decor, editor, issues, terminology
Save the user.
User edit
Change email for just created author user, save.
Change Organization, and save.
Change Description, and save.
Add a group 'debug', save.
Change password, and save.
Precondition
Server has building block repositories configured. To configure those:
https://acceptance.art-decor.org/ad/#/server-admin/art-settings
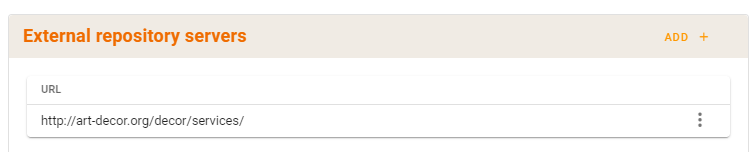
URL: http://art-decor.org/decor/services/
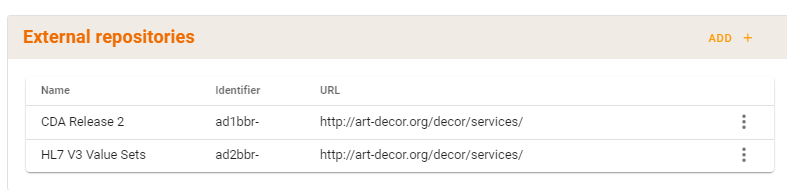
Via the edit-option: select, to select BBR projects: ad1bbr & ad2bbr & ccda
End result:
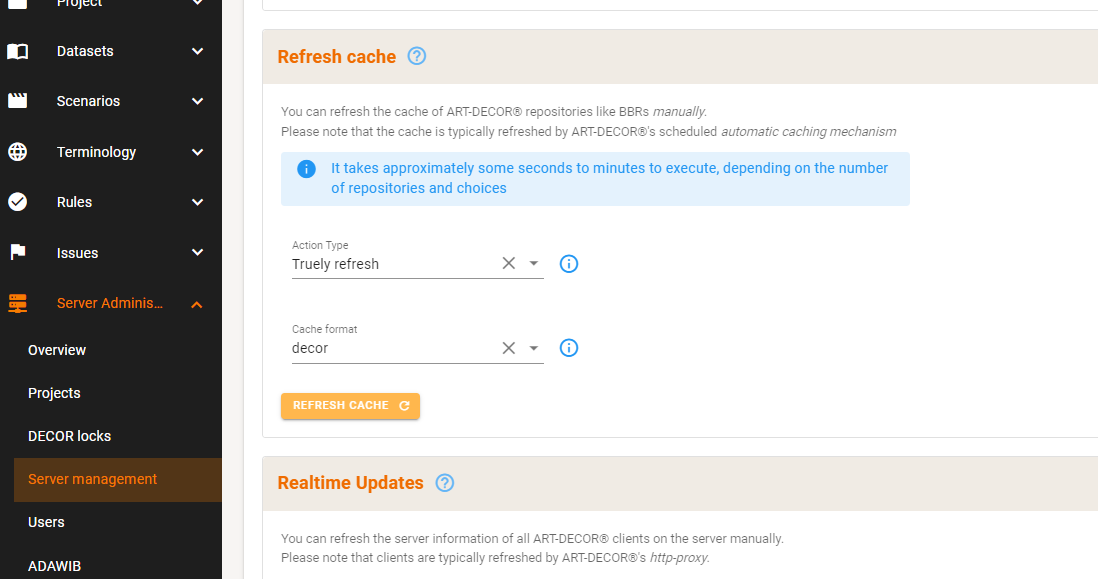
- Refresh cache
- Select option: Truly refresh
https://acceptance.art-decor.org/ad/#/server-admin/server-management
Start with clean setup
Delete the project if it already exists.
This can be done only by having low level access with admin rights to the underlying eXist database: Delete the collection the project's data resides in.
For this test project we want to remove the following collections:
/db/apps/decor/data/projects/test
/db/apps/decor/history/test
/db/apps/decor/releases/test
/db/apps/terminology-data/codesystem-stable-data/projects/test-
Run the following query (for example, in eXide, New XQuery, paste the query, then eval):
xquery version "3.0";
try {
xmldb:remove('/db/apps/decor/data/projects/test'),
xmldb:remove('/db/apps/decor/history/test'),
xmldb:remove('/db/apps/decor/releases/test'),
xmldb:remove('/db/apps/terminology-data/codesystem-stable-data/projects/test-')
}
catch *
{ '' }
Create a project test
Login as the DBA user. See ART_maintenance_manual#Creating_a_project for further instructions.
| Property | Example |
|---|---|
| Name | Test: Vital Signs CDA Document |
| language | en-US |
| OID | 2.16.840.1.113883.3.1937.99.99.906 |
| prefix | test- |
| Experimental | yes |
| Copyright - Contributor | Add your or a random name |
| Description | Test: Vital Signs Report Summary CDA Document |
| Authors | Add the project admin user as author & testuser1 & test user 03 |
After clicking "Create Project" you return on an empty "new project" screen. No indication is given that the project was created successfully.
Edit project settings
Login as project administrator and open the test project you just created.
https://acceptance.art-decor.org/ad/#/test-/project/overview
Overview
- Add or change project description. Add the current date.
Copyright
Add a Contributer by clicking the +.
Enter name and contact information.
Enter the correct Copyright years.
Add a logo from your computer by clicking on add and then browse.
Enter contact information: add an entry, and select the type.
Repositories
- Add building block repositories with prefixes 'ad1bbr-' & 'ad2bbr-' & 'ccda-' by clicking on the + next to 'Repositories'.
Services
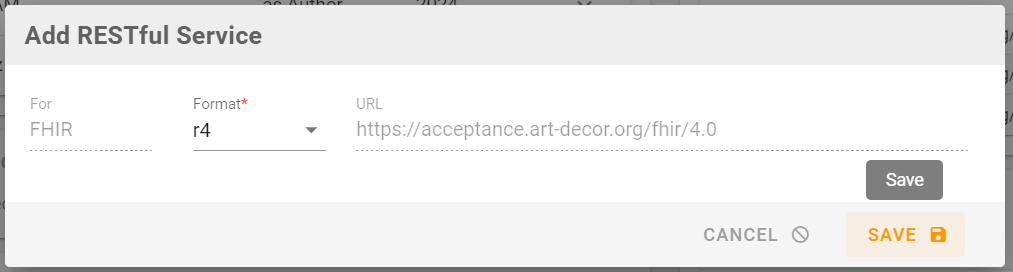
Add a FHIR service: Documentation: https://docs.art-decor.org/documentation/project/#services-card
- Add a FHIR service by clicking Add:
Select Format as r4 and save:
Authors tab
Add an author by clicking on the +. Add the author user we created above to this project.
Edit that author by enabling Subscribe to all issues
Add an author by clicking on the +. Add: testbackendbot2
Search on 'test'. The added testuser should be present in the result.
For testbackendbot2, set the expiration date to yesterday
Select an author to show all information: email, expiration, ..
Switch to demo1 project where this user is not an author. Expected result: 'Only visible for project authors'. Display and editing should not be possible.
Identifiers tab
For more information: Project editor manual.
Base Id's:
Add Base id by clicking on the +.
Fill in the Id (e.g. 2.16.840.1.113883.3.1937.99.99.906.99)
Type: Questionnaire
prefix: test-questionnaire-2-
Default: selected, save.
Set the default back to: test-questionnaire-
Search on 'que'. Expected result: all 3 test-questionnaire* base id's.
Other Id's:
Add an other Id by clicking on the +.
Fill in the Id: 1.2.3
Add designations: Synonym, Language EN and Display name: syn1
Synonym, Language EN and Display name: syn2
FSN, Language EN and Display name: FSN1
FSN, Language EN and Display name: FSN2 -> should not be allowed
Preferred, Language EN and Display name: preferred1
Preferred, Language EN and Display name: preferred2 -> should not be allowed
Abbreviation, Language EN and Display name: abbrev1
Abbreviation, Language EN and Display name: abbrev2
Patient-friendly, Language EN and Display name: patfriendly1
Patient-friendly, Language EN and Display name: patfriendly2
FSN, Language NL and Display name: FSN1_NL
Add a FHIR System URI: http://art-decor.cloud/test. Preferred: selected
Add another FHIR System URI:-> should not be allowed
Delete Patient-friendly designation, Save.
Search on 'FSN'. Expected result: all other id with FSN as display name.
Switch to project where this user is not an author, edit an base id, and edit an other id should not be possible. Showing all data is Ok.
Governance Groups tab
For more information: Dealing with governance groups.
- Make the project member of a governance group (e.g. ART-DECOR testing) by clicking on the + to the left of the governance group name.
Datasets
Login as project author. For this section, click on the Datasets menu (in the top menu bar).
Basic dataset changes
Use the "Datasets" tab. Make some basic changes to the test dataset:
Add a version label.
Fill in a dataset description
Name the dataset: Test dataset
Change dateset description. Add the current date for all project languages.
Add a new dataset: Test dataset 2
Fill in a dataset description: current date
Clone the first dataset. Leave all options as default.
Edit dataset description: add another current date
Change dateset description. Add the current date for all project languages.
Change the dataset name. Add the current date behind the name.
Add concepts
For more information check the Dataset editor manual.
Use the dataset editor to edit the first dataset. Recreate the concept "Person" (and underlying concepts) from the demo5 project dataset, see [[3]].
Add the Person concept by clicking on the +
Enter Description, Synonym, Source, Rationale, Operationalization, Comment.
For each concept:
Select the right kind of type (group or item)
Add a name for the concept.
At 'Value' select the type
Metadata for the first item concept.
For all metadata (Synonyms, Operationalization, ..) enter bogus values.
Save.
For the last concept: Change last concept description. Add the current date for all project languages.
For the last concept: Add two comments in the same language.
Checks:
- Check the FHIR output: On the dataset, AID, open FHIR 4.0 XML. Check that last concept has two comments.
Import LOINC panel
While in datasets: Import a LOINC panel (/ item bank)
Make sure the user has selected the details of a dataset, dataset concept Person is selected
Menu: Import LOINC panel
Search for code: 62337-1
Select: PROMIS item bank - 29 profile
Following Person
Save
While in datasets: Import a LOINC panel (/ item bank)
Make sure the user has selected the details of a dataset, dataset concept Person is selected
Menu: Import LOINC panel
Search for code: 76805-1
Select: PROMIS short form - physical function 8b ...
Following Person
Save
Check the preview screen to that: Expected outcome: The second import will create inherited concept from the first item bank.
Checks:
check that both LOINC panels are present as sets of concepts in the dataset
later we run a decor check to check for project health.
Inheritance
Insert new group after:
Name: patient
Filter on project: zib2020bbr-
Top concept: Patient (path is empty), As inherit.Expected: groups shown as open folder icon, items shown as chain icon.
Change status: Under pre-publication review.
Change status: Draft.
Expected: groups shown as open folder icon, items shown as chain icon.
Reference / contains
Insert new group after:
Name: healthprofessional
Filter on project: zib2020bbr-
Concept: healthprofessional (path is empty), As reference.Expected: group shown as arrow icon, no subconcepts.
Change status: Under pre-publication review.
Change status: Draft.
Expected: group shown as arrow icon, no subconcepts.
De-contain / De-inherit
De-inherit: patient.
Expected: group shown as not inherited. Subitems shown as inherited concepts.
De-contain: healthprofessional.
Expected: group icon and children concepts icon change to open folder icon (shown as inherited)
De-inherit: healthprofessional.
Expected: group shown as not inherited (closed icon). Children concepts shown as inherited concepts.
Change healthprofessional concept description. Add the current date for all project languages.
Go to HealthProfessional / HealthProfessionalRole. Click on valueset under Value Set Association. Check that this valueset is opened and codes are displayed.
Scenarios
For this section, click on the Scenarios menu (in the top menu bar).
Add actors
Use the Actors tab.
Add two actors by clicking on the +
Person: actor1/actor1
Organization: organization1/organization1
Change type for organization to type device.
Change actor1 description. Add the current date for all project languages.
Scenarios tab
Use the Scenarios tab.
Add a scenario by clicking the + next to Scenarios.
Fill in a name and description for the new scenario.
Next.
Fill in a name for the new transaction group: group1
Fill in a type and name for the new transaction leaf: leaf1 (type = initial). Select the 2 actors.
Fill in a type and name for the new transaction leaf: leaf2 (type = back). Select the 2 actors.
Save.
Change scenario & group & transaction leaf description. Add the current date for all project languages.
Change the second transaction:
Change the type to: Stationary.
Remove the actor receiver.
For leaf1 transaction:
Source-dataset: edit and select our 1st dataset.
Add Concepts to the created transaction. Add all concepts (0..1 R) we created in our dataset. Click save and then close the window to go back to the transaction.
edit the transaction. Change cardinality and conformance for last concept. Save.
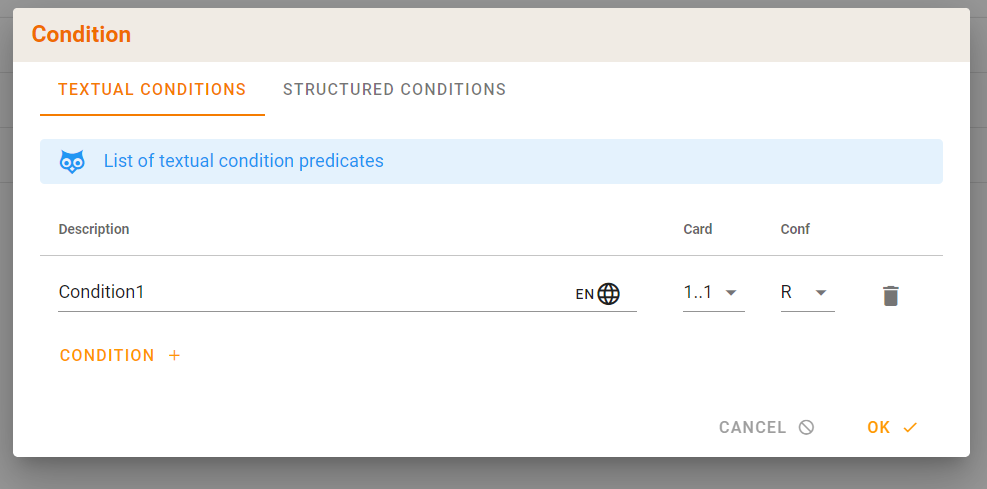
edit the transaction. Select first concept. Change conformance to C. Add textual condition: description: condition1, 0..1, R. Ok. Save.
edit the transaction. Select next concept. Change conformance to C. Add structured condition:
question: select concept Gender
operator: exists;
answertype: answerBoolean
value: true
Also add a textual condition, same as before
save
Add a transaction leaf Label: value: schematronlabel1
- This prevents an error later: Transaction with a representing template SHALL have a schematron label.
Checks:
Check the FHIR output:
- Open leaf 1 transaction, click AID, FHIR 4.0 XML. Check if the constraint is present with:
<human value="Gender exists true"/>
- Open leaf 1 transaction, click AID, FHIR 4.0 XML. Check if the constraint is present with:
Value Sets (in Terminology)
Terminology menu (in the top menu bar) and choose Value Sets.
For more information: Value Set Editor manual
Create a new valueset.
Click on the add/+ above the tree view on the left-hand side. This opens the browser.
Search for term asthma. Select 195967001 / asthma from SNOMED. Include: extensional
Search for term acute. Select LA18821-1 / acute from LOINC. Include: extensional
Select SNOMED. Search for term eiwit. Select 256443002. Include: intensional, code and all children
Select SNOMED. Search for term eiwitarm. Select 160673009. Include: intensional, all children only
Select SNOMED. Search for term voorlichten. Select 54070000 / postpartum voorlichten. Exclude: extensional
Select SNOMED. Search for term cong ana. Select 63565007
Congenital anemia (disorder). Exclude: intensional, code and all children
Select SNOMED. Search for code 419891008. Select Record artifact (record artifact). Exclude: intensional, all children only
Select LOINC. Search for code LA24830-4. Select Ortho. Include: extensional
Add value set
Enter display name for value set: valuesettest
Save
Expand the valueset just created. Save the expansion. Check that the saved expansion is listed under Usage.
Expected number of codes: 6.
256443002 has one child code: 2 codes
160673009 has one child code: children only 1 code.For the valueset: Fill in Version label
Add the valueset/description.
Change valueset/description. Add the current date for all project languages.
Add valueset
Add value, scroll below to composition.
Add manual concept by clicking on the Add.
Concept: Fill in (Add another item in between codes)
Level Type (L, A, S, D) code (required) Display name Ordinal CS 0 L 243324 test-1 0 2.3.66.5 0 L 243325 test-2 1 2.3.66.5 0 A 243326 test-3 2.3.66.5 1 L 243327 test-4 3 2.3.66.5 1 A 243328 test-5 2.3.66.5 2 S 243329 test-6 2.3.66.5 3 L 243330 test-7 3 2.3.66.5
Save the value set: levels
Clone a valueset. Clone the just created valueset. Keep Id's = true. Expected: this should create a new version of the existing valueset (with datetime set to today)
Clone a valueset. Clone the just created valueset. Keep Id's = false. Expected: this should create a new valueset in the valueset tree, with the same name.
Create a reference
Precondition: repository reference to a bbr project is already present
Click on 'New reference' / "chain" icon above the tree view on the left-hand side
Search for a valueset, and select it to save it to this project
Search for 'patch'
Select 2.16.840.1.113883.1.11.14499 / PatchDrugForm (from bbr project ad2bbr).
Clone the referenced VS PatchDrugForm, Keep ids = true.
Clone the referenced VS PatchDrugForm, Keep ids = false. Expected: this should create a new valueset in the valueset tree, with the same name.
Create a reference to valueset 'Administrative Gender' from project ccda-
New reference
search: 'administrative'
Select: 2.16.840.1.113883.1.11.1 Administrative Gender (HL7 V3)
Reference to VSs from the current project is not a desired option. No tests.
Terminology associations
Create a terminology association between data concept, Person / Name and SNOMED concept
On terminology / associations
Select dataset, Person / Name
Concept Associations: Search. Terminology browser should open.
Search: 'name'. Select 703503000 / Name from SNOMED.
Save.
Create a terminology association between data concept, Gender, and referenced valueset Administrative Gender (HL7 V3)
On terminology / associations
Select dataset, Person/Gender
Add Value Set Associations: Administrative Gender (HL7 V3), as dynamic.
Create a Identifier association between data concept, National Patient Identifier, and id 1.2.3
On terminology / associations
Select dataset, Person / National Patient Identifier
Identifier Associations: Create association, OID registries = true. Search for 'identi'. Select 2.16.840.1.113883.3.2562 / PIP. No tests yet defined for this section.: maybe find a better usecase here. Documentation is missing:
https://docs.art-decor.org/documentation/terminology/#terminology-associations-panel
Check in the dataset
Check: Go to dataset, Person / Name. Under terminology association should show the SNOMED code.
Check: Go to dataset, Person / Gender. Under value set association should show codes from the valueset: Female, ..
Check: Go to dataset, Person / National Patient Identifier. Should show: Identifier associations with PIP.
Templates
For this section, click on the Templates menu (in the top menu bar) and choose the Templates menu entry.
For more information: https://docs.art-decor.org/documentation/template/
Create template from scratch. New.
- Create a couple elements and attributes. Save.
Create a template. Click 'New from prototype' next to tree view. A new window opens.
Search 'CDA Act'
Filter on project: ad1bbr-
Select: 2.16.840.1.113883.10.12.301 / CDA Act
Edit template
Set hl7-subject: Conf to NP. Save the template
Re-edit the template
classCode, actions: unselect.
hl7:id, actions: unselect.
Save the template
Re-edit the template. Check that both are shown as greyed out: classCode and hl7:id.
Change template description. Add the current date and two-letter language for all project languages.
Scenarios: relate the selected template to our created transaction.
In templates, 'add new from prototype', from ccda, for the following templates, in this order: Patient Referral Act (type = CDA Entry Level Template)
US Realm Header for Patient Generated Document (V2) (type = CDA Document Level Template)
Author Participation (type = Template type not specified
Provenance - Assembler Participation (type = CDA Header Level Template)
Advance Directives Section (type = CDA Section Level Template)Expected outcome:
Template types in the tree are always sorted as (top to bottom):
CDA Document Level Template
CDA Header Level Template
CDA Section Level Template
CDA Entry Level Template
HL7 V2/V3 Datatype Level Template
Template type not specified
Issues
For this section, click on the Issues menu (in the top menu bar).
For more information: https://docs.art-decor.org/documentation/issue/
On: https://acceptance.art-decor.org/ad/#/test-/issues/issues
Issue-labels
Create three issue-labels in at least two languages, save
Search for the issue-label
Edit the last issue-label. Change label description. Add the current date and two-letter language for all project languages.
Delete the first issue-label
Add an issue by clicking on the right: New issue
Select the correct type (incident, change request, for future consideration, request for information/education): Incident
Fill in a title: testissue1
Select the desired priority (Lowest, Low, Normal, High, Highest): low
Fill in description: description1
Assign issue to an author: demo-project-admin
Save
Link to a dataset: Concerns: Our dataset.
Link to a dataset concept: Concerns: National patient identifier.
Link the issue to two labels. Remove a related label from the issue.
Concerns: Click National patient identifier, Go to. Check that in the dataset, this concept has Issues (1) shown.
Questionnaire
Form: Rules/Questionnaire: transform from transaction leaf1
Display the just transformed Questionnaire: Render
For item 1, select an answer from the dropdown, Save
Change Questionnaire description. Add the current date and two-letter language for all project languages.
Find the Questionnaire in the project index
- Download FHIR 4.0 XML. Check if the constraint is present, expected an enableWhen statement with the OID of the concept Gender:
<enableWhen question="2.16.840.1.113883.3.1937.99.99.906.2.1.8" operator="exists"><answerBoolean value="true"/></enableWhen>
- Download FHIR 4.0 XML. Check if the constraint is present, expected an enableWhen statement with the OID of the concept Gender:
Code system
Create code system
Create code system from scratch
Name/display/description: Organisation
Codes: 1, 2, 3
Add a designation, fully specified name on 1: code-1
Save.
Change code system description. Add the current date and two-letter language for all project languages.
Clone just created CS. Keep ids = true. This will create a version of the CS.
Edit the oldest version of just cloned CS.
In the old version, move code 1 below code 2.
Save. The newest CS should have the original order: 1, 2, 3.
Create code system reference
Search for: 'cod'. Select: CodingRationale / 2.16.840.1.113883.5.1074
No tests yet defined for this section: Which bbr is this CS coming from?
No tests yet defined for this section: Find a better example from ad1/ad2bbr.
Complete code system
In terminology/valuesets. Create new VS. Down below: composition, Add.
Complete code system.
Select code system for context: Just created CS above, static.
Add, Add value set: includeCS
Expand: Should show the codes from CS.
Concept map
Create concept map 1
Source value set (dynamic): levels, target value set: valuesettest. Add and open.
Edit. Associate first codes, equivalent. Save.
Edit. Associate second codes, wider. Save.
Edit. Associate third code, unmatched. Save.
Add concept map description. Add the current date and two-letter language for all project languages.
FHIR profile
(not included in 3.8.3 release, so for a later release) Options:
New
New from prototype
New reference
Clone
Associate to transaction
Associate to Questionnaire?
Publication
Log in as demo-project-admin
Check-decor on
https://acceptance.art-decor.org/ad/#/test-/project/developmentEnable all options
No tests yet defined for this section: CDA Act shows a error, Maybe use another template.
Terminology-report on
https://acceptance.art-decor.org/ad/#/test-/project/developmentIn overview, set the publication location to: https://acceptance.art-decor.org/pub/
Create a new version
- Intermediate version
Create a release: Development
- Find the development release at:
https://acceptance.art-decor.org/decor/services/RetrieveProject?prefix=test-&version=development&format=html&language=en-US&ui=en-US&mode=verbatim&download=false&force=false
- Find the development release at:
Issues:
Add a new event for the issue we created
Change status from open to closed for the issue. (Now it should show up in the next publication suggested release notes).
Create a new publication
Release without publication request without parameters and no filters
Release notes: Automatic Release Notes suggestions based on a previous release, from the development release
Release label: Release with publication request without parameters and no filters
Release with publication request without parameters and no filters
Release with publication request
with all parameters active
Add filters
Either wait for the hourly ADRAM cronjob, or via SSH run ADRAM manually to handle the publication requests:
/opt/art-decor-release-and-archive-manager/release-and-archive-manager.sh
Go to project index, select a couple releases
- test that (for some views/XML/JSON) you get output
Versioning
Dataset Versioning
Change the dataset
name to: Test dataset version
status to: final (green bullet, top right)
status to: Deprecated (Blue bullet, top right)