Template
Tree View on Templates
All templates of a Project are shown as usual in a Navigation Card to the left of the Templates Panel. All Templates are arranged by their type, such as CDA Document Level Type, CDA Header Level type etc.
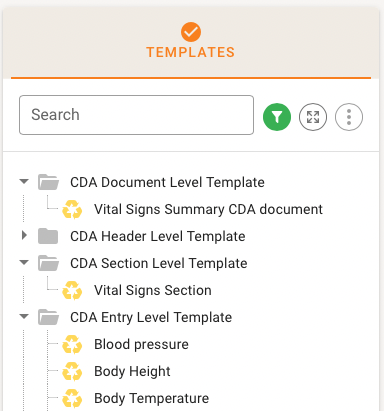
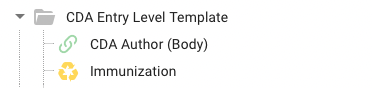
Template Reference, i. e. definitions drawn from another Building Block Repository for re-use, are denoted appropriately with a link symbol.
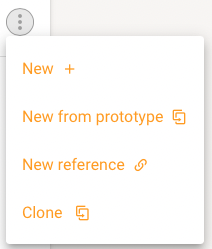
The Tree can be filtered, completely expanded or collapsed and the menu item offers to create a new Template (using Prototypes or from scratch), to establish a new Reference to a foreign Template, or to clone an existing Template in the Project.
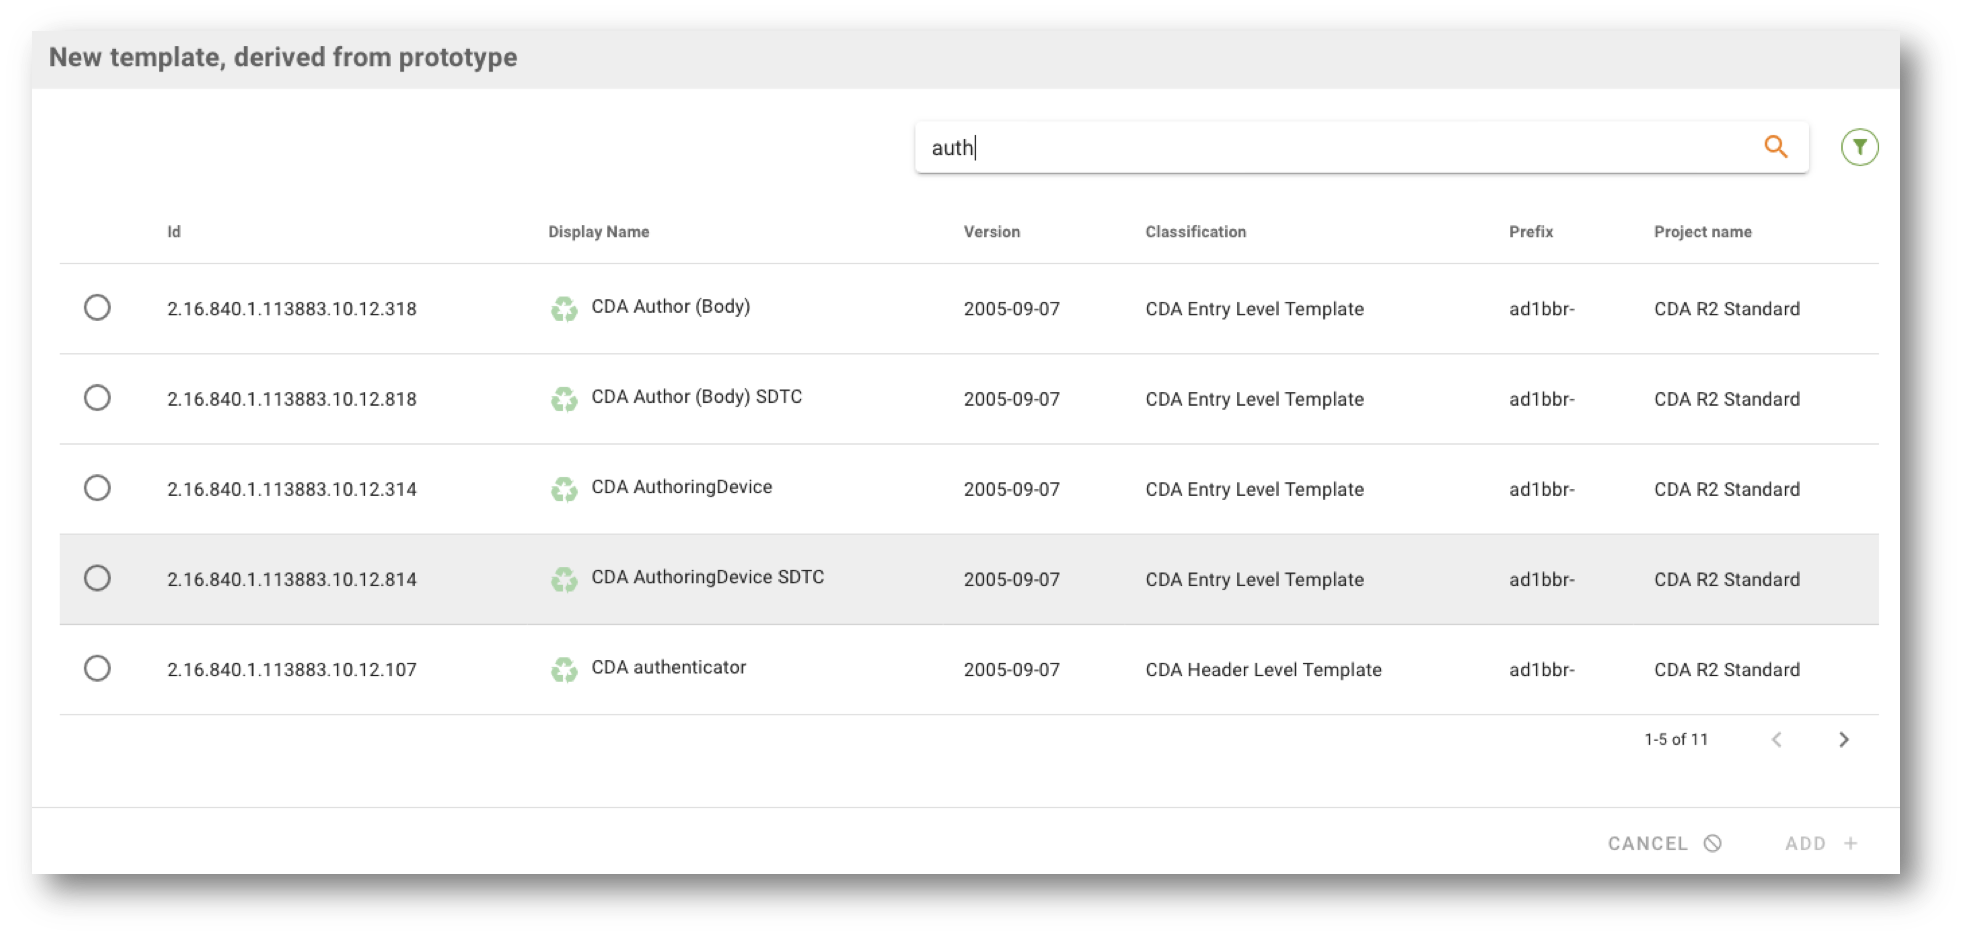
When adding a Template based on a Prototype, a search dialog offers all reachable Template Definitions to be used as the starting Protype for the new Template Design.
Template Metadata
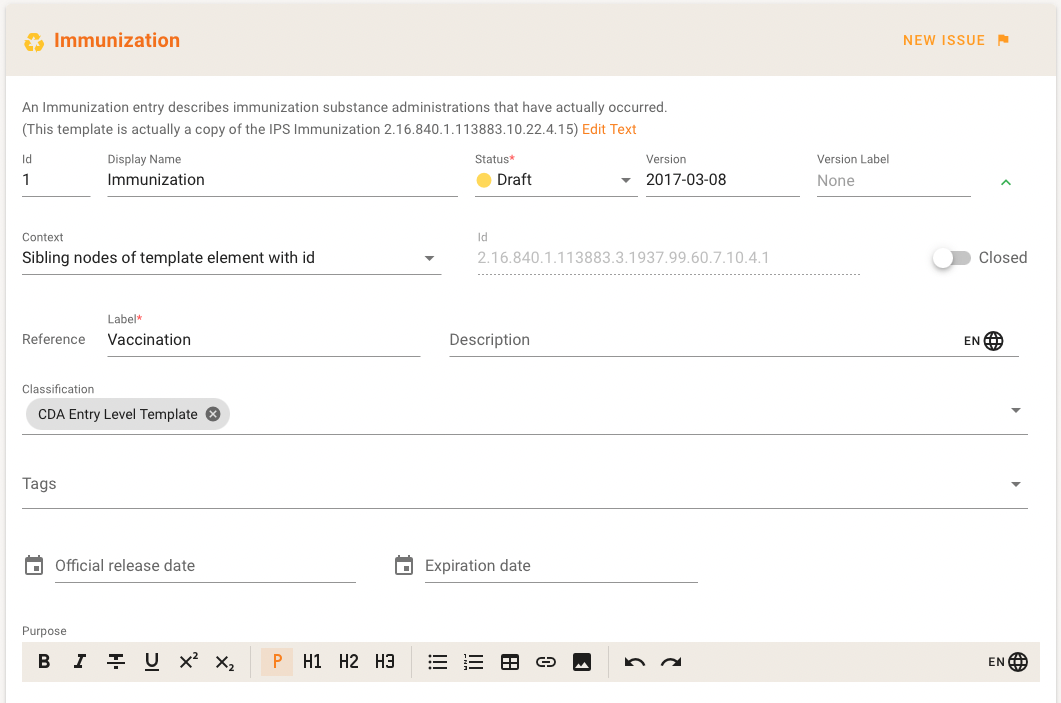
Template Metadata appears on the right detail area of the Template Panel. Next to the description, the usual version data is shown such as id, display name, status, version and label. Context of the id is shown and any Top Level Reference Label that is used throughout the design. A classification is displayed, and the new Tag features allows Template Designers to classify their Template with tags.
Most of these items are directly editable (microscervices).
NOTE
The optional context of a template describes where in an XML instance the template rules are considered to apply to. From a practical viewpoint templates may have no explicit context. In this case, the template is not “exposed” for external use, but rather used for internal inclusion in other templates and thus gets it’s context from the location where it is included/contained.
If the template is intended to be published for external purposes (for containment in other template designs) and for example be triggered by a template id in an instance, it shall have a context.
Typically, there are three types of context specifications.
**Parent node context ** (Parent nodes of template element with ID x)
The template rules apply to the parent node and all descendent nodes in the instance. This means that the context for validation is: all sibling nodes of any templateId element in an instance where the @root is populated with the same id as the template id including the parent node tag name.
A typical example is a CDA entry level template observation. The definition in the template design includes the name of a root element “observation” and child nodes like @classCode, id, code etc. The root element is parent to templateId, all other nodes are siblings to templateId.
The “scope” of the template, i.e. where the constraint rules are applied to, covers the root element and all siblings to the templateId in the instance.
**Sibling node context ** (Sibling nodes of template element with ID x)
The template rules apply to all sibling elements and descendent nodes in the instance. This means that the context for validation is: all sibling nodes of any templateId element in an instance where the @root is populated with the same id as the template id. This excludes the parent node tag name.
As an example you may think of a template that lists all attributes and elements of an organization, i.e. @classCode, @moodCode, id, name, telecom and addr.
By not specifying a root element this list of constraints can be used in the CDA author template as content of the representingOrganization, but also in the CDA custodian as content for representedCustodianOrganization (re-usability aspect). The template with the list above is defined in sibling context, i.e. it does not have a root element.
Alternatively, you would have to define one template with representingOrganization and one for representedCustodianOrganization while the content is likely to be exactly the same.
Pathname specified context
A pathname (making use of XPath expressions) is specified, which allows to activate templates in an instance without the need to have template id elements in an instance.
A pathname context is often defined for CDA document level templates (i.e. pathname specified context is "/") or non HL7 Version 3 XML-based specifications (SOAP, ebXML etc.).
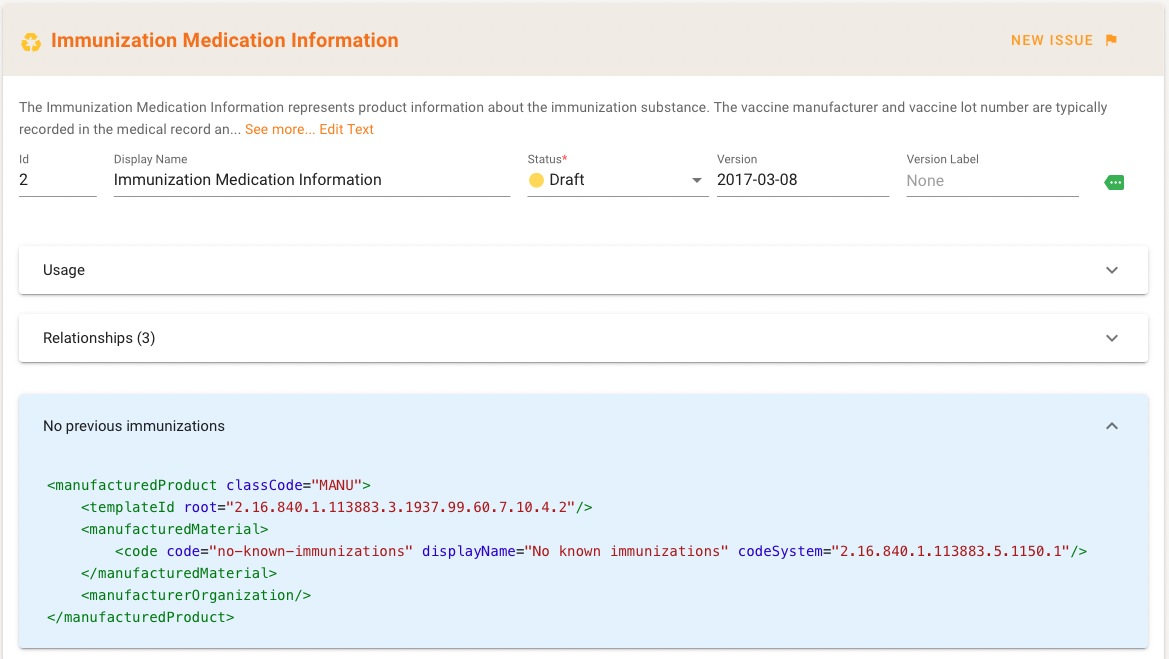
Also Usage, Relationships and Examples are shown here.
Template Relationships
Based on the design techniques used to define templates, several types of relationships exist between different templates and between design versions of a single template.
Version
A “version” relationship may be automatically derived (in a proper registry) or explicitly set to express the relationship to other (older or newer) versions of a template design. Versions typically have the same id but different effective dates.
Distinct versions of a template can be “active” or “draft” or “review” at the same time, e.g. version 2014-02-03 of Template X is “active” while another version 2014-05-07 of that template is still in “draft”.
Adaptation (based on)
Copying a template design from another governance group (i.e. design copy/clone) and change it, i.e. change both id and design is called adaptation. The adapted template is “based on” the original template which means it can be an extension or a specialization (restriction) of the original template design.
This implies always the creation of a new: the adapted template gets a new id and a new effective date.
Specializations / Generalizations (specializes, generalizes)
A specialized template is a narrower, more explicit, more constrained template based on a “parent” template. A generalized template is a broader, less restricted template.
Examples: A “Body Weight Observation” is a specialization of a “Simple Observation”. A “Substance Administration Act” generalizes a “Prescription Act”.
Design Copy (copies)
This is used to express that a copy of a template design from another governance group has been made without change, except the id.
A design copy implies the creation of a new template. The new template gets a new id, and all other properties including the effective date are copied from the previous template.
Foreign governance groups typically do this for later adaptation.
Equivalency (equals)
“Equivalency” indicates that two templates have the same purpose and the same design; however, their governance and/or metadata and/or details of their design may be different. They are meant to be semantically equivalent because a transformation exists without addition or loss of meaning.
Examples: use of different vocabulary (LOINC vs SNOMED), slightly different XML representation of CDA entries vs. Clinical Statements in Patient Care Messages.
Replacement (replaces)
A replacement is used when a new version of a template replaces older ones. With a replacement, the status of the older one typically gets retired (or inactive). This is inherent to versioning and could also indicate a new design replacing an old design (with a new id).
Editing Template Examples
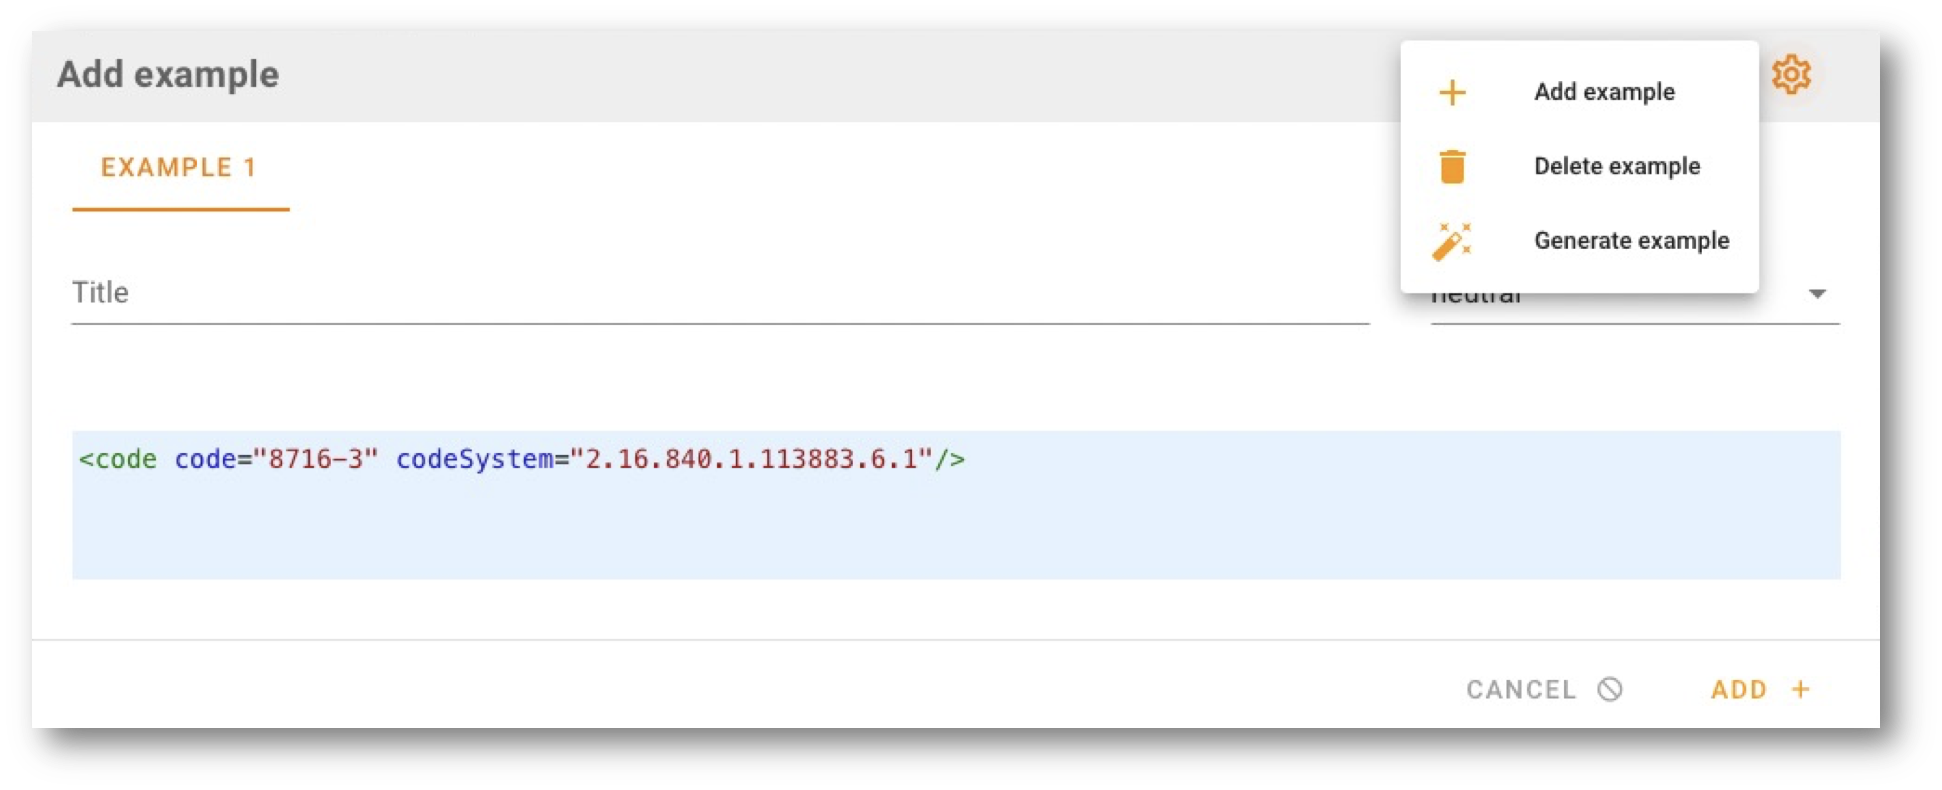
The Example editor allows adding and editing examples. Each example may have a title, type and XML body.
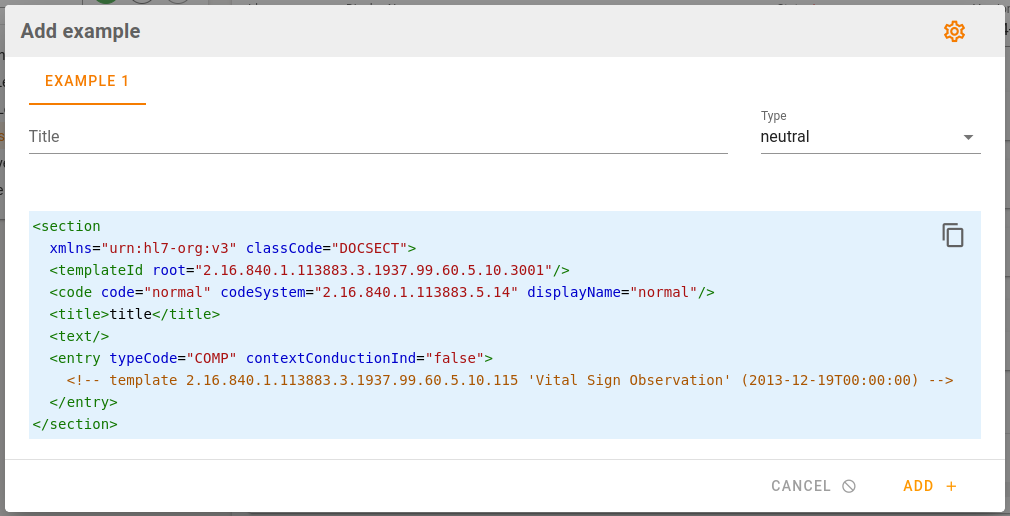
The cogwheel in the upper right corner 1 gives access to all available actions:
- Add a new example
- Remove an existing example
- Auto-generate a new example
The copy button 2 allows you to easily copy the XML body to the clipboard.
Editing the Template Design Body
The Template Design Body is shown at the bottom of the right side. You can exapand or collapse the definition tree.
For Project Authors an Edit button appears that switches the Template Design Body into the edit mode.
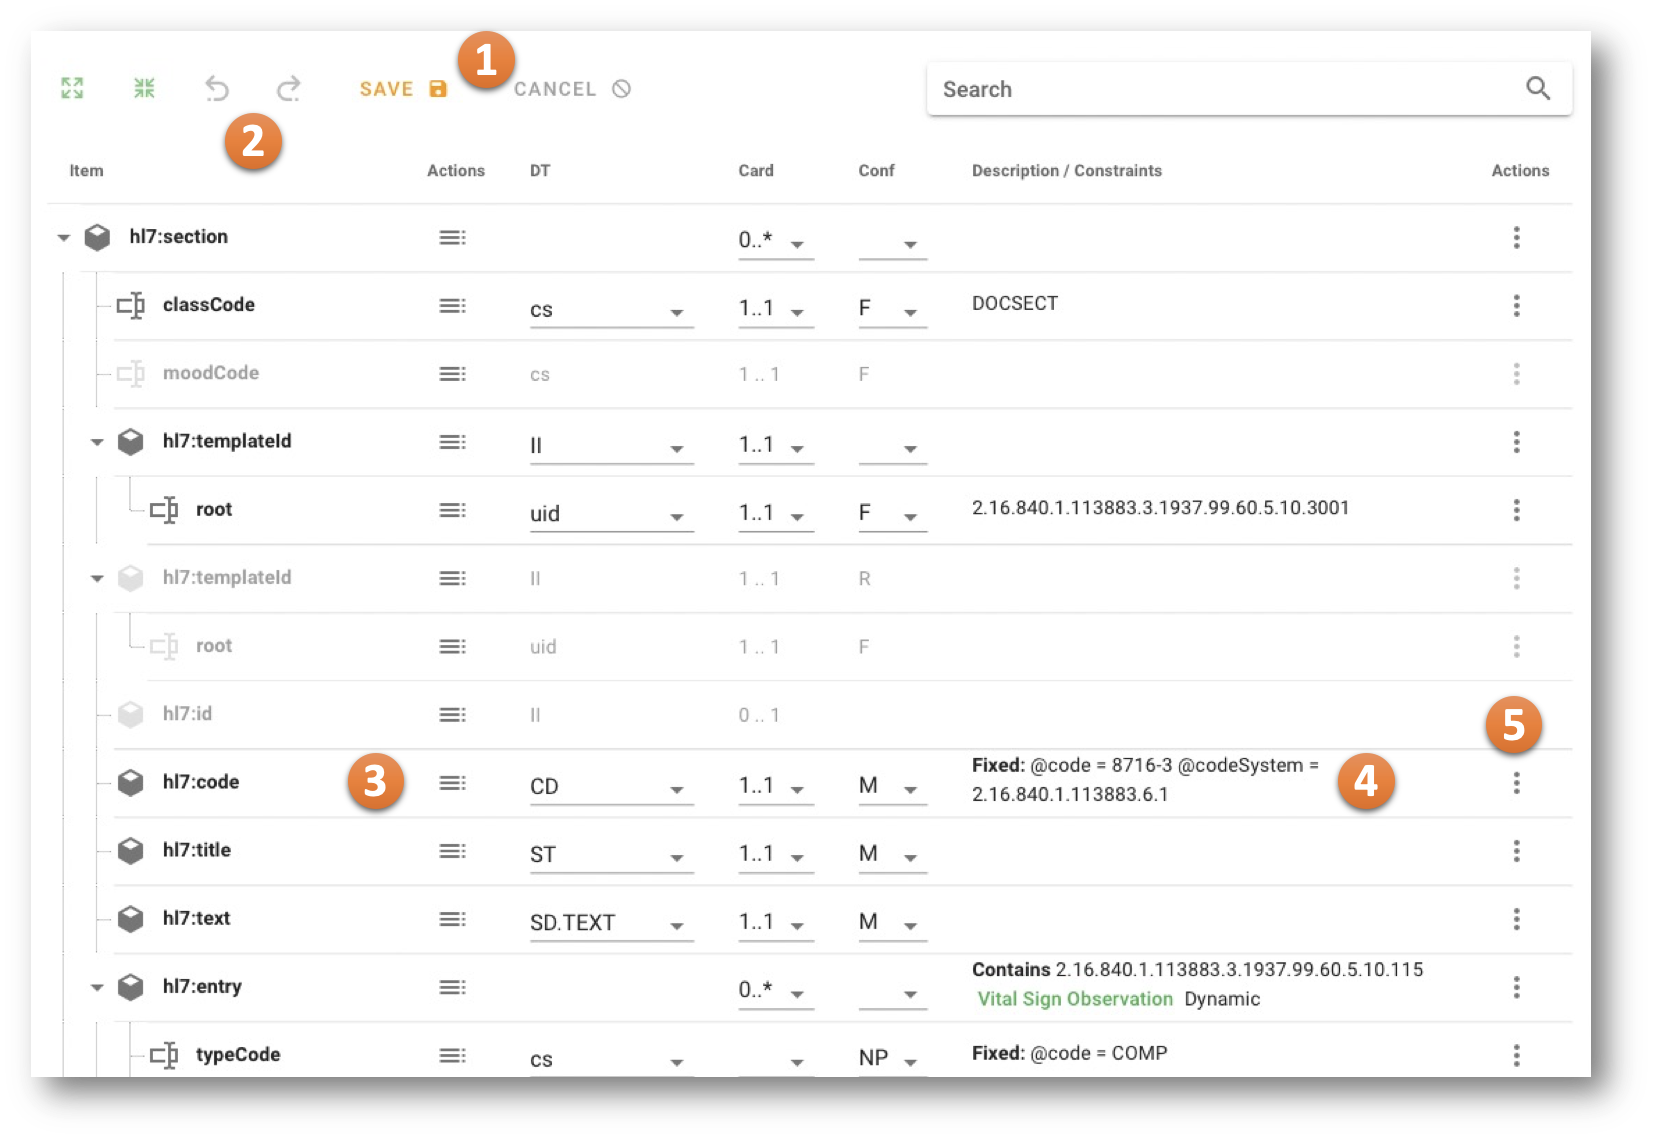
There is a SAVE and a CANCEL button1.
Once editing the Design Body you may go back and forth in edit history using the UNDO and REDO buttons2.
A line shows the Template Elements, Attributes, Includes, Choices, etc. Next to the name, the Structure Context Menu is shown3 (details see below) that allows structural changes such as adding items above, into or under existing items, deleting, selecting and deselecting items, depending on the context. This menu is followed line-wise by the datatype, cardinaity and conformance (see "In-column edits" below).
The Description and Constraint Column4contains further descriptions and shows the constraints defined for the line item.
Finally, a Property Context Menu5offers options to edit the properties of the corresponding line item.
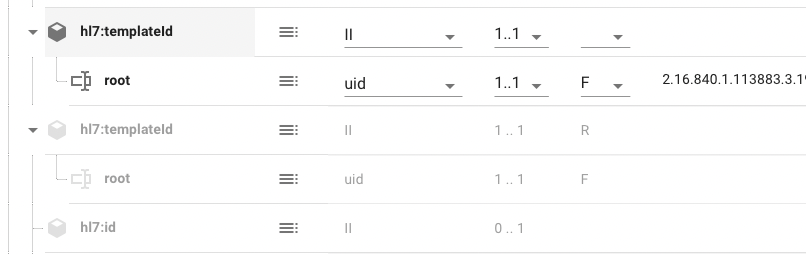
Please note, that the underlying Template (Model, Prototype) may have additional items that are not selected in the current Design. Nonetheless the unselected items from the underlying model are grayed-out and may be selected and the edited, selected items may be unselected. In the example below, the frist templateId is selected and refined, the second one is unselected (thus grayed-out).
The new editing functions, offering three manners of editing a Template Design Body, introducing Structural Editing, Property Editing and In-column Editing, are described now in more detail.
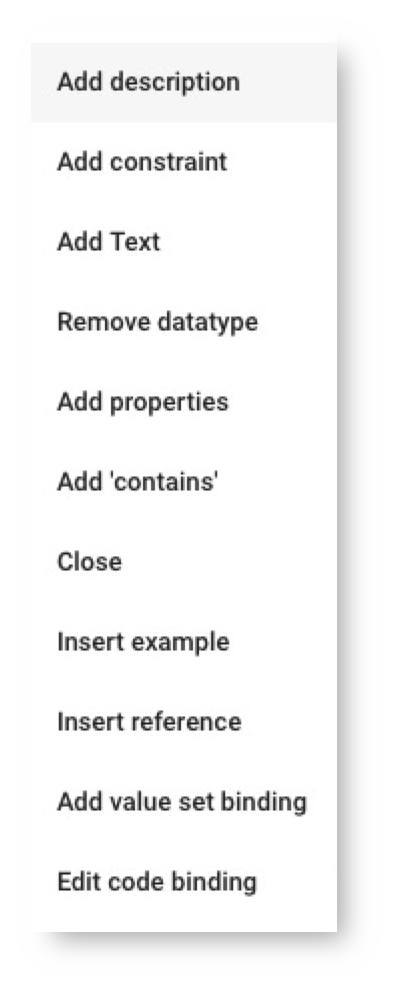
Template Structure Context Menu
The Structure Context Menu is used to alter the structure of the Template Design. Depending on the context it offers options to add new Elements or Attributes (above, into or behind existing items), to clone a line item, insert includes or choices, select and deselect an item and deal with schematron instructions such as let, assert and report.

Please note that, once an include is added for example, its properties are changed using the Property Context Menu.
Template Property Context Menu
The Property Context Menu is used to alter properties of the corresponsing line item in the Template Design. The options are context and content sensitive thus may vary from line item to line item. As an example, if you are editing the properties of an element, you add, alter or delete a datatype, add or edit the containment or examples etc. The list for an attribute is shorter, e.g. you cannot add a single example for an attribute only.
As an example, of the usage of the Property Context Menu consider you have an element code defined in your template where you want to add an Example. The definition of the element looks like this.

If you go to the Property Context Menu and use "Insert Example", you get the folllowing dialog.
This let you add an example to the list manually, delete an example from the list, or ask the Example Wizzard to generate an example. Once added you can save it and it appears immediately as a property of your element.

In-column edits
The columns datatype, cardinality and conformance allow direct editing in the respective column.
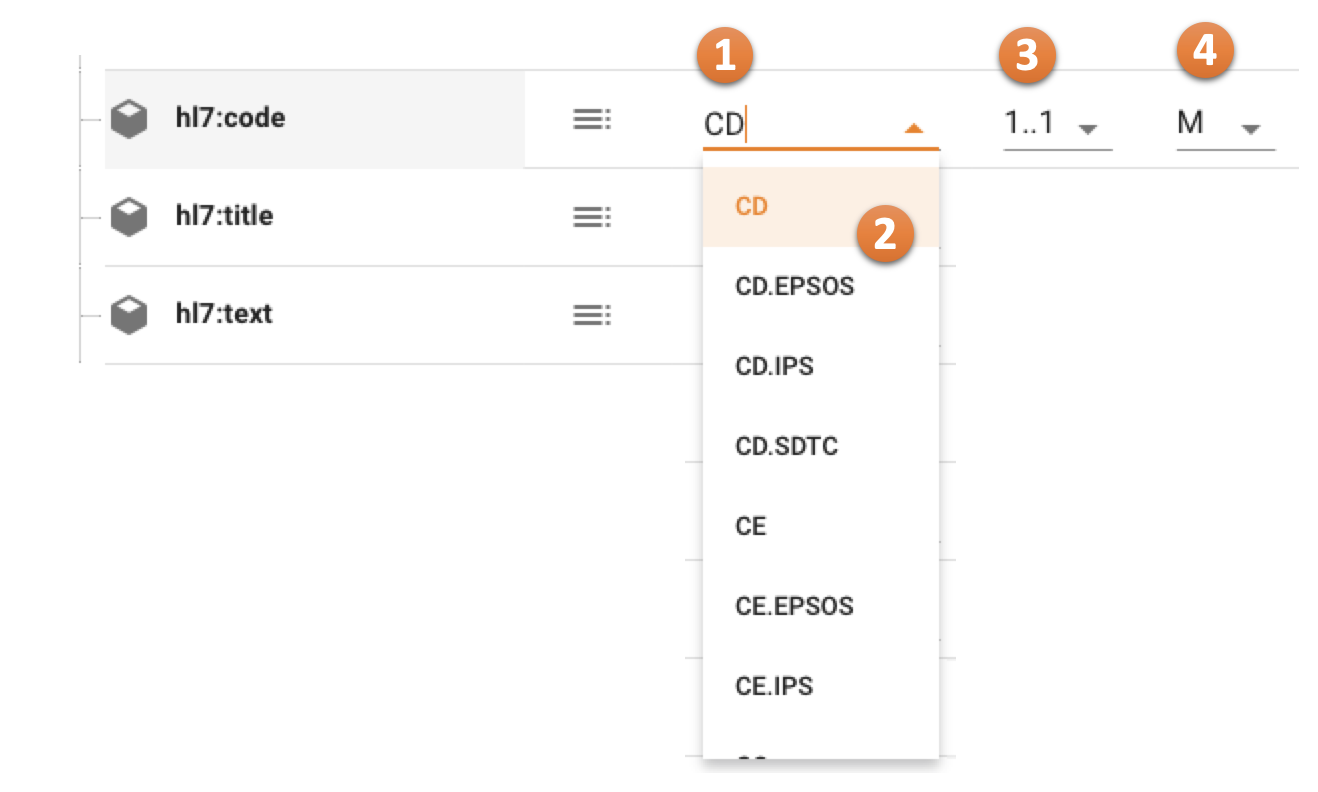
The datatype is context and content sensitive and offers all options to change a datatype of an item1. In the example, A CD (Concept Descriptor datatype) may be refined to any of the datatypes in the list2. The "wisdom" for this list comes from the underlying datatype specification(s).
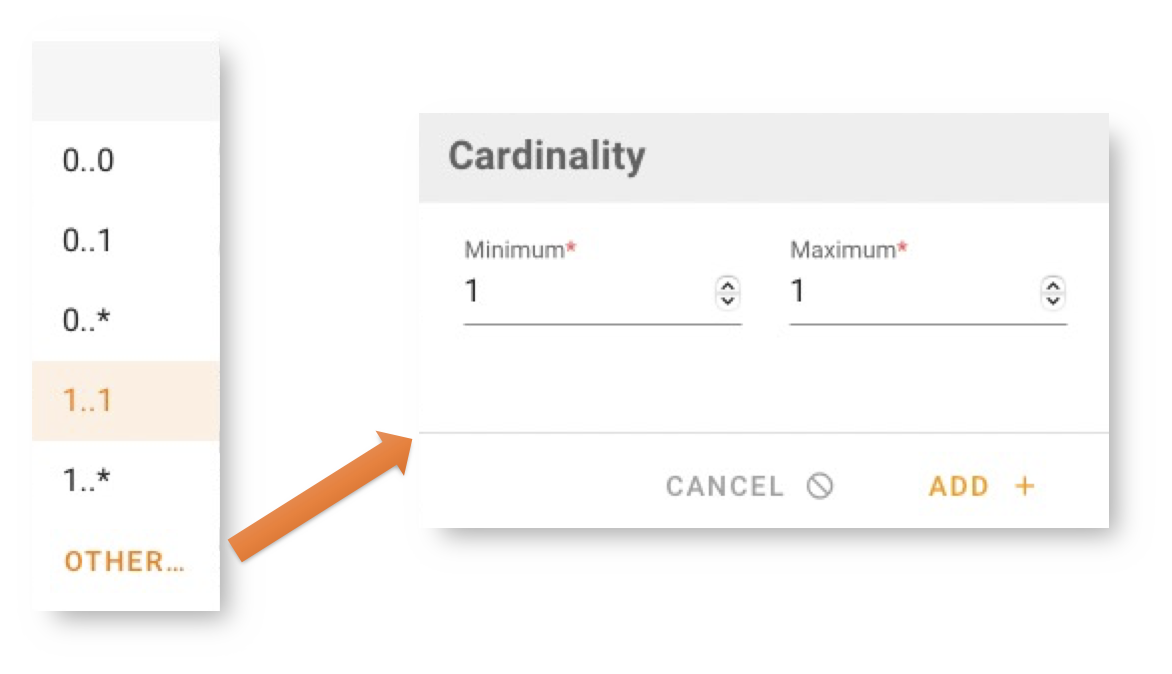
Also the cardinality may be changed in-column3. The typical situations are refelcted as a choice, e.g. 0..1, 1..* etc., but you may edit the cardinality also component-wise to define "unusual" cardinalties.
The conformance can also be edited In-column4.
Undo-Function
A new Undo-Function has been added for the Template Design. Once editing the Design Body you may go back and forth in edit history of the current edit session using the UNDO / REDO buttons in the top buttons row.

There are three steps stored in the buffer, so you can undo work up to three steps. If there is no edit history, the buttons are disabled.
Explicit Template Predicates / Slices
Templates with choices typically carry predicates or slices to distinguish between the different elements in the choice. In cases of template containment or inclusion, the schematron engine automatically creates implicit predicates / slices based on the content. In other cases there is no automatism, so the predicates / slices need to be specifed explicitly.
::: note
In CDA Template Designs the predicate/slice can be anything, just constructed through an XPath expression.
Most common options are predicate/slice based on
- datatype (offer this option if the elements has a datatype), leads to something like
@xsi:type='PQ' - containment (although created automatically the user could have the desire to make it explicit, offer if containment specified), lead to something like
[@xsi:type='PQ'] @rootor@extensionattribute, e.g. of II types elements likeidortemplateId, leads to something like[@root='1.2.3.4.5']- position, such as the first the second element etc, leads to something like
[1]or[2]
For Temple users also this kind of predicate/slice is then possible (entered with care): [hl7:id[matches(@root,'^2.16.840.1.113883.2.9.2.')] or [hl7:id[matches(@extension,'^ENI[A-Za-z0-9]{1,13}$')]
In FHIR Profiling there are five different processing types for discriminators to achieve a predicate/slice.
value
The slices have different values in the nominated element, as determined by the applicable fixed value, pattern, or required ValueSet binding.
This is the most commonly used discriminator type: to decide based on the value of an element as specified by a fixed value, a pattern value, or a required value set binding. Typical example: slice on the value of Patient.telecom.system, for values phone, email, or slice on the value of Observation.code, for values LOINC codes 1234-5, 4235-8 etc.
exists
The slices are differentiated by the presence or absence of the nominated element. There SHALL be no more than two slices. The slices are differentiated by the fact that one must have a max of 0 and the other must have a min of 1 (or more). The order in which the slices are declared doesn't matter.
This is not used commonly - it only has 2 values, so not much discrimination power. It's mainly used as an adjunct slicing criteria along with other discriminators. Elements used like this are mostly complex backbone elements. The slices are differentiated by the presence or absence of the nominated element. There SHALL be no more than two slices. The slices are differentiated by the fact that one must have a max of 0 and the other must have a min of 1 (or more). The order in which the slices are declared doesn't matter. Typical example: slice on the pattern of Observation.code and the presence of Observation.component.
pattern
The slices have different values in the nominated element, as determined by the applicable fixed value, pattern, or required ValueSet binding. This has the same meaning as 'value' and is deprecated.
This code means the same as value, and is retained for backwards compatibility reasons
type
The slices are differentiated by type of the nominated element.
Used to match slices based on the type of the item. While it can be used with polymorphic elements such as Observation.value[x], mostly it is used with Resource types on references, to apply different profiles based on the different resource type. Typical example: slice on the type of List.item.resolve() for the types Patient, RelatedPerson.
profile
The slices are differentiated by conformance of the nominated element to a specified profile. Note that if the path specifies .resolve() then the profile is the target profile on the reference. In this case, validation by the possible profiles is required to differentiate the slices.
Used to match slices based on the whether the item conforms to the specified profile. This provides the most power, since the full range of profiling capabilities are available, but it is also the hardest to implement, and requires the most processing (>1000-fold compared to the others). Implementers should use this only where absolutely required. Typical example: slice on the type of Composition.section.entry().resolve() for the profiles Current-Clinical-Condition, Past-Medical-Event, etc.
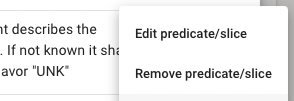
For that purpose one can add, edit or remove predicates / slices to elements while editing a Template using the Property Context Menu.
:::
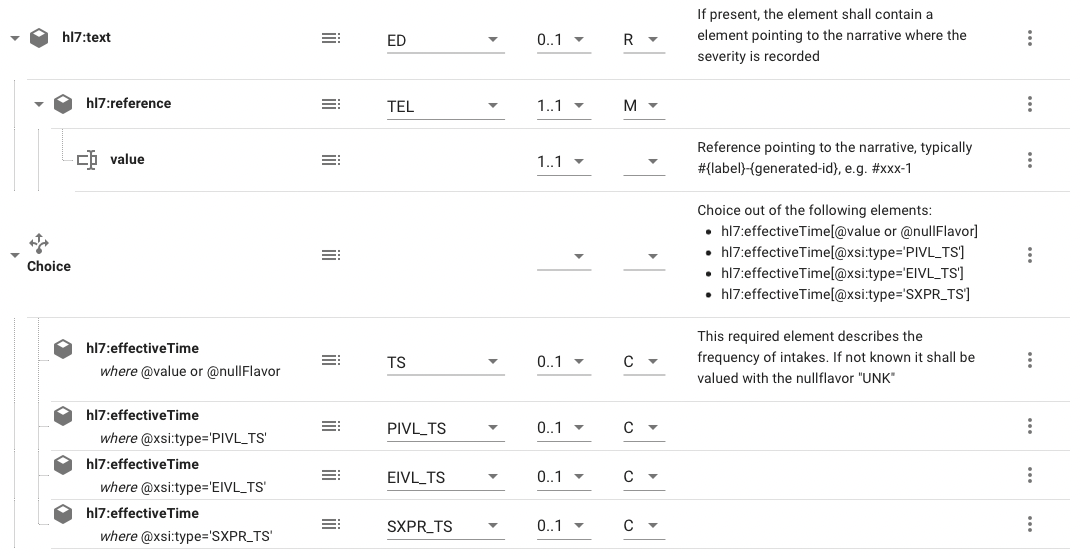
The following example my illustrate the need of explicit predicates / slices.
EXAMPLE
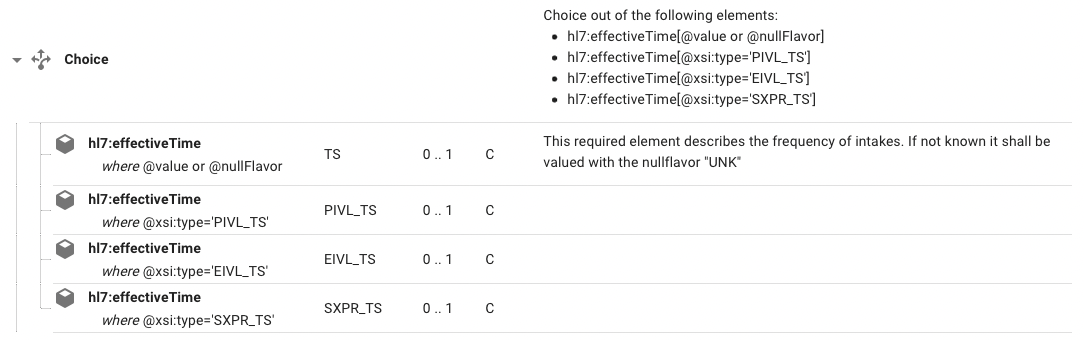
In a choice with three hl7:effectiveTime elements all of them need an explicit predicate / slice so that e. g. validation can work properly. Each of the equally named elements in the choice gets a predicate / slice, e.g. based on the xsi:type data type attribute specification such as IVL_TS, PIVL_TS etc.
Using the Property Context Menu allows to add a predicate / slice. A dialog appears that allows adding or editing. The same Property Context Menu offers a remove option if a predicate / slice already exist for that element.
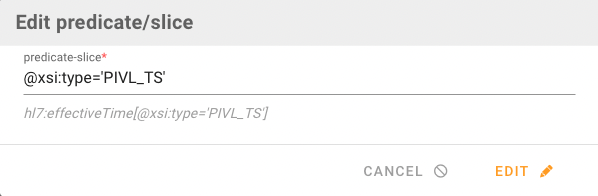
Predicates / slices are displayed using the where clause.
Template Choices
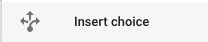
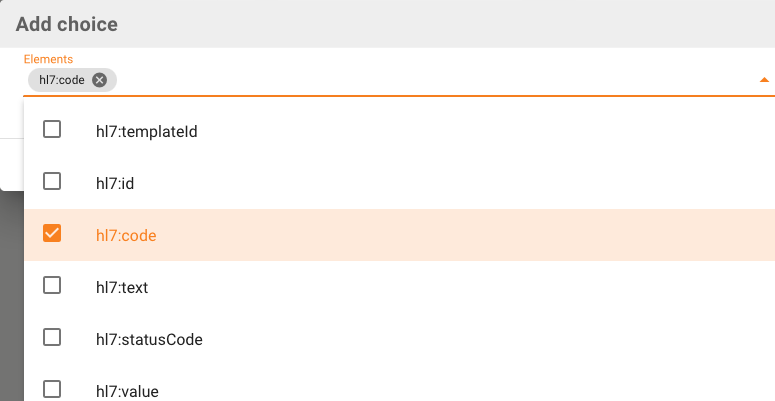
A choice of elements can be created during Template editing using the Structure Context Menu.
A dialog appears that offers you all Template eklements on the same level to choose from which one(s) shall be moved into the new choice. A new choice is created with the elements chosen in the dialog.
Other elements can be created into the choice or next to existing elements in the choice.

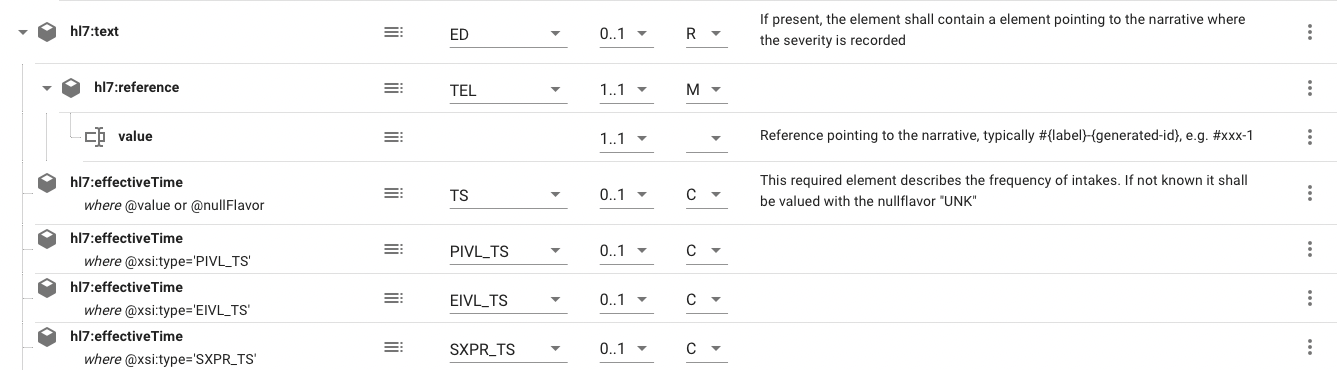
When deleting a choice in the template editor the elements in the choice wqill be re-arranged in the template design. They will all replace the choice element at the same location. The following example shows a selection of four hl7:effectiveTime elements. When removeing the choice, all four elements are psoitioned where the former choice was located.
Before removal:
After removal:
Template Associations Panel
The new Template Associations Panel offers a new look-and-feel to create links between a logical concept in a dataset or scenario and a technical artifact such as HL7 Templates or Template components. The new Panel is offering read operations on all existing associations, in subrelease 3.5.1 it allows – next to see a listings – also creation, update and deletion of associations by simple drag-and-drop creation of associations.
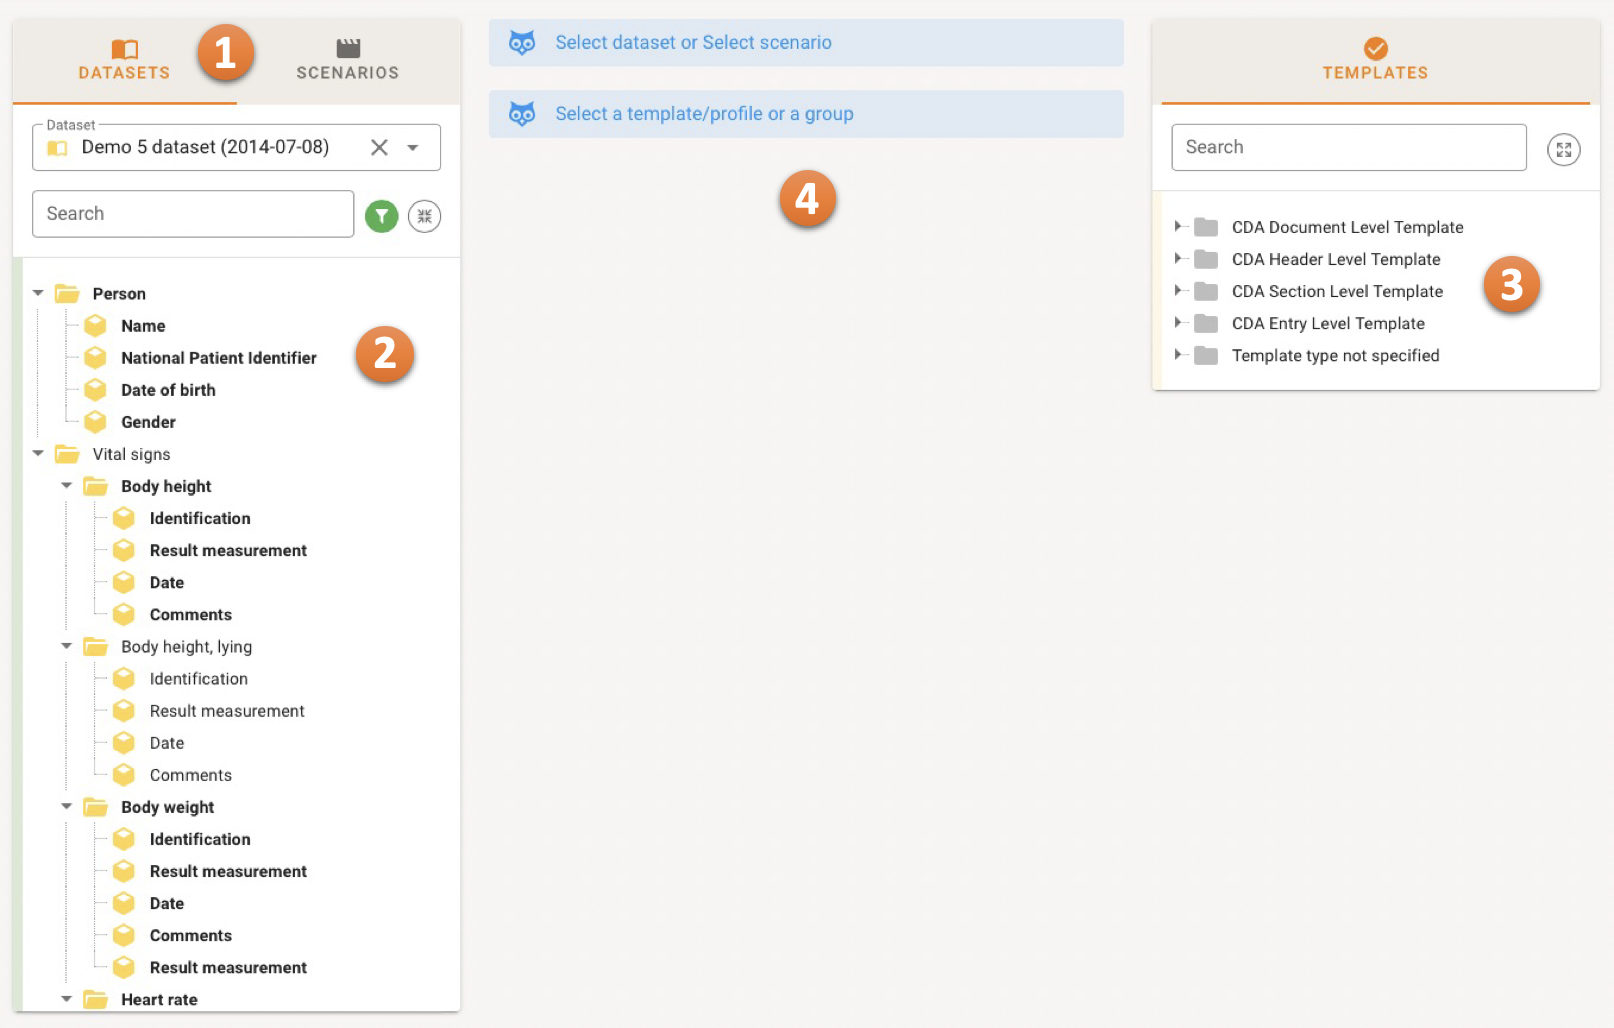
In principle, the Panel allows you to select a Dataset or Scenario 1, the content is shown in the left Navigation Bar 2. Please note that concepts that have an association with a Template or Template Element are in bold face.
The right Navigation Bar 3 shows all Templates of the Project, as usual grouped by type. Both the left and the right Navigation Bar can be expanded with one click.
The area denoted by 4 will carry the details of the selected Dataset / Scenario concept, the Template and of course the actual mappings/associations. For example if you select Person––Date of birth on the left Dataset details, the middel area shows the following details.
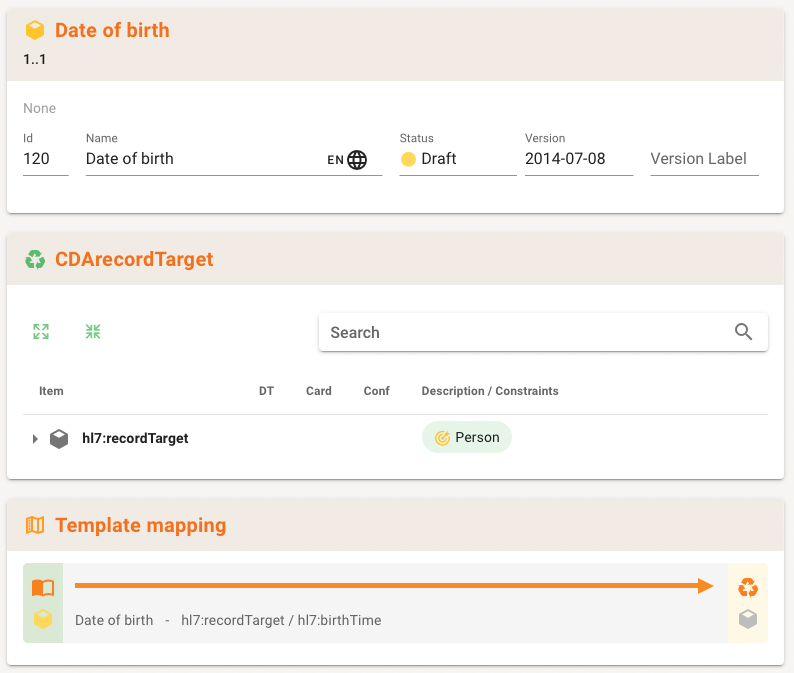
The top middel area shows some details of the selected concept. The midde part shows the Template were the mapping/association points to. Finally, the lower part depicts the mapping/association between the selected concept and the Template/Template element.
When clicking on a Template in the Templates Navigation Bar,...
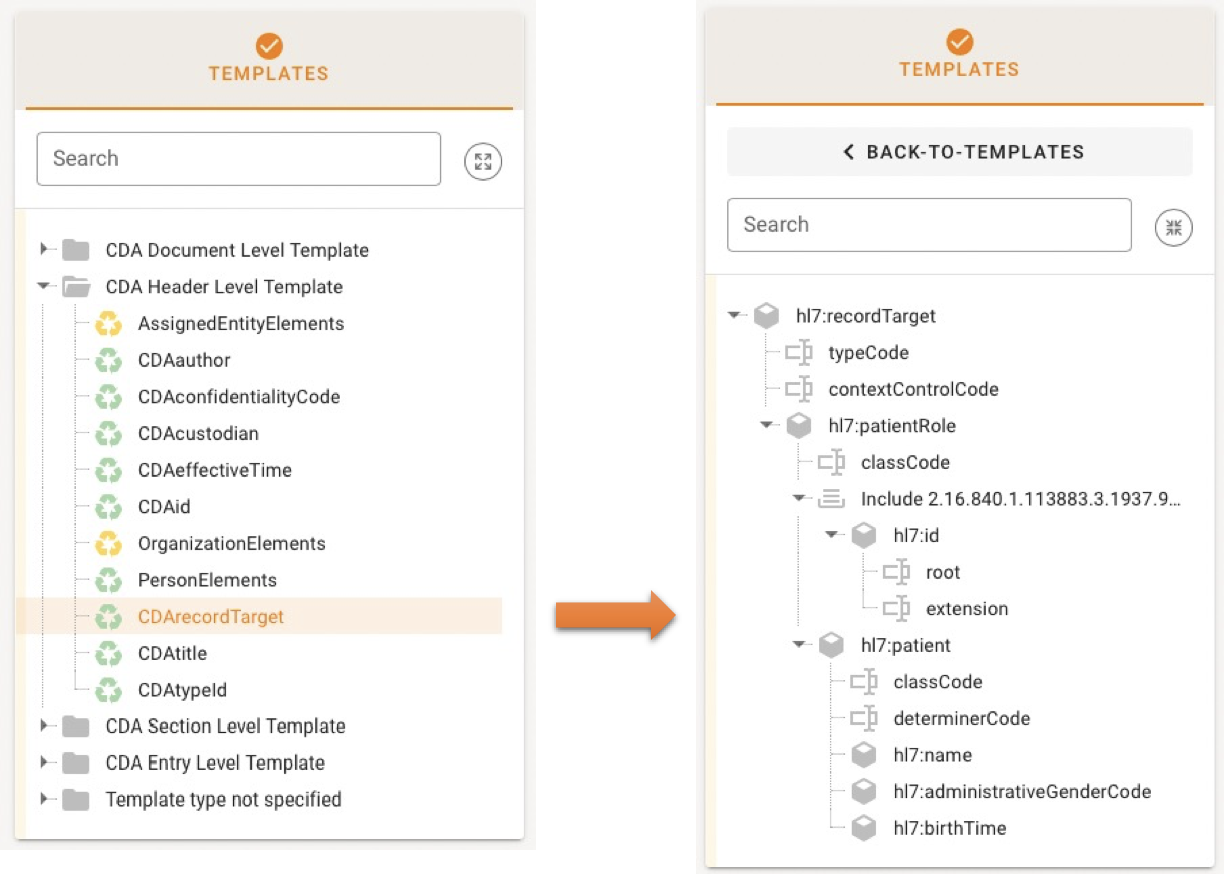
...it morphs the Navigation Bar (showing all Templates) to display the selected Template Element hierarchy.
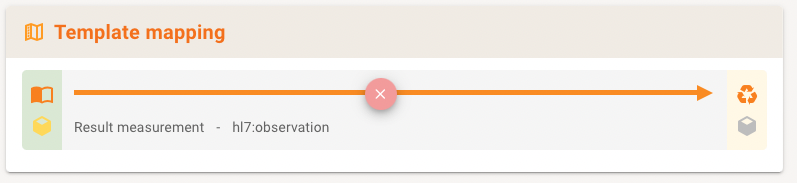
An association can be created when a concept and a Template or Template Element is selected. You simply take the part of the Template, drag it into the middle area and drop it there.
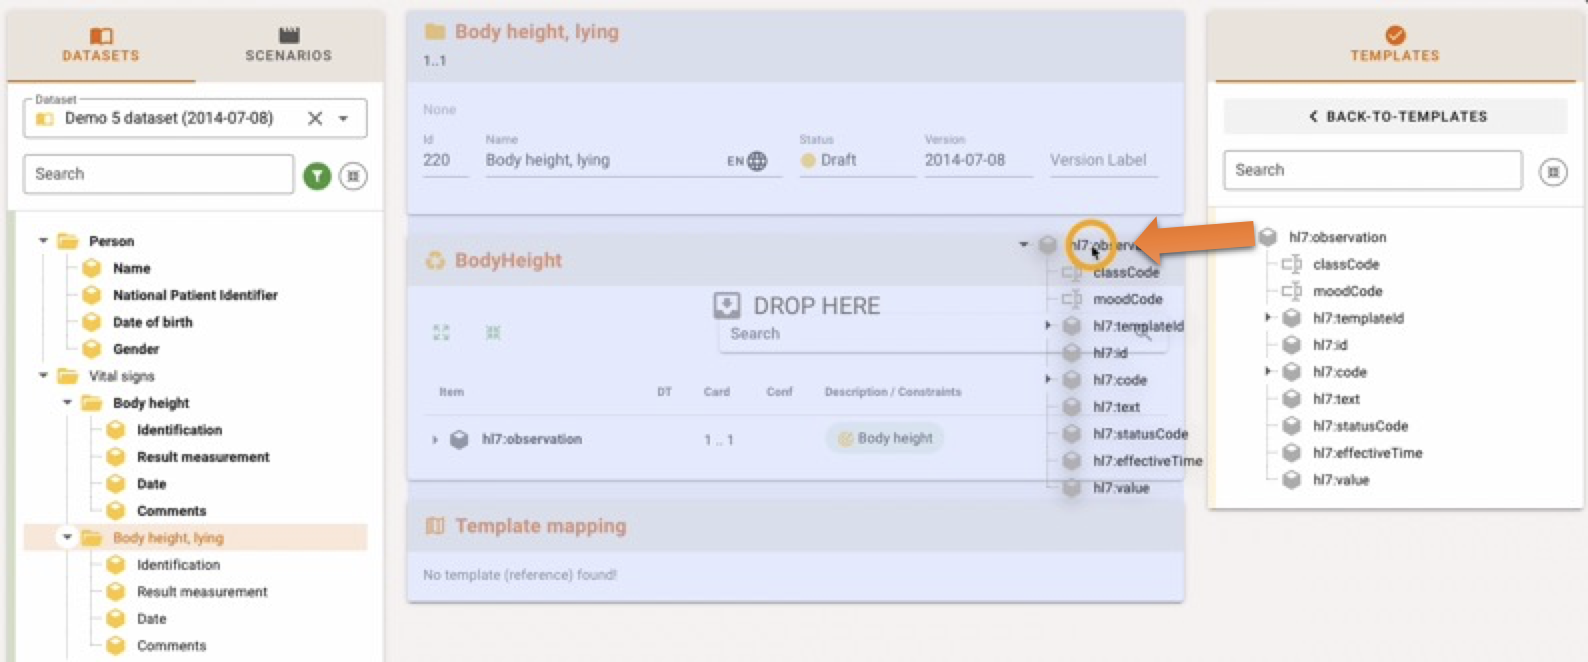
The Template Association is then created and displayed as follows in the lower middle card. It can be deleted by simply click on the X button in the arrow.