Scenario

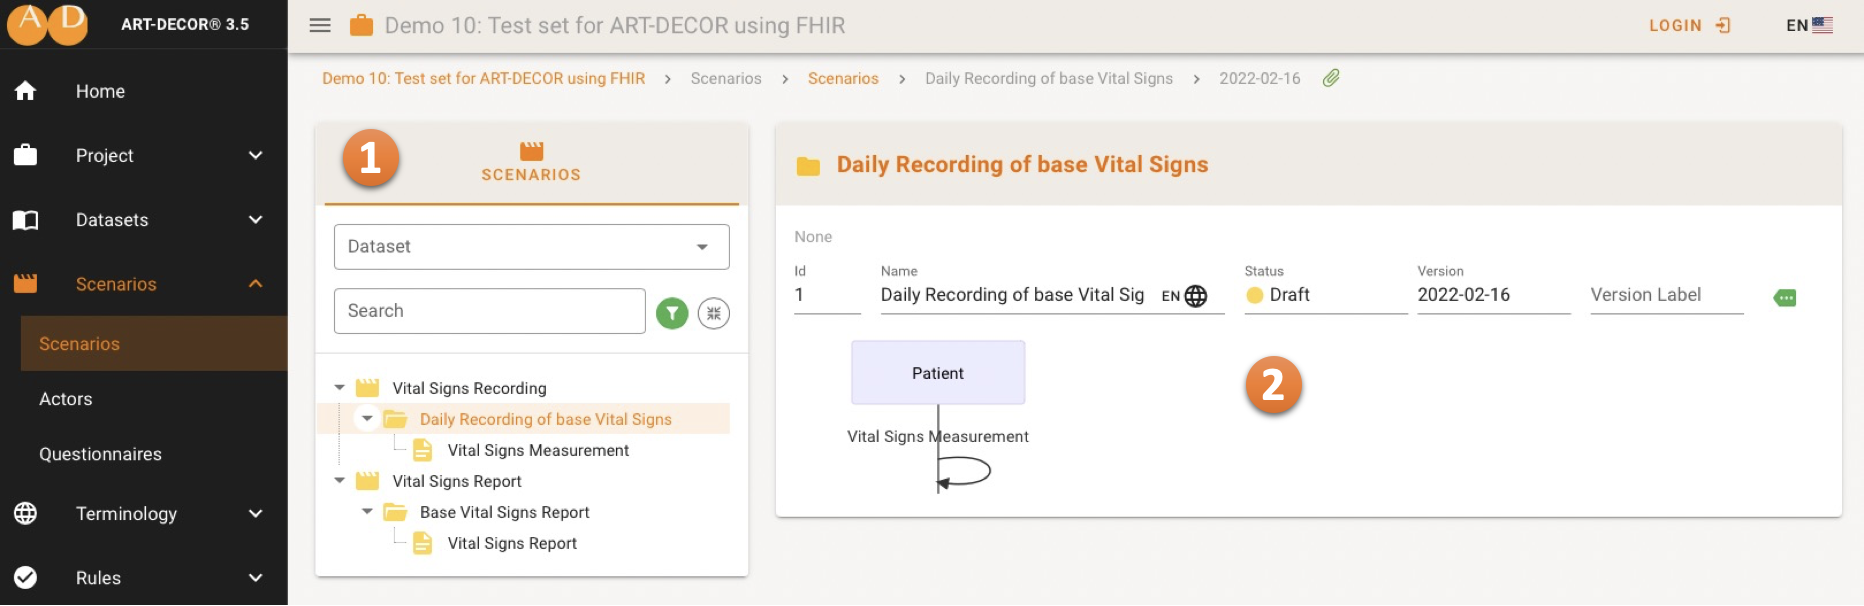
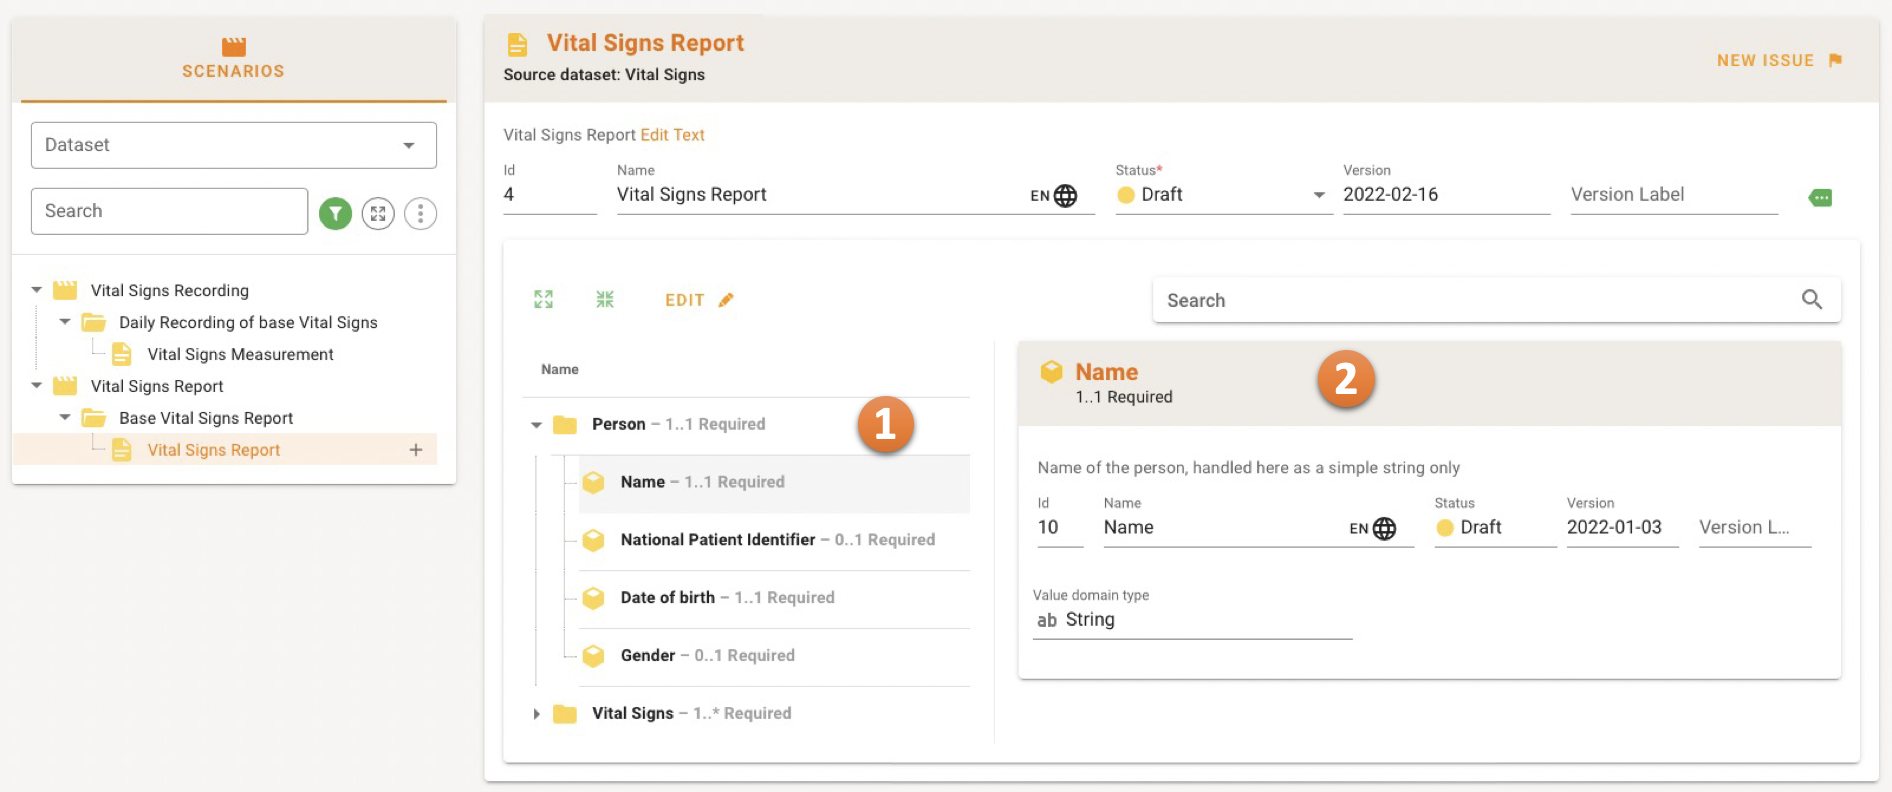
The Scenario Panel offers an overview of the Scenarios and the underlying grouped Transactions 1. Details are shown to the right 2.

image-20220705110352623

Choosing a Scenario

When choosing a Scenario you can

  • either select from all the Scenarios in the Project or
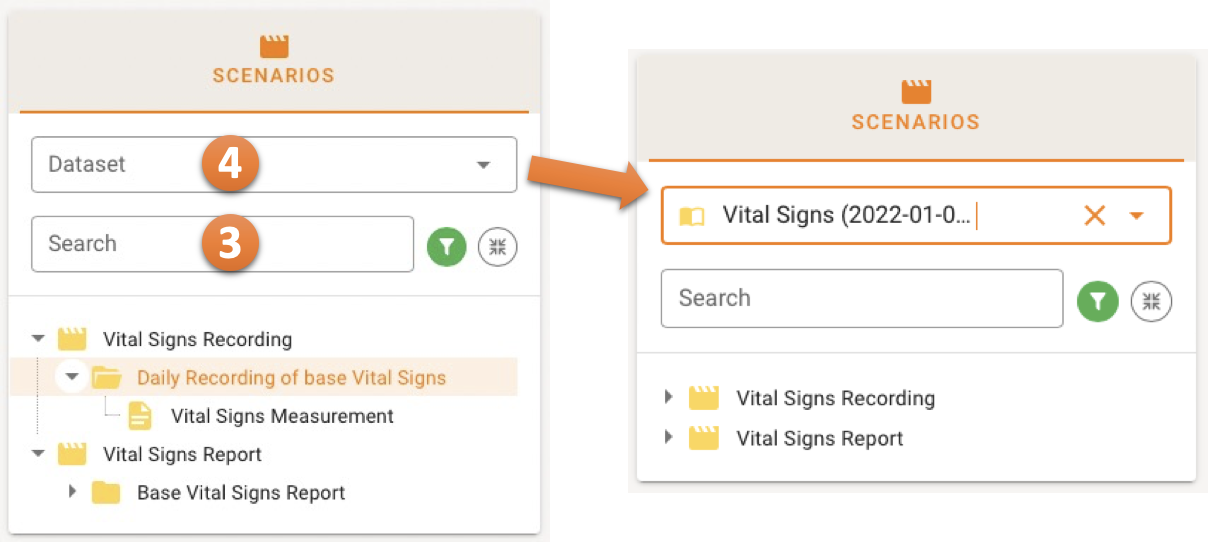
  • perform a simple search on names using the Search Bar 3 or
  • first select a Dataset in the Dataset Selector Bar 4 to filter the Scenarios to only those who make use of the selected Datasets; this is very useful if you have a large number of Scenarios in your project.

The filter option allows you to filter the Status of the Scenarios/Transactions shown in the list. The Scenarios related to that dataset will be shown in the tree.

image-20220705110841384

Transaction Detail Panel

After choosing a scenario, the transaction detail panel opens where you can find a list of all the transactions for that specific scenario.

When a Scenario is selected you see the Scenario details including the Use Case Story (Description), Condition and Trigger.

image-20220705111321709

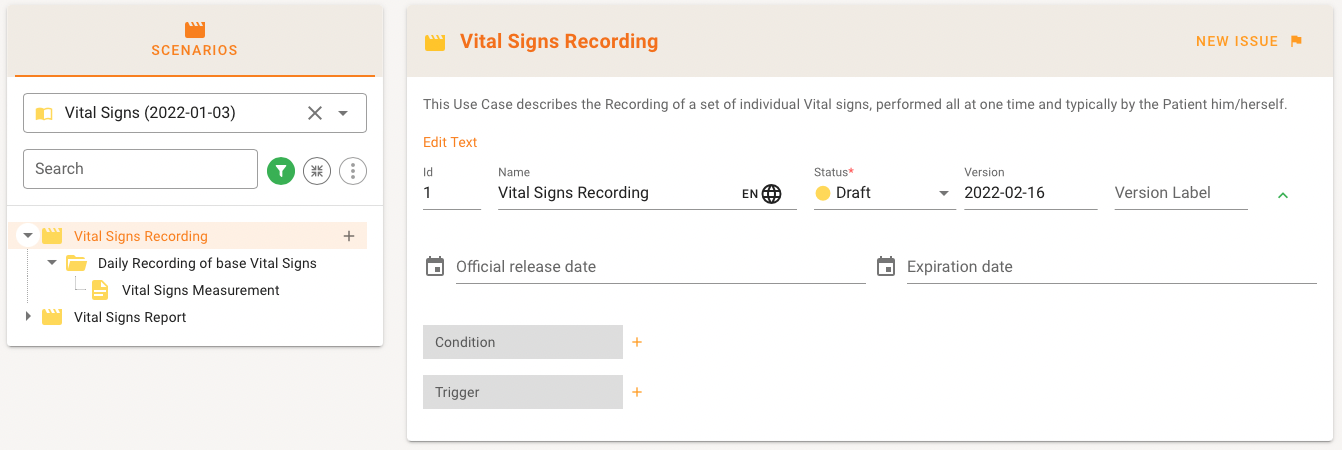
When a Transaction group is selected, the details of the group are shown, including a sequence graph on Actors and communication structures.

image-20220705111447764

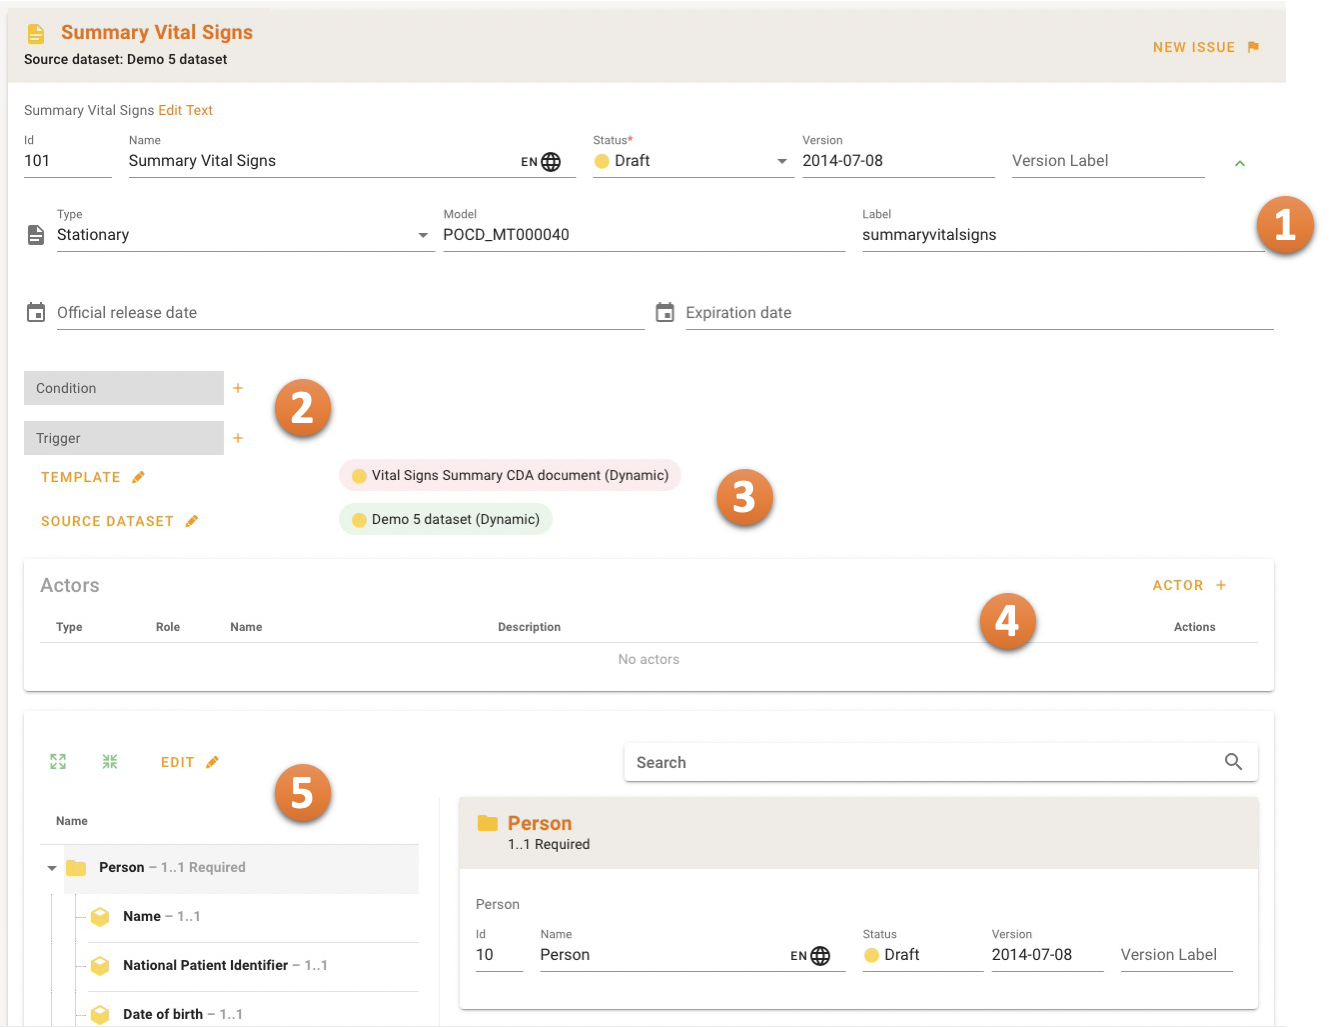
When selecting a Transaction Leaf, Type of Transaction (see Categories). the Transaction Model and Label etc. Also A Representing Template and a Source Dataset can be seen/maintained here. In the lower part of the Details the actual Concepts belonging to the Transaction are shown in a Tree View 1 with Concept Details to the right 2.

image-20220705112618937

Add a Scenario

By choosing ADD from the menu item you can add a new Scenario or choose CLONE to clone an existing Scenario.

2022-06-23_12-58-36.png

Add a name and a Use Case Description.

image-20220705114524577

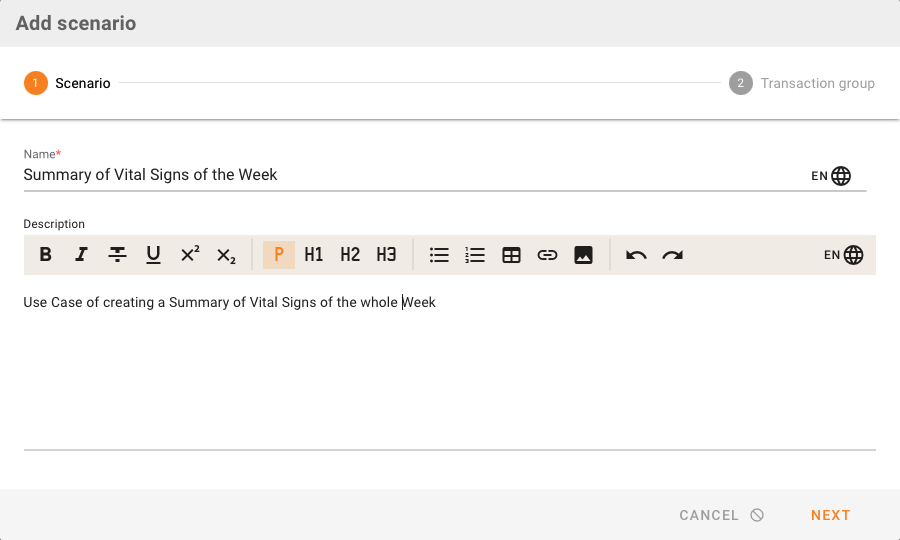
The next step allows you to add Transaction Groups and Transaction leaves (see also below). Don't forget to save the new Scenario.

image-20220705114648641

Add a Transaction

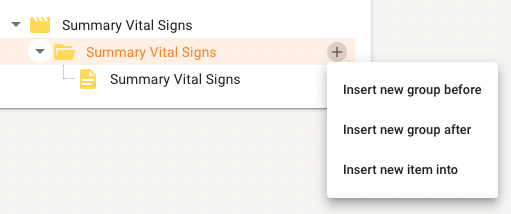
By selecting + from the Transaction Tree you can add a new Transaction to a Scenario. The mini menu offers insertion of a new Transaction Group before or after the selected existing one, or addition of a Transaction leaf (item).

image-20220705114832318.

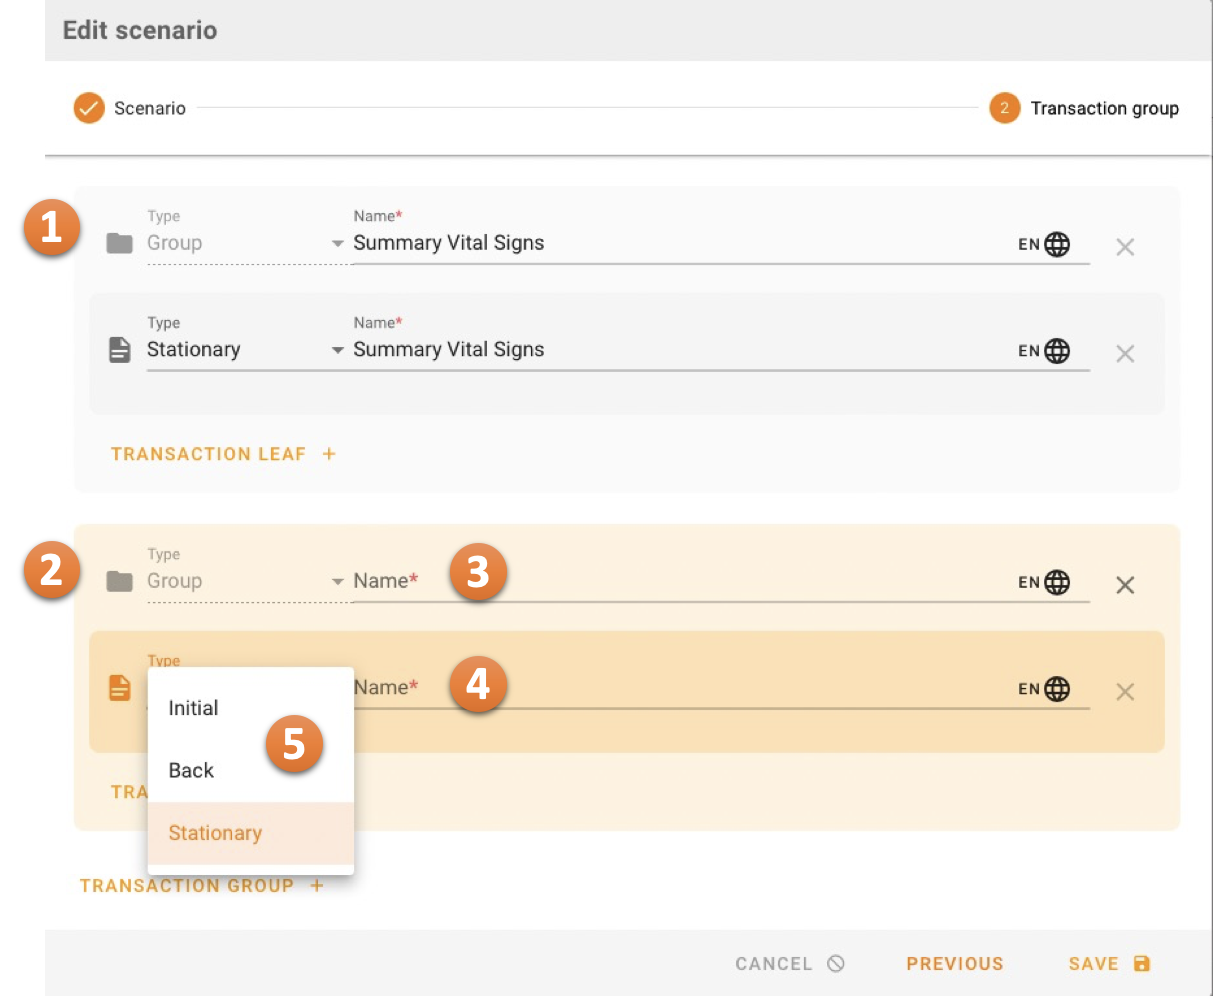
A new window opens showing all Transaction Groups so far 1, the new one to be edited is colorized in orange 2.

First, add a name for the Transaction Group 3 and Leaf 4. Select also the Type of Transaction (see Categories) 5.

image-20220705115144490

Editing Transaction Leaf Details

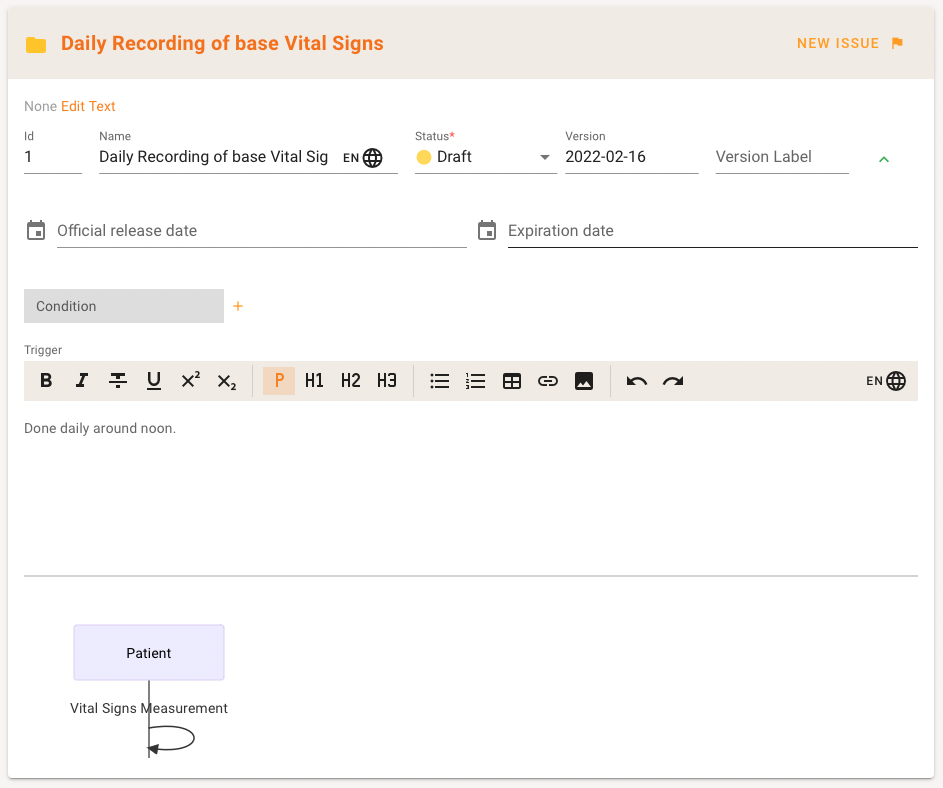
When a Transaction Leaf is selected, the details of that Transaction are shown (see below).

If you are a Project Author, Metadata can be directly edited 1, also Conditions and Triggers can be specified 2.

The Source Dataset must be selected from the Project in order to be able to work with the Transaction at all 3.

In the same area 3, the associated Representing Template and Questionnaire can be chosen which is a Template or Questionnaire from the Project that represents the Transaction from a technical dataformat perspective content-wise.

Actors 4 are predefined in the Actors Panel and may be chosen here a sender/receiver/stationary etc.

There may be information displayed about Copyright and/or Publishing Authorities 5. This information could also be inherited from parent artifacts.

Finally, the Transaction Concepts – a set of references to the Concepts from the Source Dataset – are shown in a hierarchical tree 6 and can be put into edit-mode to change the set of concepts or their properties such as cardinality, conformance, conditions etc.

image-20241029184330630

Managing the associated Source Dataset, Representing Template, Questionnaire

image-20241029184734459

The Source Dataset must be selected from the Project in order to be able to work with the Transaction at all. It can be added and also edited. If a Transaction has already associated concepts from a Source dataset, a special Smart Cloning option (see below) might help you to properly migrate the already refined concepts to a new version of a dataset.

associated Representing Template and Questionnaire can be chosen which is a Template or Questionnaire from the Project that represents the Transaction from a technical dataformat perspective content-wise.

Choosing Actors for the Transaction

You must choose Actors from the Actors list. Refer to the later section here about adding an Actor. Once Actors are available to choose from, select a sender and receiver Actor for the transaction (type initial and back), or just a sender (for type stationary only).

Concepts for the Transaction

All concepts that are part of the current Transaction are "borrowed" from the Source dataset. They are listed in non-edit mode as a tree in the Concept List Card. When clicking on an item in the tree details are shown to the right (actually drawn from the underlying dataset).

image-20241029185912265

When in edit mode (typicall switched to Fullscreen mode by the way to make use of the screen), all concepts in the tree can be selected or deselected to be included in the Transaction.

image-20241029190244839

The 1 column offers a switch to deselect the concept from the Transaction or to select it. When newly selecting a concept, the following helping dialog offers the most common choices for the Cardinality and Conformance of the item. It can still be manually corrected.

image-20241029190404132

There is an Action menu to the right of each concept.

image-20241029190521745

You can set the Context of a Transaction item by selecting the four-dot icon menu item. The context provides additional information or constraints for the concept in the light of the Transaction. Here are some examples:

  • Additional information the for the concept particularly in this Transaction

  • A reference to further information

  • A binding to specific properties such as types of example or preferred Value Sets or types of Identifies etc. If terminology or identifiers are known and can be referenced this shall be done by the binding of terminology or identifiers to this concept by means of Terminology Associations or Identifier Associations.

The menu also offers the dialog to edit and manage the set of conditions whenever a Transaction concept is set to "conditionally". The list-and-arrow icon opens the Condition Dialog.

image-20241029190846406

You can edit the list of Conditions. The simpliest way is to add textual conditional statements like in the follwing example.

image-20241029190938114

If applicable you can also set structural conditions, as seen in the following example.

image-20241029191109609

NOTE

Structural Conditions translate into conditional Questionnaire Constructs (enableWhen) when transforming a Scenario with Conditions into a new Questionnaire.

Your First Scenario from scratch

It needs to be mentioned that – if a Project has NO scenario so far – the procedure to add the very first one makes a few more steps necessary. The following documentation describes setting up Actors first, and then add a first Scenario. In essence this includes:

Actors

Add Actors

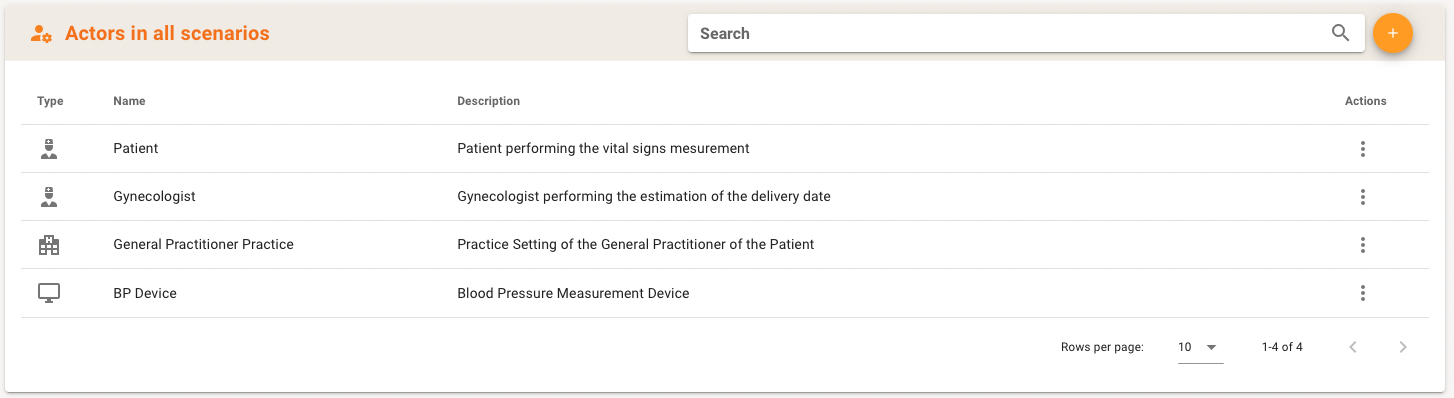
In the Scenario Panel there is also the Actors Panel available. This Panel gives you an overview of all Actors in any of your Scenarios. Actor's type (person, organization, device), Name, Description. The Action menu at the right allows you to edit or delete an Actor. The latter is only possible if the Actor is not used in any Transaction so far.

image-20220705124946675

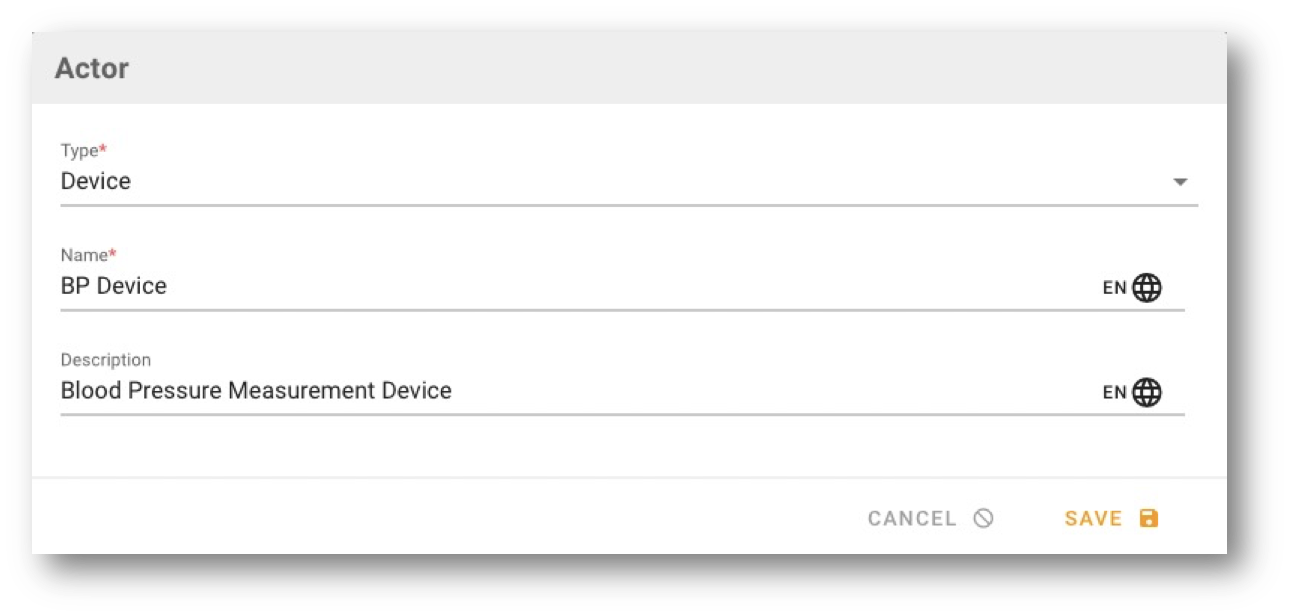
By clicking on the + button you can add an Actor. A new window will open where you can fill in the type of actor: Person, Organization or Device.

A name of the Actor must be specified, also a description is always useful.

image-20220705125145726

Edit and Delete Actors

When selecting the mini menu of an Actor you have the option to edit (pencil) or delete (x) the specific Actor.

image-20220705125236757

Smart Cloning of a Scenario

We added an essential feature when working with multiple versions of Datasets and Scenarios. When cloning a Transaction leaf of a Scenario the new Scenario is basically empty as it loses its Source Dataset. We now introduced the Cloning a Transaction leaf of a Scenario based on a new version of the underlying dataset. Below we have included some background we recommend you read.

Background: a Source Dataset provides a set of Concepts (with an id and effectiveDate) that are referenced in a Transaction Leaf.

image-20231109-183852

Creating a new version of the Dataset may typically let all IDs be the same per concept (persistent IDs), while the effective dates move on to the cloning date (the new version date).

image-20231109-183949

Problem: Cloning a Transaction that is based on Version 1 of the dataset loses all referenced concepts (is basically empty) as it loses its Source Dataset

image-20231109-183929

Happier with Smart Cloning: With the pre-requisite that the IDs are kept for the concepts in Dataset version1 and the new Dataset v2, cloning a Transaction based on Dataset v1 may include the option to take over all concepts in Transaction v1 that are also present in Dataset v2 and populate the newly cloned Transaction with references to the concepts in Dataset v2. So the cloned Transaction is now based on the Concepts of Dataset v2 that where already present in Transaction v2 based on Dataset v1.

image-20231109-183909

An example: assume that there is a Scenario that has just been cloned from an existing one. Looking at the Scenario metadata we see that the underlying dataset is still the Estimated Delivery Date as of 2021-12-10 dataset, the old version.

image-20240601101934753

When clicking on the pencil to edit the Source Dataset you see a dialog that shows all dataset in the project. We still see that the Estimated Delivery Date v1 dataset is chosen, but we want to re-assign the underlying dataset to the new existing version 2 of the Estimated Delivery Date dataset.

image-20240601101956361

When selecting the new Estimated Delivery Date v2 dataset the right side of the dialog opens up to summarize what you are going to do: the wise owl days that the concepts in the current transaction leaf are based on the displayed original dataset and that you can "smart clone" the concepts in the transaction leaf referring to the selected new dataset. It shows old and prospective new dataset and explains the options to either just re-assign the transaction to another dataset and lose all references of the concepts in the transaction (so you can start building the concepts from scratch) or to smart clone concepts of this transaction based on another (newer) dataset.

image-20240601102015219

For the latter option there is a button SMART CLONING (PREFLIGHT) to start a pre-flight to see the statistics of the resulting concepts in the transaction, i.e. a list of concepts that could not be transformed in to the new dataset.

image-20240601102029771image-20240601102056231

Once you decide what to do you can either "smart clone" the transaction, or cancel the preflight and just re-assign to start from scratch with selecting concepts in the transaction.

Last Update:
Contributors: dr Kai U. Heitmann, Vanessa Braumüller, Maarten Ligtvoet, Rogier Wiertz